
|
|
 |
 |
 |

|
 |
BMW Garage | BMW Meets | Register | Search | Today's Posts | Mark Forums Read |
 |

|
BMW 3-Series (E90 E92) Forum
>
Intake Manifold Removal Help!!!
|
 |
| 10-08-2013, 05:33 PM | #1 |
|
New Member
4
Rep 11
Posts |
Intake Manifold Removal Help!!!
Hello, I'm trying to remove the intake manifold for my 06 e90 325i, but can't get the wiring harness box (black box under the manifold) off. It seems without it, I can't get the manifold off. I tried searching but couldn't find anything on this. Any help is greatly appreciated! Or if anyone can link me to a DIY intake manifold removal, that would be great too.
I am currently trying to replace my starter and promise to post a DIY on this if I get help. Thanks!  Last edited by nautilus5; 10-08-2013 at 06:00 PM.. |
| 10-13-2013, 03:59 PM | #3 |
|
Banned

138
Rep 2,731
Posts |
i like this diy... http://www.pelicanparts.com/BMW/tech...eplacement.htm although ironically it doesn't show how to get that harness off too well. Easier to remove the two small torx bolts that attach the harness bracket to the plastic manifold, as mentioned above.
|
|
Appreciate
0
|
| 10-16-2013, 10:59 AM | #4 |
|
Lieutenant Colonel
 
375
Rep 1,928
Posts
Drives: 2010 BMW E90 330i M Sport
Join Date: Aug 2010
Location: Cape Town, South Africa
|
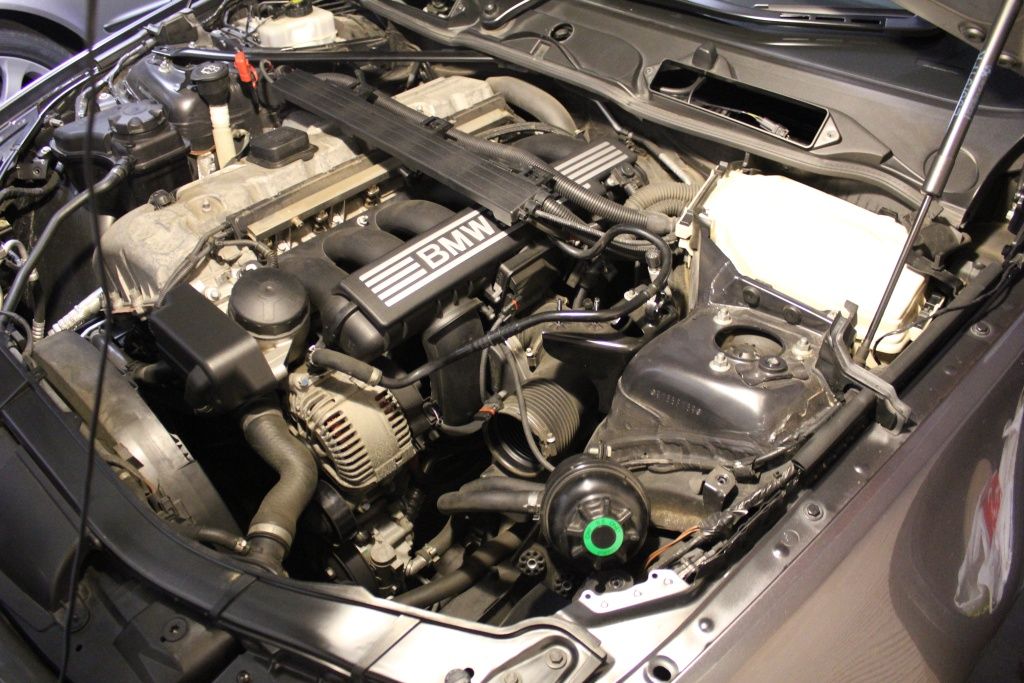
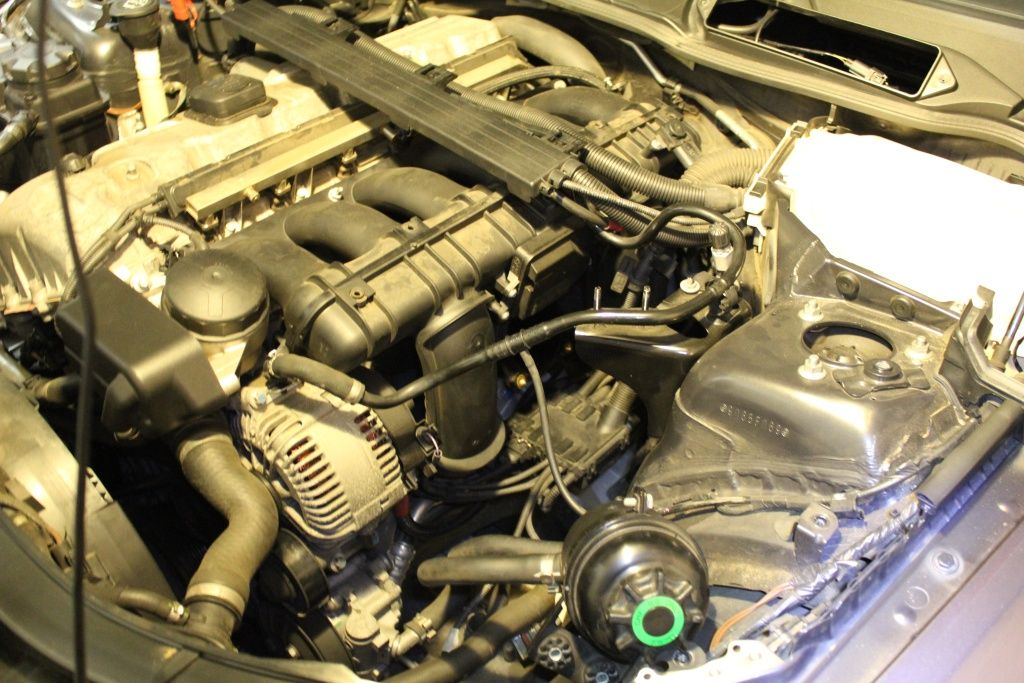
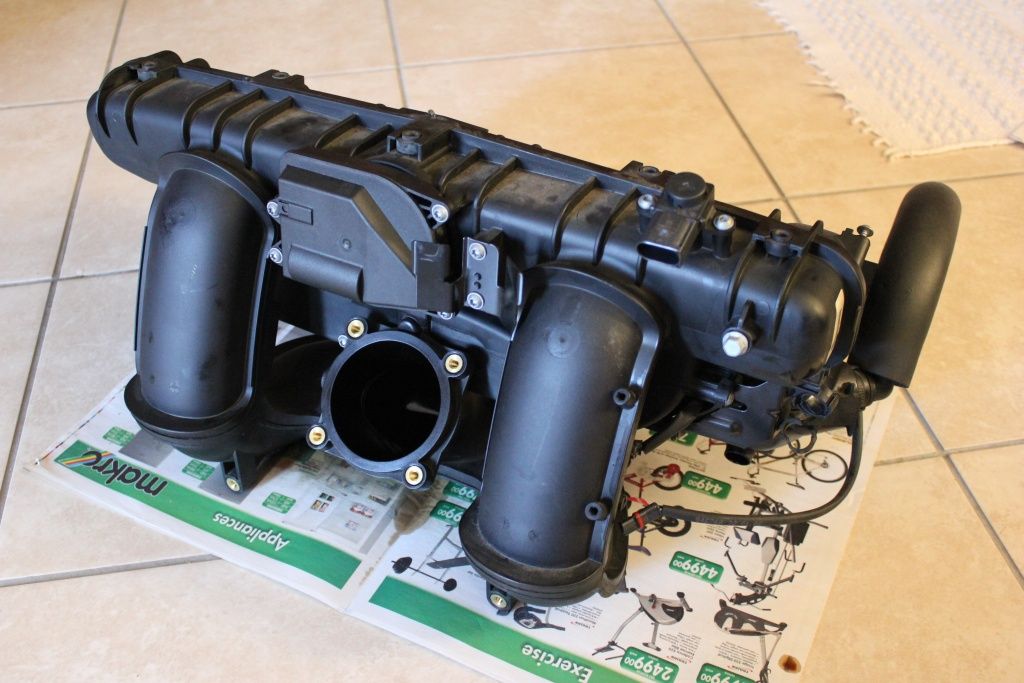
When I removed the manifold from my 330i I also battled, but eventually this is what all needed to be done from the start. (Added some pics to show some items better)
1. Engine covers off 2. Strut brace off 3. Air box and intake pipes off - at this point clean any visible dust away from the intake manifold as it meets the cylinder head  4. Loosen power steering reservoirs and move aside 5. Disconnect cable to throttle body and mark and remove throttle body  6. Disconnect various cables to DISA motor(s) and mark, as well as the cable to the intake pressure difference sensor, and remove any pipes secured to the manifold 7. Remove nuts and bolts holding manifold onto head so that you can release it, remove the upper vent hose from the rear of the cylinder head and if you can reach, the lower vent hose from the PCV - this will allow more space as you will find needed later 8. Remove the pipes from the clip on the manifold near the firewall - I struggled with one where the would not release, if so move to next item   9. Remove the bracket holder from the electrical bus on the manifold near the firewall - this will again give you more space  10. Unplug the cables for the vent hoses and PCV from this bus and again mark - the bus can now be put aside 11. At this point there should be nothing still attached to the intake manifold and it should be free to be removed - take your time to make sure 12. To prevent any dust getting into the intakes it might be worth covering them with some masking tape - carefully clean the intake surfaces first I hope this helps! |
|
Appreciate
0
|
| 10-16-2013, 11:54 AM | #5 |
|
Enlisted Member
 2
Rep 40
Posts |
Wow, I am going through the same thing! (doing the 3-stage intake swap) and I am trying to remove the back screw but can't get the tool on it. Maybe I should remove the throttle body first? Seems like it after reading the Pelican instructions.
|
|
Appreciate
0
|
| 10-16-2013, 10:18 PM | #6 |
|
Major
 
59
Rep 1,465
Posts
Drives: 2009 BMW 335xi
Join Date: Feb 2012
Location: Maryland
|
Remove the throttle body first.
|
|
Appreciate
0
|
 |
| Bookmarks |
| Thread Tools | Search this Thread |
|
|