
|
|
 |
 |
 |

|
 |
BMW Garage | BMW Meets | Register | Search | Today's Posts | Mark Forums Read |
 |

|
BMW 3-Series (E90 E92) Forum
>
DIY : "Dynamating" Trunk & Trunk Lid
|
 |
| 06-29-2011, 05:03 PM | #1 |
|
Second Lieutenant
 
13
Rep 282
Posts |
DIY : "Dynamating" Trunk & Trunk Lid
Hello,
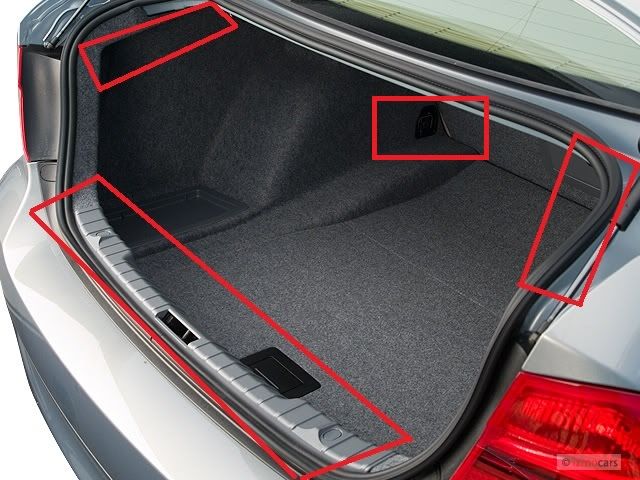
I recently installed a system in my 2008 BMW 328XI with HIFI stereo and since I had my trunk gutted, I went ahead and "Dynamated" my vehicle. From searching the internet, I found a great and cheap alternative to use rather than Dynamat. The product is called Peel & Seal and you can purchase it at your local Lowe's in the roofing department. In this DIY, I only did the trunk and trunk lid of my car. I covered a majority of both the trunk and lid by using one roll of Peel & Seal that measures out to 6"x25'. To do a complete job you will need 2 rolls. I will be going back and purchasing another roll to complete the entire trunk and have a ton left over. Tools Required : - (2) Peel & Seal - $18.06 each - Box Cutter (Scissors don't work as well) - Flat Head & Phillip Head Screw Drivers - Torx 40  ** Missing some pictures due to camera memory card** (Steps 1 & 2 use the same illustration) 1) Remove the trunk floor matt and remote the plastic trim by viewing the illustration below. Use your Phillips head screw driver and remove the plastic covering and unscrew both screws. Then if you stick your head in the trunk you will see 4 tabs, use the flat head and pry them out carefully. Remove it from the car. 2) Use your flat head and pry out the black tabs on both side panels. You will also have to use your Torx 40 and remove both metal tie downs.  Once the plastic cover, trunk flooring, and both side panels are removed, your trunk should look similar to this.  3) Grab your Peel & Seal and your box cutter and start cutting and apply to any metal that can be seen. **The sticky side is very sticky so make sure to not touch anything you don't want it to stick too**. Once applied, your trunk should start looking like so : (Flooring, tail light area, and any surrounding metal should be covered)  (Stick your head into the trunk and look up, you'll see a ton of metal that should be covered)  4) Now you can move onto the trunk lid. Lift your trunk up and use your flat head to pry out the plastic tabs until you can remove the lining. For the green plastic that is hanging from your lid, use your common sense to remove that". 5) Start cutting and applying Peel & Seal to the bare metal. I applied to only what my lining will cover.  Like I stated at the beginning of this thread, I only purchased one roll of Peel & Seal and I got this far in the trunk section of my car. I would recommend purchasing 2 rolls of Peel & Seal to make sure you cover ALL metal surfaces of your trunk. You will have a TON left over. I rushed through this DIY due to time, but if you have any questions, feel free to post in this thread or send me a PM. |
| 06-30-2011, 02:04 PM | #2 |
|
Second Lieutenant
 
20
Rep 220
Posts |
How does it sound now? Big improvement? Also, is the adhesive good? Does it soften or creep at high ambient temperatures?
__________________
 Current: 2019 G01 X3 Before that: 2009 e70 X5 Before that: 2007 BMW 335i Coupe - ZSP |
|
Appreciate
0
|
| 06-30-2011, 02:08 PM | #3 |
|
Second Lieutenant
 
13
Rep 282
Posts |
I feel like the subwoofer has given be better feedback but maybe I'm dreaming. I plan on finishing up my trunk and trunk lid soon when I go purchase another roll of it and start putting it in my door panels and wherever else I can.
The adhesive is VERY sticky. I pretty positive it won't start lifting up or anything. My car hasn't been in the heat (garage) since I've done it but I will find out if it softens up today and update this thread. |
|
Appreciate
0
|
 |
| Bookmarks |
| Thread Tools | Search this Thread |
|
|