|
|
|
|
 |

|
 |
BMW Garage | BMW Meets | Register | Search | Today's Posts | Mark Forums Read |
 |

|
BMW 3-Series (E90 E92) Forum
>
E90 D1S bulb replacement DIY needed!
|
 |
| 07-26-2009, 05:53 PM | #2 |
|
Major General
 
151
Rep 6,333
Posts |
good point!
__________________
2017 BMW M4 DCT Lease Transfer: https://f80.bimmerpost.com/forums/sh...8#post23736398
|
|
Appreciate
0
|
| 08-17-2009, 04:23 PM | #4 |
|
Lieutenant
 
10
Rep 462
Posts |
No luck searching google either.
__________________
|
|
Appreciate
0
|
| 03-14-2010, 04:19 AM | #7 |
|
Private

1
Rep 56
Posts |
Manuals don't have instructions for changing Xenon bulbs yourself. At least my 2010 manual didn't. They recommend taking it to an Authorized BMW center.
I assume its probably similar to the E92 installation. I'll find out in a few days. |
|
Appreciate
0
|
| 03-14-2010, 03:57 PM | #8 |
|
Major
 221
Rep 1,313
Posts |
For the e90 you have to
1) jack up the car 2) remove the tires 3) unbolt the fender wells. most are 8mm and the largest being a 10mm 4) pull back the front side of the fender well (there are two sides, a front and a rear) 5) you can use anything to keep this piece back so you can see the rear of the headlight (i usually zip tie it through one of the screw holes to the spring to keep it from flopping forwards) 6) You will now see the cover to get into the D1S housing 7) using a flat head screwdriver pry off the cover via the latches and remove the cover 8) you will now see the exposed D1S bulb 9) the bulb has a clip holding it to the housing. To remove the bulb first unplug the harness, push the clip in and move the top pieces off from side to side. This will release the clip. Remember Push in with your thumb on the bottom of the bulb (you will see what i mean) and at the top of the clip it till look like a "T".. you are going to move the metal clip out to the sides to un-attach it. 10) once you get the bulb out reverse the instructions to put everything back into place note: when I installed my new bulbs my headlight alignment went out of whack.. use the screw holes on top of the headlight (up and down) and also the holes where the fender meets the headlight (if you look inside the hole you will see something circular you can fit a flat head screw driver into) this will be the left and right... thats pretty much it in a nutshell.. good luck and sorry no pics...
__________________
2007 TiAg e90 335i sport. Yes, The e90 "Mustache" is cool!
|
|
Appreciate
0
|
| 03-21-2010, 02:17 PM | #9 |
|
Private
1
Rep 56
Posts |
I just changed out the passenger side xenon D1S yesterday on my E90 LCI 335d. The instructions above do not apply for LCIs I assume after trying them. Only Steps 1-6 are correct. After I finish the driver side I will clarify any details I left out and edit if needed.
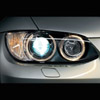
For E90 LCI Xenon: 1) Jack up the car. 2) Remove the tire on the side you're working on. 3) Unbolt the fender wells. most are 8mm and the largest being a 10mm 4) Pull back the front side of the fender well (there are two sides, a front and a rear) 5) you can use anything to keep this piece back so you can see the rear of the headlight (i usually zip tie it through one of the screw holes to the spring to keep it from flopping forwards) 6) You will now see the cover to get into the D1S housing 7) Using a Torx bit to remove the 4 torx screws securing the cover behind the D1S bulb, Once all the screws are removed the the cover will come right off. 8) You will now see the exposed D1S bulb 9) The bulb has a clip holding it to the housing. To remove the bulb first unplug the harness, then push the top of the clip inward (move both pieces to the left for the passenger side) This will release the clip and then you can move it down and out of the way so you can release the bulb. 10) Insert new bulb, refasten clip and plug in the connector and you can put everything back together. If your're installing new fog light bulbs as well now is the time, you can easily access the fog light bulb with the fenderwell liner pulled out. Pics: Fenderwell:  Fenderwell pulled back, black D1S cover exposed  D1S Cover off  D1S Clip close-up  |
|
Appreciate
0
|
| 04-29-2012, 06:21 PM | #10 |
|
First Lieutenant

21
Rep 358
Posts |
for better instructions here
http://www.trickykegstands.com/e90Headlight.html
__________________
black saph./black leather/xenon/heated seatscomfort pkg./advantage pkg |
|
Appreciate
0
|
 |
| Bookmarks |
| Thread Tools | Search this Thread |
|
|