|
|
|
|
 |

|
 |
BMW Garage | BMW Meets | Register | Today's Posts | Search |
 |

|
BMW 3-Series (E90 E92) Forum
>
New UUC Evo3 Short Shifter for our 335
|
 |
| 03-12-2008, 01:13 PM | #1 |
|
Car Guy

44
Rep 803
Posts |
New UUC Evo3 Short Shifter for our 335
I recently installed the pre-production version of the UUC Evo3 in my wife's 335i and wanted to share my DIY guide and feedback. I spoke with Rob at UUC shortly after installing the Evo3 in my M Coupe and was thrilled to hear they had one in development for the 335.
The shifter is not physically any shorter in height than OE, but the shorter throws and the more precise feel make this a desirable mod. The shifter replaces all of the plastic pieces with metal and the pivot bushings with bearings, this contributes to the smooth and precise feel. On to the DIY guide, also found here: http://www.billswebspace.com/335UUCEvo3DIY.htm The UUC shifter comes packaged with all the pieces needed to install their Evo 3 short shifter. Additional carrier lock pins (circled below) are included if the installer desires to remove the carrier during installation: 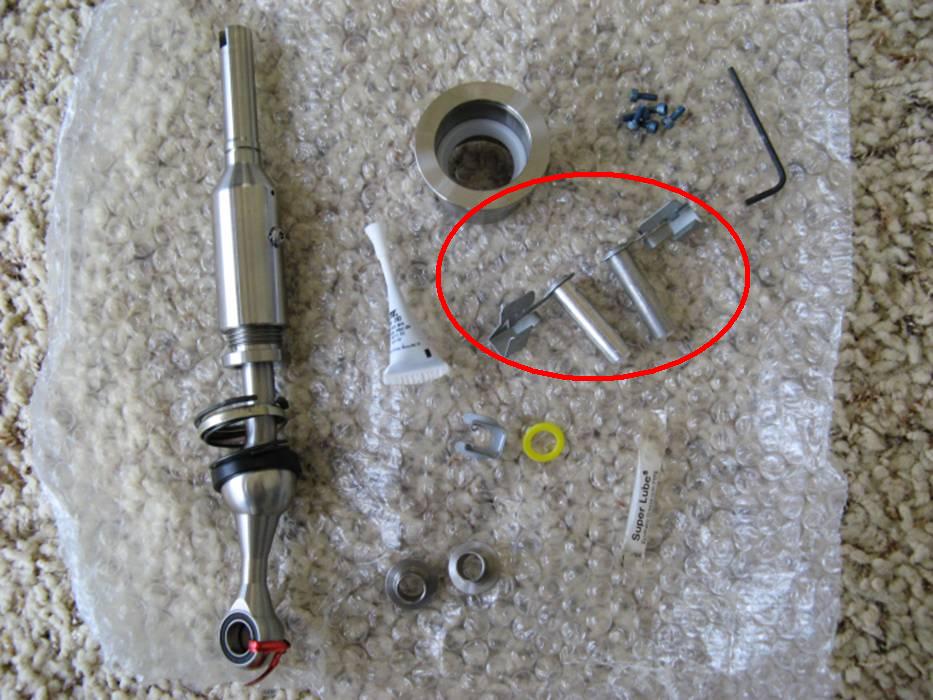 NOTE: The following is provided for information only and any use of this information by you is at your own risk. The first thing I did was to remove the shift knob (pull up hard), the shift boot (four clips, removed by tugging upward gently at clip areas), the foam insert around the shifter, and the carpet around the shifter: 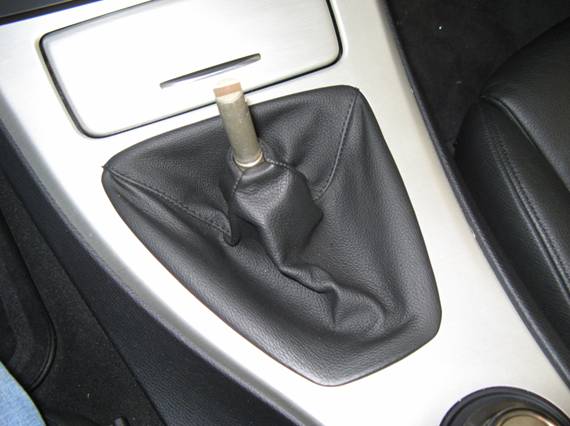 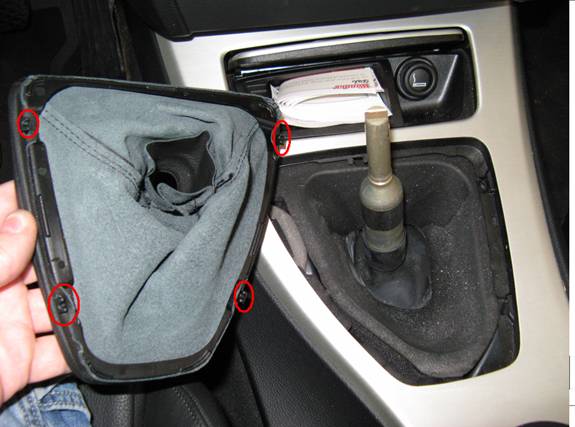 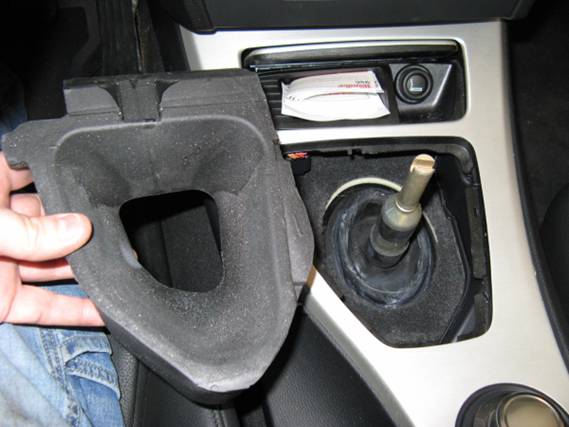 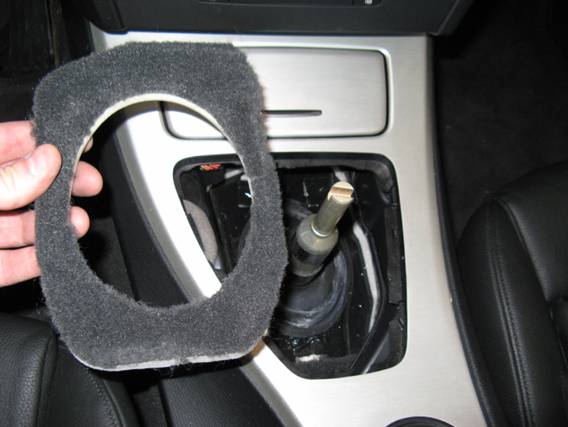 The rubber boot can be carefully removed as well: 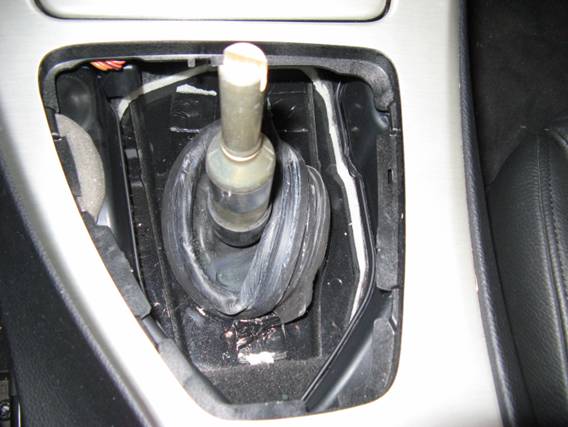 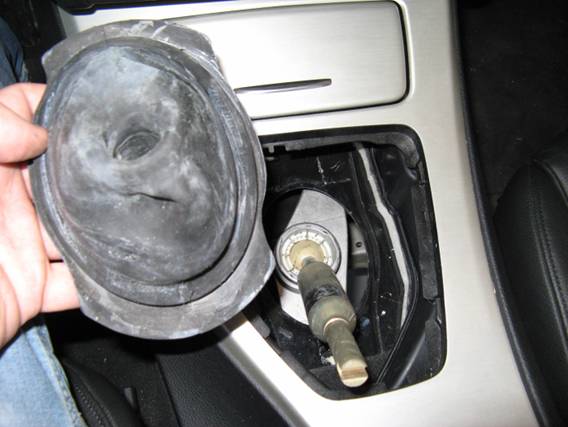 Note in this picture of the bottom of the boot the area that goes around the shifter carrier opening, this can be felt/positioned through the top part of the boot during reinstallation: 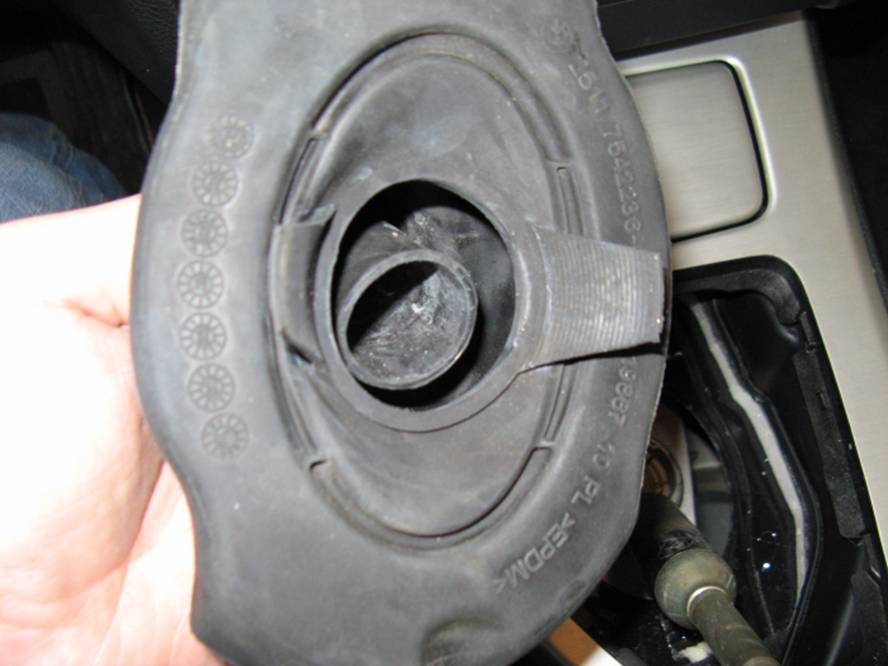 All of the pieces removed so far:  The plastic piece under the car is removed with an 8mm socket driver for access to the bottom of the shifter. The heat shield can be carefully bent back to allow access after using a 10mm socket driver to remove the drivers side nut: 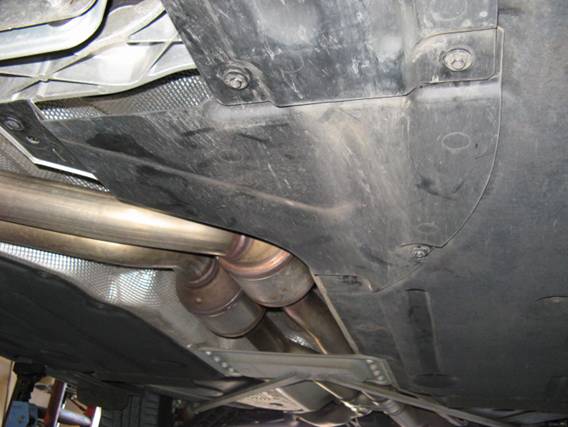 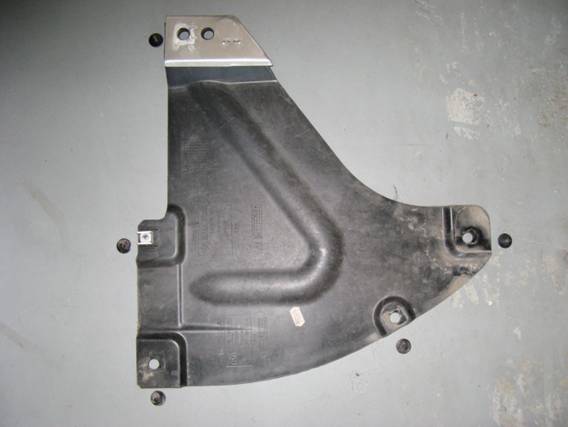 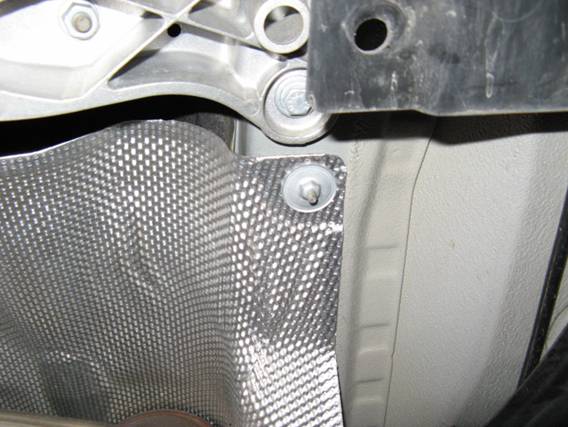 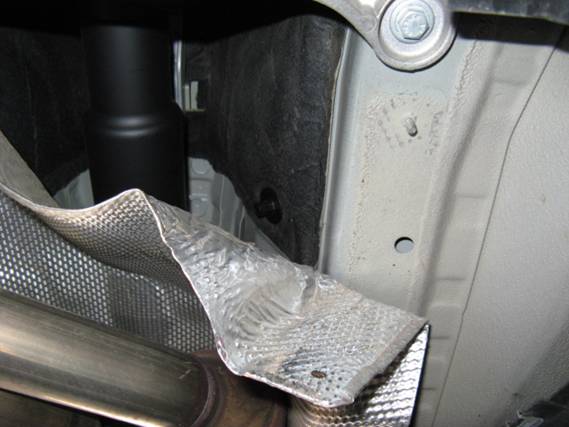 The shifter is held to the shift rod with a C-Clip, it can be removed with the help of a screwdriver: 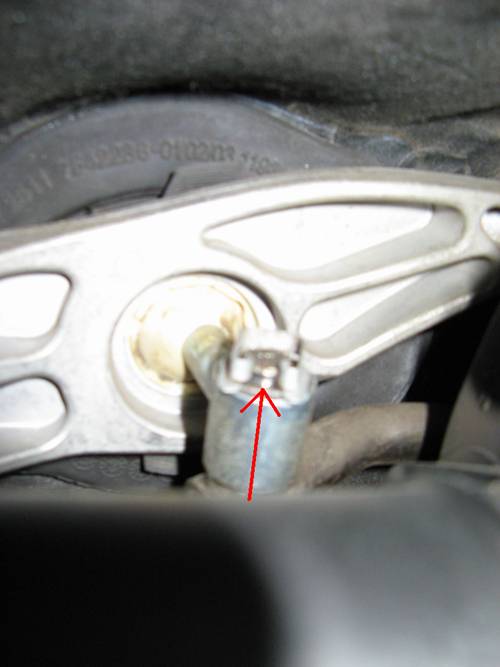 The shifter is also held to the carrier with a plastic collar, it needs to be rotated clockwise to release from the carrier slots it locks into. This plastic collar can be turned by inserting needle nose pliers or a small standard screwdriver into the slots located around the perimeter of the collar. I was able to get the collar turned easily with two small screwdrivers- once the tabs highlighted are rotated clockwise about 90 degrees they are free of the slots that retain the bushing and the shifter can be lifted out of the carrier: 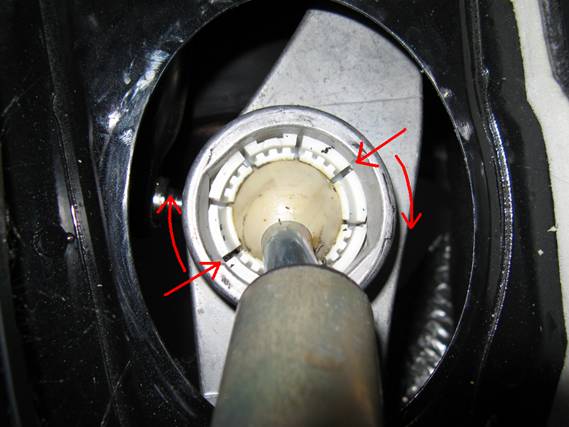  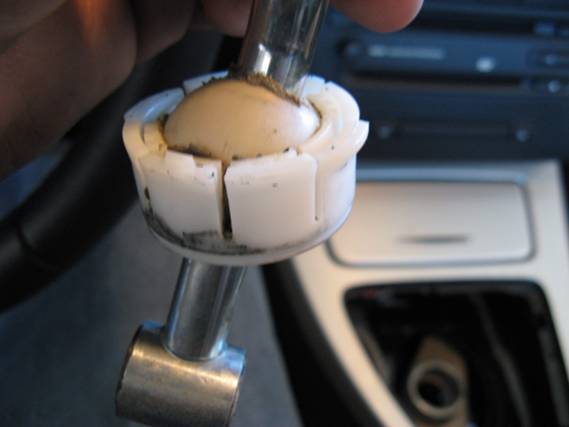 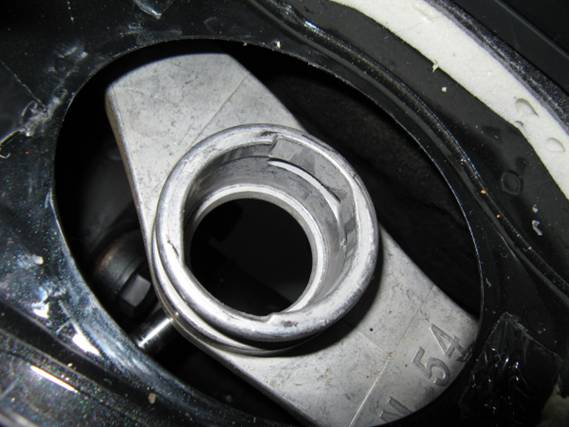 To install the UUC carrier pivot height adapter, the white ring bushing is placed in the adapter with the cup towards the top and Loctite is applied to screw holes on either side: 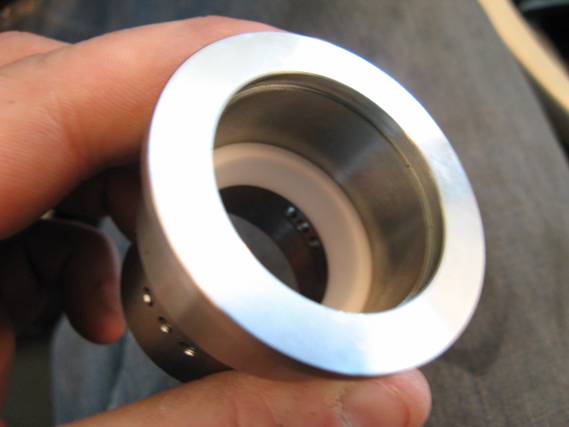 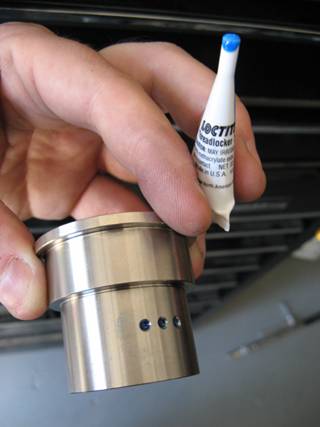 The pivot height adapter is installed next, it should sit flush with carrier base and the screw holes should line up with the slots in the carrier. Screws are installed loosely by hand and then tightened with supplied hex wrench alternating sides. After getting one screw on each side started it was much easier to start the other four using the one installed as a reference point. Be careful to get the screws just hand tight, no need to crank on the hex wrench (HINT: I found that using my grinder to cut down the hex wrench allowed for easier use): 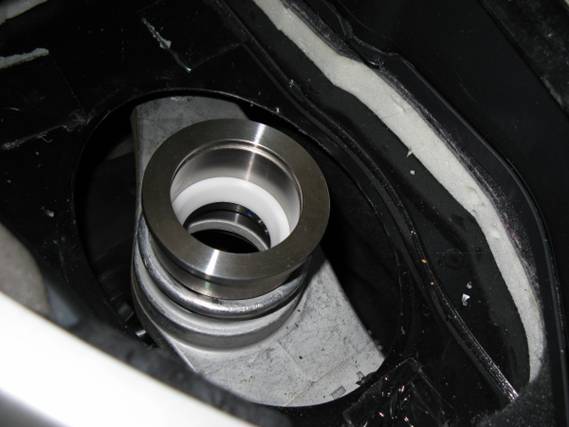 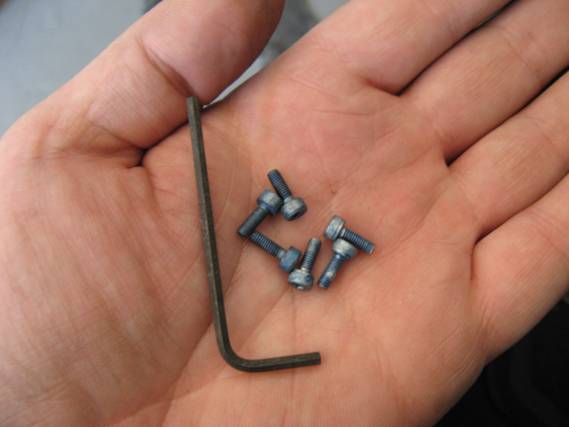 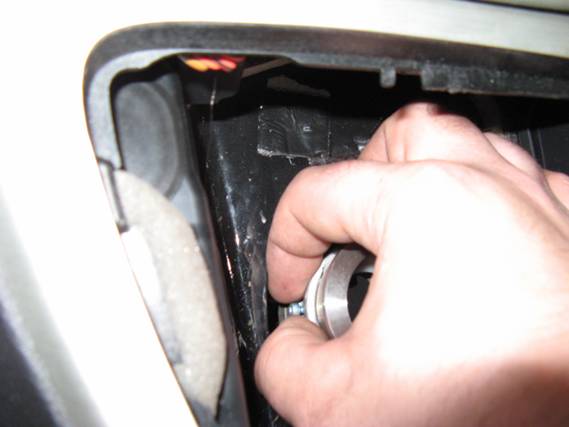 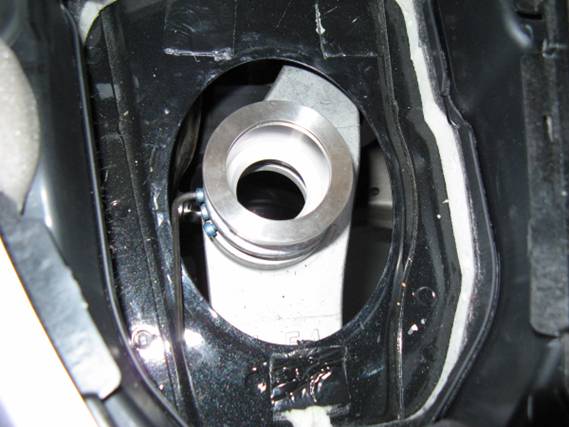  Supplied grease is then applied to shift ball, order of components for installation into carrier from shiftball up should be nylon cup, spring, spring retainer, and snap ring. Also note the slight bend above the pivot ball to the left, the shifter should be installed with this bend towards the driver:  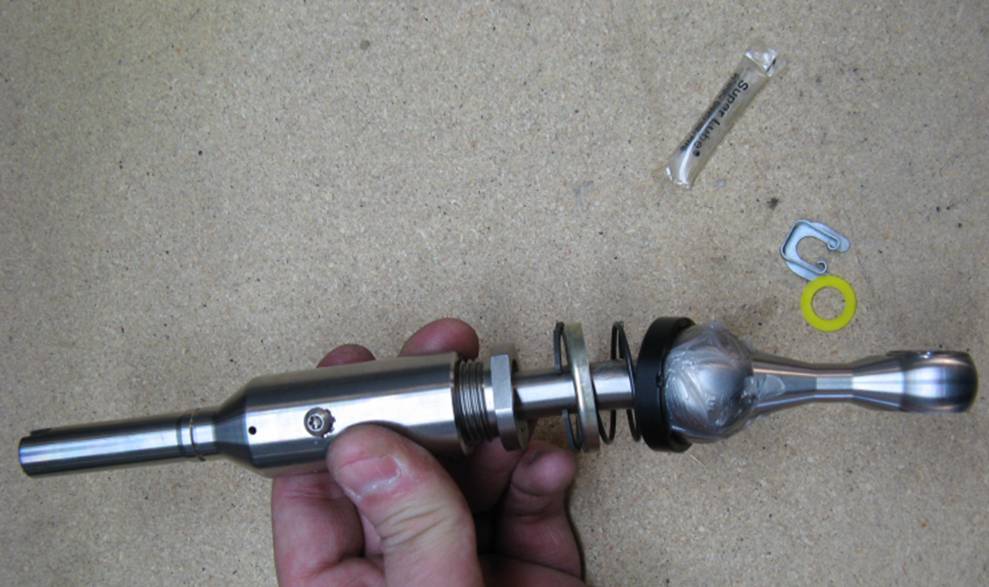 To install shifter in carrier, snap ring pliers are used to insert snap ring into adapter after shifter is placed in carrier: 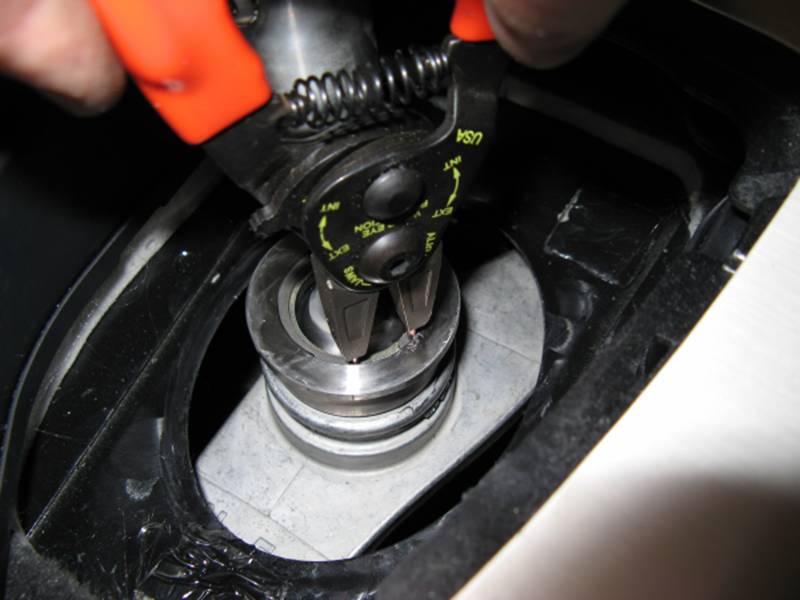 Shifter is then connected to shift rod by placing bearing liners into bearing on either side, sliding shift rod pin through bearing, installing yellow plastic washer, and finally installing the C-Clip: 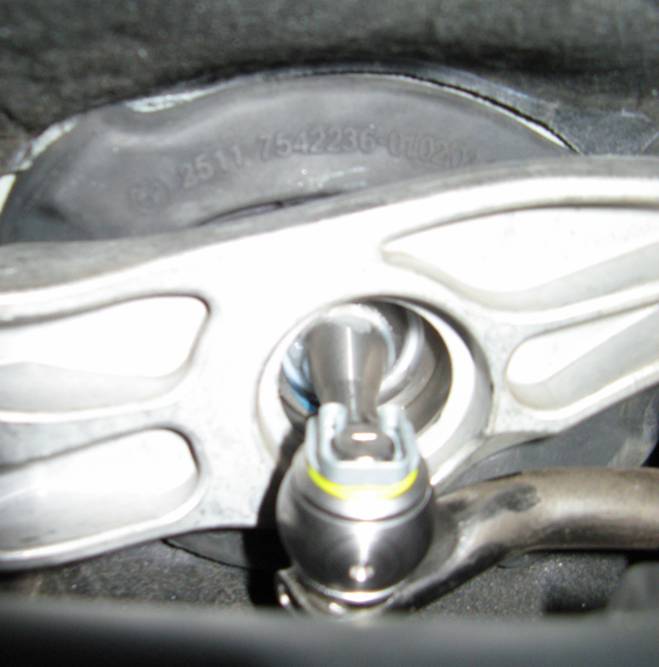 Heat shield is bent back to normal and bolted back up, plastic panel is reinstalled, shifter rubber boot (arrow on boot towards front of car), carpet, foam, shifter leather boot, and knob are reinstalled. When reinstalling the rubber boot, the lower seal for the smaller ring on the carrier around the shifter can be pressed on/around the carrier opening by feel through the rubber boot as the larger lip is press fit into the console body hole. 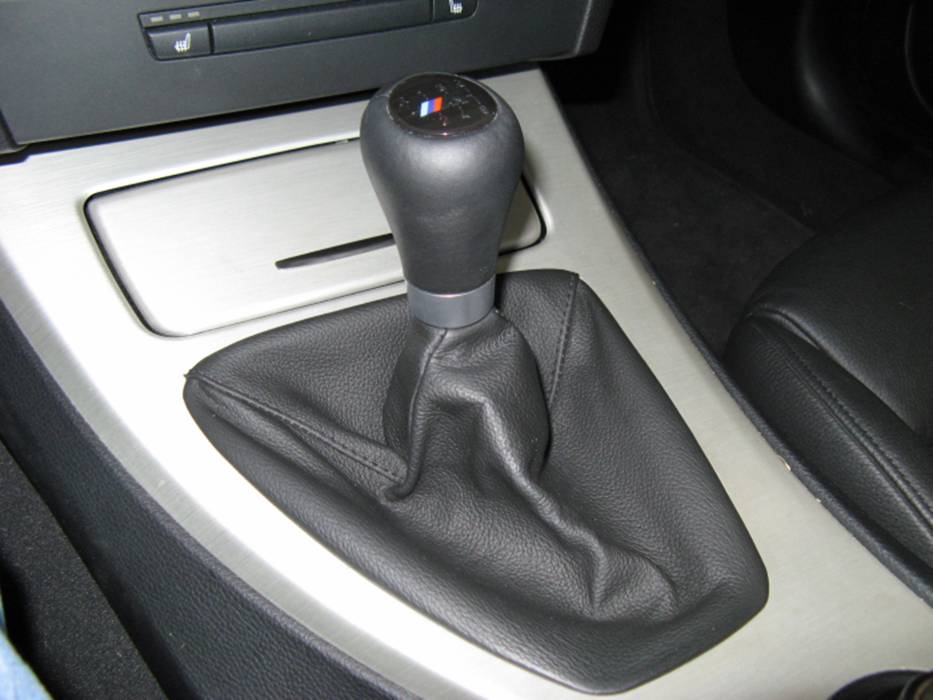 I am in no way affiliated with this vendor, just a satisfied customer, see http://www.uucmotorwerks.com/html_pr...hifter_nav.htm for more information.
__________________
|
| 03-12-2008, 01:39 PM | #3 |
|
Major General
 
381
Rep 5,842
Posts
Drives: 2006 325xi
Join Date: Aug 2005
Location: South Central Connecticut
|
Great write-up Do you have any pictures before and after to compare the difference?
|
|
Appreciate
0
|
| 03-12-2008, 01:45 PM | #5 |
|
Car Guy
44
Rep 803
Posts |
Sorry, the only before pics I have probably are not directly comparable to the after. If I had to guess I would say the throws are about 30% shorter? Whatever it is, it seems perfect to us, UUC might be able to provide some numbers- I'm sure this varies if the shifter height is adjusted, I left mine set to the height it was shipped at.
__________________
|
|
Appreciate
0
|
| 03-12-2008, 07:44 PM | #6 |
|
Moderator

136
Rep 6,775
Posts
Drives: TiAg E92 335
Join Date: Oct 2006
Location: Raleigh, NC
|
Thanks for the excellent DIY write-up!
 After seeing that you don't need to replace the whole carrier assembly, I think that I may just sell my oem short shift lever and pick up one of these. How does it feel?
__________________
-Michael.
Berlina Black S2000 CR is now in the garage   l 19" Rial Daytona Race l KW V2 l Eisenhaus Race Exhaust l |
|
Appreciate
0
|
| 03-12-2008, 07:45 PM | #7 |
|
Car Guy
44
Rep 803
Posts |
It feels very precise and is the perfect amount shorter in throw. Kudos to UUC for some great products, I have their shifters in both of my cars and have been very pleased with the results.
__________________
|
|
Appreciate
0
|
| 03-28-2008, 09:20 PM | #9 | |
|
Car Guy
44
Rep 803
Posts |
Quote:
__________________
|
|
|
Appreciate
0
|
 |
| Bookmarks |
|
|