

|
|
 |
 |
 |
|
 |
BMW Garage | BMW Meets | Register | Today's Posts | Search |
 |

|
BMW 3-Series (E90 E92) Forum
>
DIY - How NOT to remove your trunk lock and lock cylinder
|
 |
| 01-14-2009, 12:17 AM | #1 |
|
Brigadier General
 
95
Rep 3,709
Posts |
Sorry about not having more pictures, I didn't think a trunk swap was going to be all that difficult. 99% of the trunk swap is easy, this was the part I got stuck on for a good hour or two until I realized what I did wrong. In the following few pictures, I attempt to explain what not to do when trying to remove the trunk lock cylinder from the OEM trunk.
I tried to make this as detailed as possible considering I wasn't really planning on making a DIY and thought the install would be fairly straightforward. After my frustration with this cylinder lock and realizing I stripped the torx screw and would have to shell out about $100 for a new one I figured I'd try and help out the community so people won't make the same mistake as me. As far as E92 trunk swap DIYs, I didn't see any, and I'm sure this is probably the hardest part to swap on the trunks, everything else was relatively simple and straightforward. Minus this locking mechanism crap, I did the rest of the trunk swap within half an hour. Any other questions, feel free to pm me. Hope this helps. Also, I took these with an iphone as my normal camera was out of batteries. Picture 1 shows the trunk lock cylinder mechanism. It shows roughly the locking piece that is in the open position that keeps the cylinder in place when installed on the OEM trunk. With this piece open, even if you unscrewed both screws that hold the cylinder in place with the trunk, it will still not move. Best case scenario you can wiggle it a little, which I did for probably half an hour before I realized it wasn't going to come out. Also, it shows you where you can access the ratching lever lock to allow the locking piece to be moved to the closed position via the plastic torx screw (which I stripped. Why it's plastic I don't know) 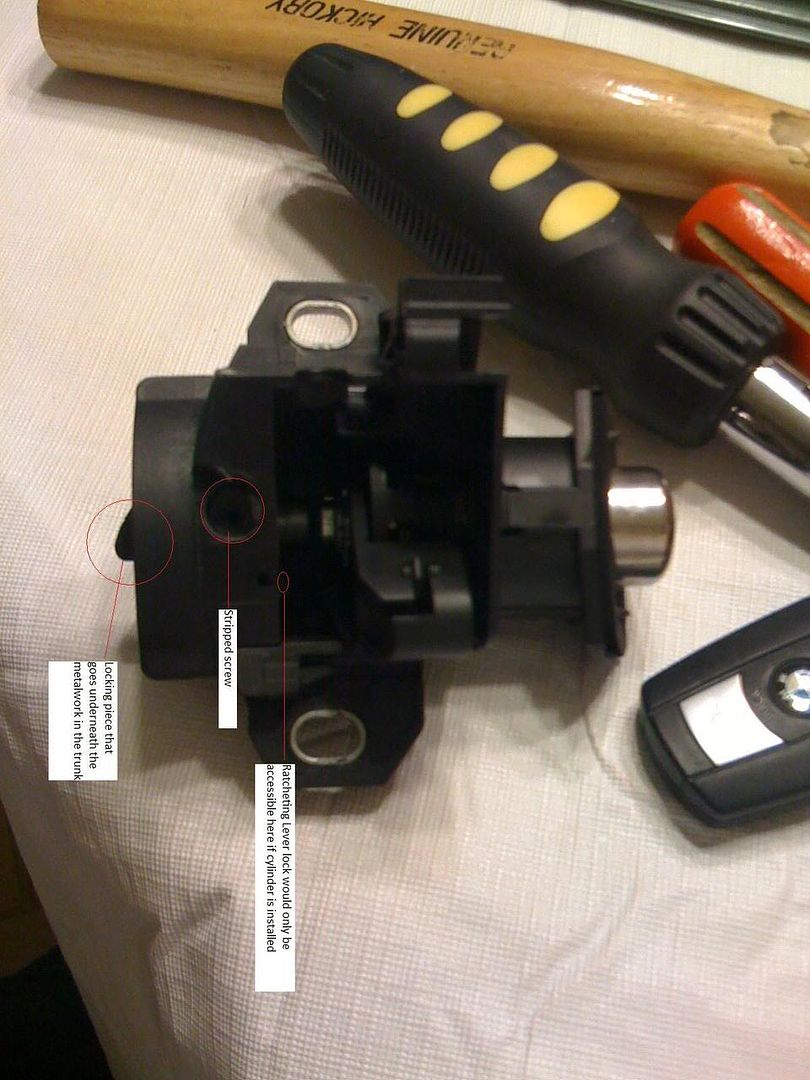 Picture 2 is a side view of the actual locking lever and the ratcheting piece that is attached to the plastic Torx screw. If you look closely to the right of the ratcheting device, you'll see a plastic locking tab. 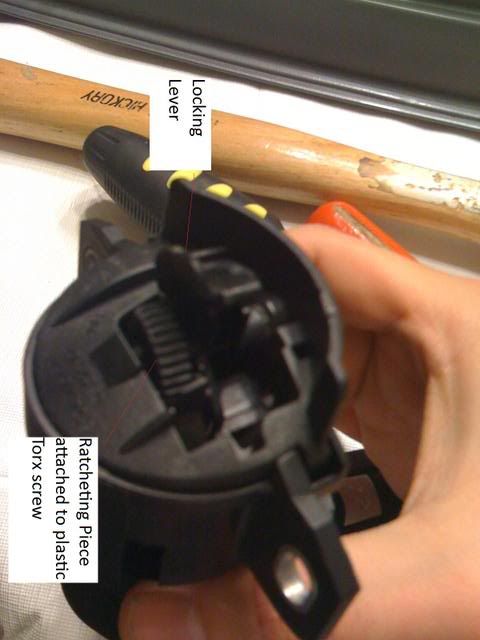 Picture 3 - locking piece in open position. Note that the locking piece looks kind of like a blade (I guess propeller looking piece would be the closest description) 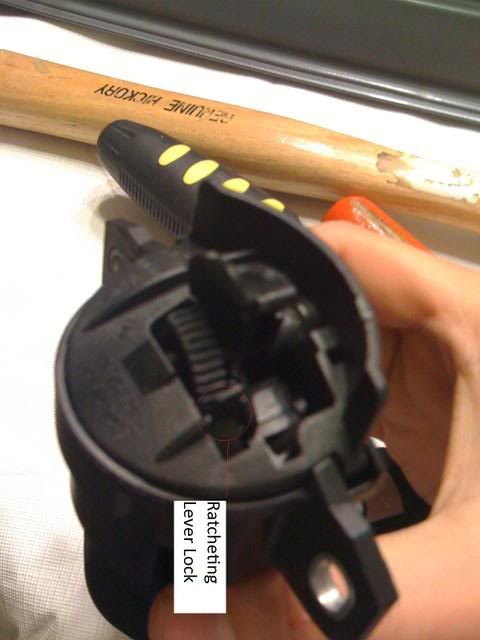 Picture 4 - the lever lock that prevents the locking piece from moving around. Even if you were to try and screw the Torx screw up top, this piece has to be pushed to the open position to let the ratchet move to let the locking blade to be closed. 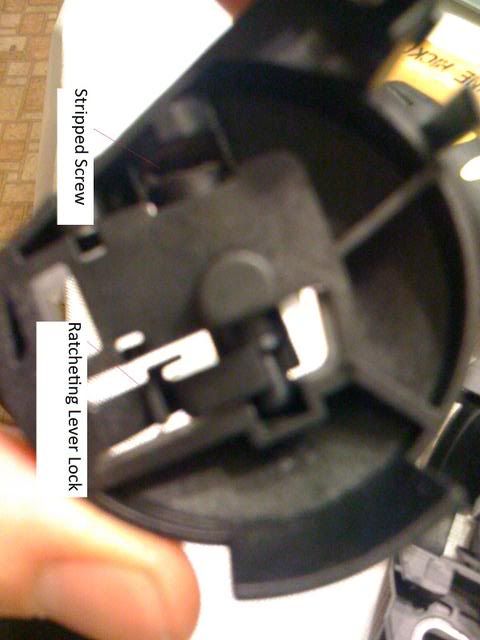 Picture 5 - the locking blade is now in the "closed" position which should allow the cylinder to be removed from the trunk. The 2 red straight lines show where the metal bodywork panel would be and hence why if the blade is open, the cylinder can't be taken out without closing the locking piece first. 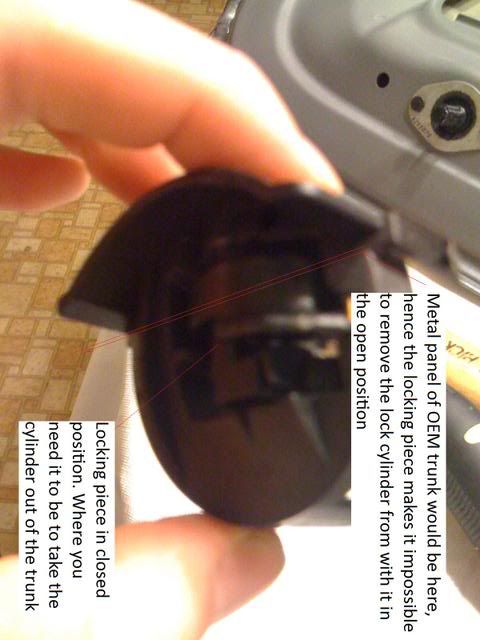 Picture 6 - Locking piece is in open position for reference. This is how it would look normally when the cylinder is installed in the trunk. 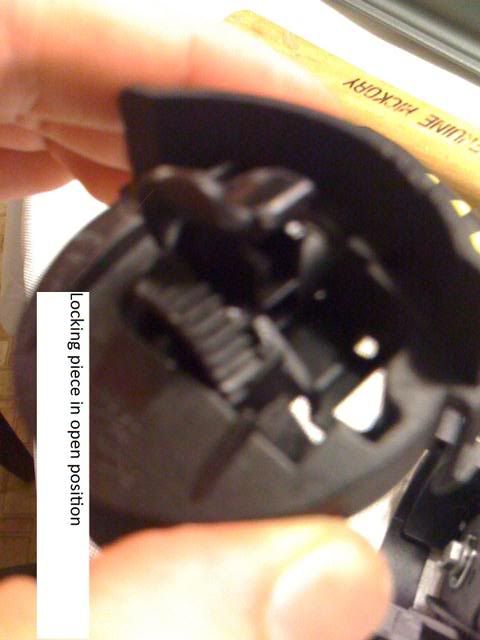
__________________
OG E90 Pwhore
2003 Porsche 911 Turbo Cobalt Blue (BLU 996) - 500+hp of mods. 2010 Toyota FJ Cruiser (Batmobile) -TRD stuff 2009 Merc C-350: AMG package, loaded 2008 E92 335xi - Gone Last edited by Dragonman4; 01-14-2009 at 12:34 AM.. |
| 05-23-2020, 03:13 PM | #2 |
|
Private First Class
 25
Rep 102
Posts |
removing trunk lock
Go to this link here. Using this link you will get your lock out
https://www.e90post.com/forums/showt...1#post26215741 |
|
Appreciate
0
|
 |
| Bookmarks |
|
|