

|
|
|
|
 |
|
 |
BMW Garage | BMW Meets | Register | Today's Posts | Search |
 |

|
BMW 3-Series (E90 E92) Forum
>
DIY: E93 Dome Removal
|
 |
| 05-21-2011, 02:25 PM | #1 |
|
Lieutenant
 38
Rep 555
Posts
Drives: E93 328i
Join Date: May 2008
Location: So.Cal
|
DIY: E93 Dome Removal
So, I have seen some E93 owners trying to install LED interior lights for their car. One problem though, is that the removal of the front dome is not the same as E90/92. In order to install any LED lights in the dome for E93 owners, we have to remove the entire assembly. (Extreme PITA) Anyway, onto the DIY!
Tools: -One long flat head screwdriver -Most importantly, patience Recommended Time: Well, being that I am just a 17 year old high school senior and this was my third mod on the car aside from scoops and LED license plate lights, you can tell I do not have much experience. Thus, the first time I removed the dome took me about 30 minutes due to limited resources of information. After a couple times, I can do it in less than a minute. So I would say it would take an average person about 10 minutes to do so their first time. Difficulty: Removing the Dome: I'd give it about a 1 Installing the LED lights in the Dome: About a 2 since it is an entire PITA. Imagine installing all of the lights, reassembling the whole entire dome, plugging it back into the car only to realize that you need to rotate the connection 180 degrees? Happened to me a couple of times.  Anyway, onto the DIY! 1st Step: Slip the end of the screwdriver into the assembly like so 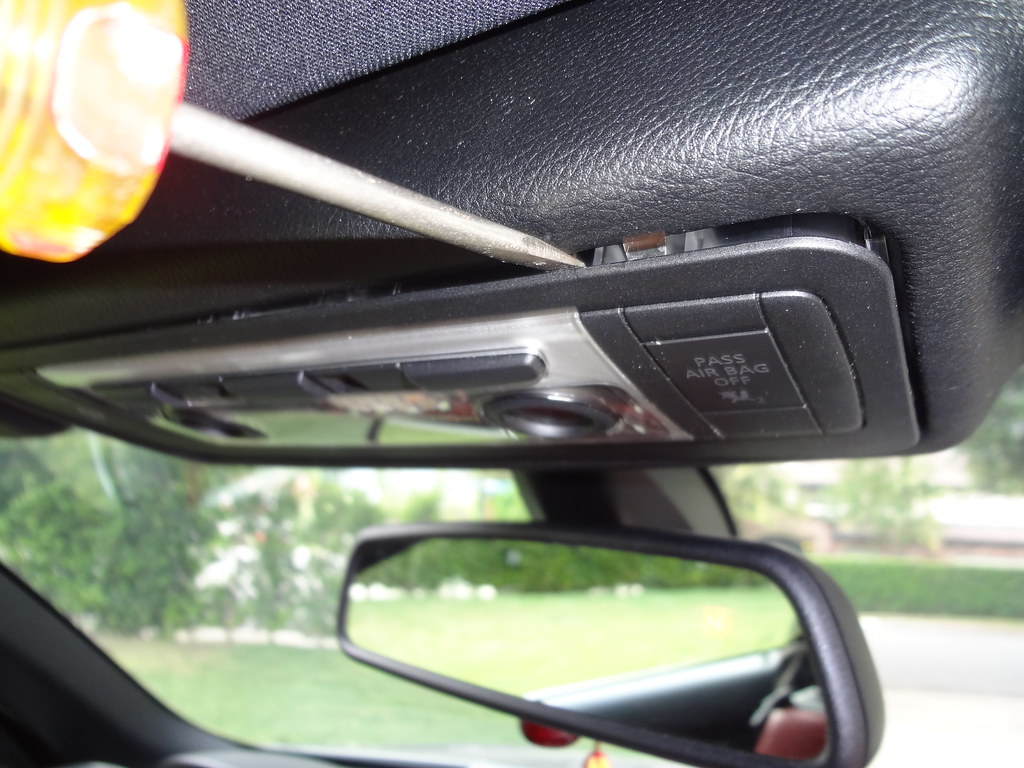 The entire assembly will drop down and you will be able to see two metal clips in the next step 2nd Step: Here, you can see the two metal clips on each side. Take your screwdriver and push it so the dome will drop down a bit more until it is at this level. 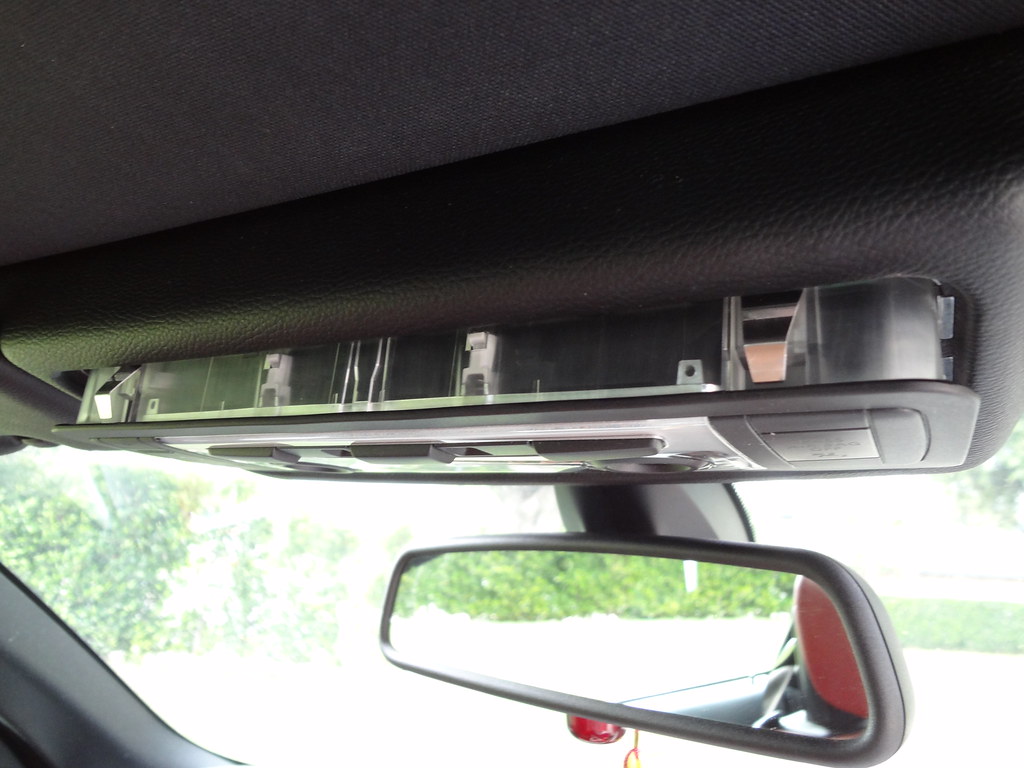 3rd Step: After the assembly is at the level in the 2nd Step. Move yourself into the passenger seat so you can then remove the two plastic clips holding the assembly up. Use the screwdriver to push in the two plastic clips while pulling down on the assembly to drop it. 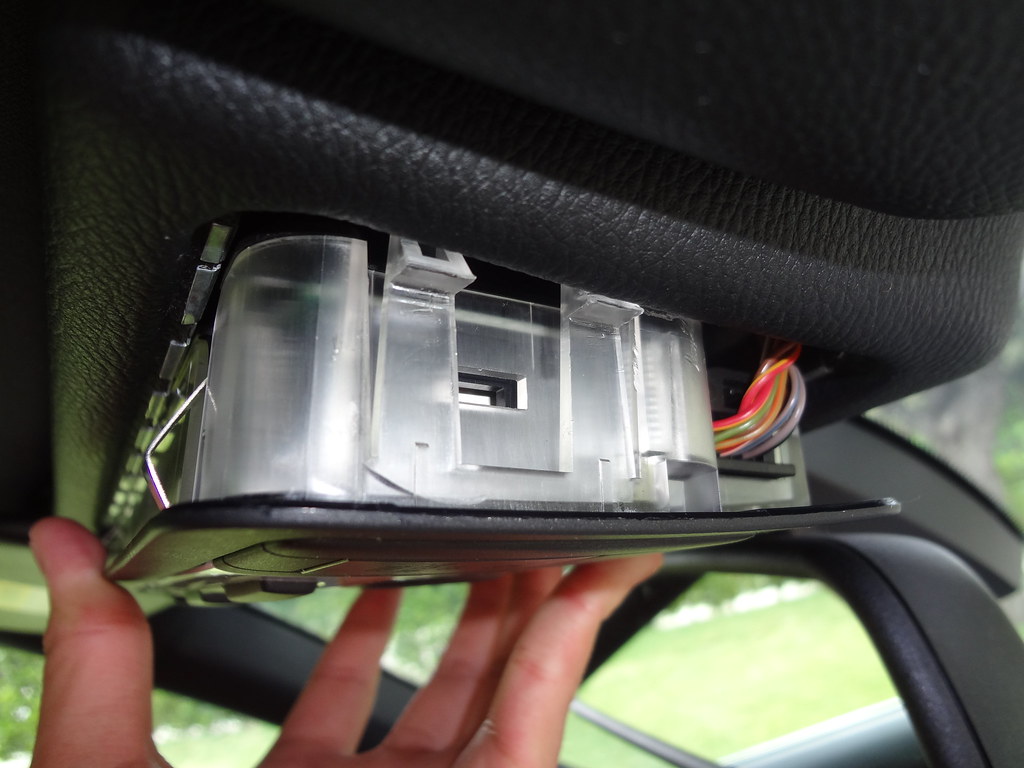 4th Step: Once the plastic clips are pushed in, the entire assembly should drop down and look like this. You then have to removed the two connectors on each side. 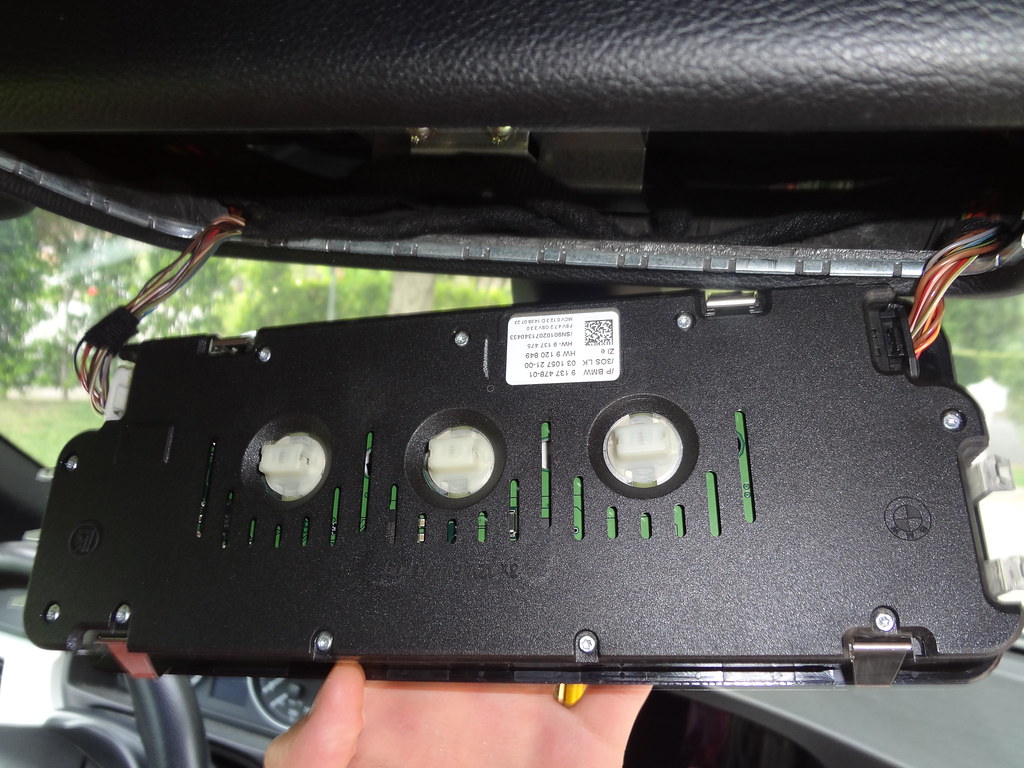 5th Step: Finally, after the removal of the two connectors, you have released the assembly from the car. Take it to a nice bright table, preferably with soft material under the dome to ensure that it does not get scratched in the next coming steps. A Torx T8 screwdriver is required to remove the 10 t8 screw on the back.  6th Step: After the screw are done with, the black backing is still connected to the other pieces. There are small clips around the see through edge that need to be released. After doing so, I found out the easiest way is to flip the module over and push on the plastic cover with your thumb while using your other fingers to pull up with the black outer edge. 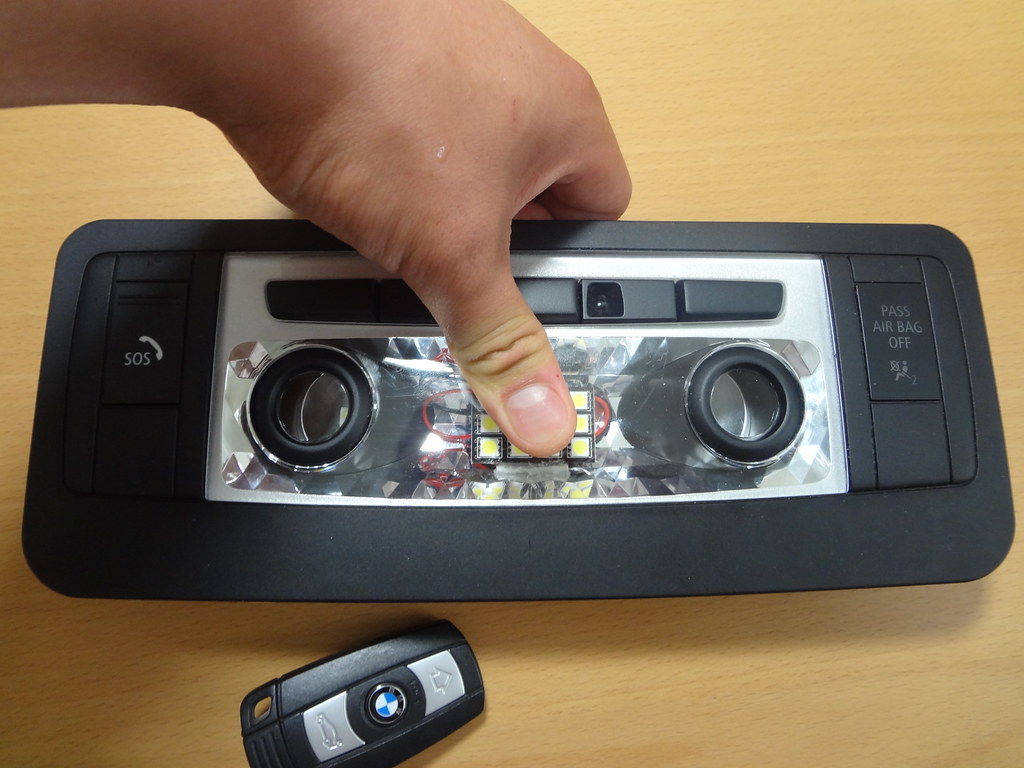 And VOILA! That is how you remove and disassemble the E93 front dome to do whatever you please with it.  If you need help with any of the steps or you were wondering how to install the LED lights after the 6th step, lets just say that if a 17 year old can figure this out with limited experience, you can too  . Jokes aside, feel free to PM me if any information is missing or if you have trouble. . Jokes aside, feel free to PM me if any information is missing or if you have trouble. Also, just let me know if there are any sections where it is unclear because this is my first DIY post! Thanks! Last edited by Spensaur; 05-22-2011 at 01:11 PM.. |
| 03-05-2012, 01:33 AM | #4 |
|
Lieutenant Colonel
 
243
Rep 1,588
Posts |
You know I did this and now when I press the center light the footwell lights turn on lol. Weird right? The left and side reading lights work fine. The middle light only turns on and off when I lock and unlock the car. Great write up though!
Thanks a bunch! Mac. |
|
Appreciate
0
|
| 03-17-2012, 12:02 PM | #5 |
|
Lieutenant Colonel
243
Rep 1,588
Posts |
I returned my iJDMTOY kit and picked up a highperformancebulbs.com e93 kit. It was well worth it! They even linked to this thread in their instructions ;-) full details of bulbs and where they go as well :-)
|
|
Appreciate
0
|
| 10-29-2020, 01:14 PM | #7 |
|
Registered
0
Rep 4
Posts |
Huge thanks.
I have been struggling with this for too long. Various u-tubes give fake info that dont relate to convertibles. There is just one that does; but he kinda ships the critical and non-obvious part about the plastic clips at one end. Your post was an example of clarity and saved my bm from my wrath. Well done! |
|
Appreciate
0
|
 |
| Bookmarks |
|
|


