

|
|
|
|
 |
|
 |
BMW Garage | BMW Meets | Register | Today's Posts | Search |
 |

|
BMW 3-Series (E90 E92) Forum
>
Claybar/Debadge
|
 |
| 05-03-2011, 11:28 PM | #1 |
|
Search or ban.


32
Rep 364
Posts |
Claybar/Debadge
So i'm in the process of doing an all out detail to my car. Today, I took care of the initial step, claybar. The claybar took me roughly 2-3 hours, as this was the first time doing so since purchase of the car. The car has 44,000 miles on it. I ended up using the Meguiars Clay Kit, broke one of the clays down into 10 pieces and worked from top down.
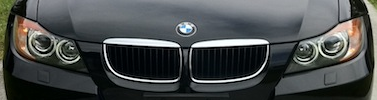
End results: Paint as smooth as a babies bottom! Prior to claybar, I washed using the 2 bucket method (Meguiars Gold Class soap) and some plush microfiber towels to scrub the car with. Took off the sprayer and hosed down car to sheet off water, then dried (dabbed) with a microfiber towel. I also took care of the de-badge that I wanted to do for a while now. I decided to do it at the same time as the claybar, as the claybar worked wonders in removing any residue left over from removing the lettering. I used satin dental floss to remove the letters, then peeled the tape off with my nails, and finally, ran clay over the last bit. Here are the results. I must say, the Jet Black paint is way too soft. I made a few extra scratches just from the claybar rubbing back and forth, and this is with me kneading after each pass and switching out the clay very often. Next up: Swirl and scratch removal/polish/Seal/Wax in that order. Will be posting details later this week.
__________________
 Last edited by digital01; 05-03-2011 at 11:34 PM.. |
| 05-08-2011, 09:44 AM | #2 |
|
Major General

127
Rep 6,594
Posts |
Looking great so far! Welcome to the world of JB detailing; it's always an adventure.
__________________
X7 LCI // Incoming C7 ZR1 ZTK // Sebring + TRX // Hydro + Raptor Gen1 Roush // Tuxedo |
|
Appreciate
0
|
| 05-08-2011, 09:59 AM | #3 |
|
Colonel

171
Rep 2,976
Posts
Drives: 07 SBM E92 335i 6MT
Join Date: Oct 2009
Location: New Jersey
|
Just removes any and all wax/residue/etc from the paint from what I've read....
__________________
In the process of restoring an 07 335i
 |
|
Appreciate
0
|
| 05-08-2011, 02:15 PM | #4 | |
|
Banned
27
Rep 872
Posts |
Quote:
Clay removes contamination from your paint that normal washing won't. There's all types of debris that sticks and embeds itself into your clear-coat. This can easily be felt after you wash your car: your paint should be smoother than glass, but chances are you'll feel a lot of tiny little bumps and areas that aren't (especially behind the wheels and on the rear-end of the car where aerodynamics kick up dirt and on horizontal panels in which things in the air naturally fall and settle onto your finish). |
|
|
Appreciate
0
|
| 05-08-2011, 08:54 PM | #5 |
|
Major General
127
Rep 6,594
Posts |
Just to adding to MuttGrunt's always excellent posts.. you can also put your hand inside a plastic bag and gently run your fingers over the paint (after washing it, of course). If it feels bumpy, you should consider claying. As said above, the paint should be smoother than glass.
Even brand new cars need to be clayed. You would be amazed how much contamination is stuck on the paint of a brand new car.
__________________
X7 LCI // Incoming C7 ZR1 ZTK // Sebring + TRX // Hydro + Raptor Gen1 Roush // Tuxedo |
|
Appreciate
0
|
| 05-09-2011, 04:15 PM | #6 |
|
Lieutenant
 97
Rep 440
Posts |
Nice job! This is getting me motivated to detail my BSM soon. What are you going to be using to polish? I really have no room to do a whole PC set up so I will be doing the polishing by hand.
|
|
Appreciate
0
|
 |
| Bookmarks |
|
|


