

|
|
 |
 |
 |

|
 |
BMW Garage | BMW Meets | Register | Today's Posts | Search |
 |

|
BMW 3-Series (E90 E92) Forum
>
35d: adding crankcase breather oil separator
|
 |
| 06-29-2014, 11:41 AM | #23 |
|
Private
 13
Rep 50
Posts |
Because the ProVent 200 has a built in valve regulating the amount of vacuum, there is no need for the original one. Once removed, I used it a template to draw an outline on a 1/4" aluminum plate...
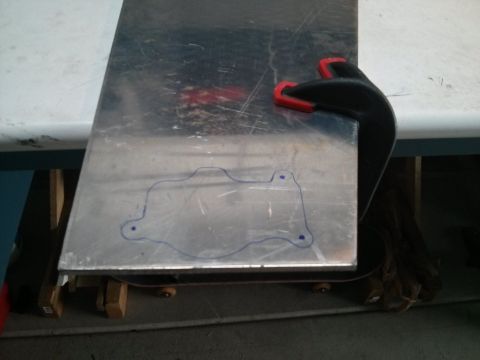 After some jigsaw and Dremmel, let's see how it fits... 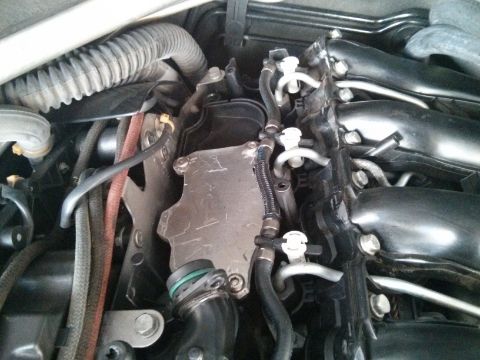 Using some JB Weld epoxy putty I attached a elbow connector to the take-off plate... 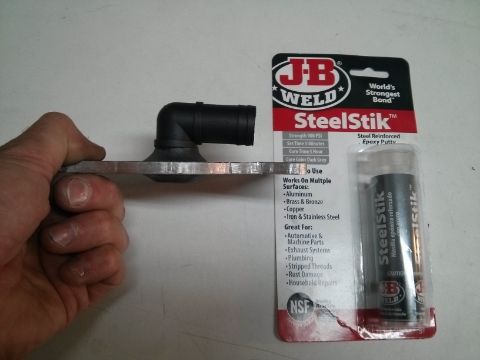 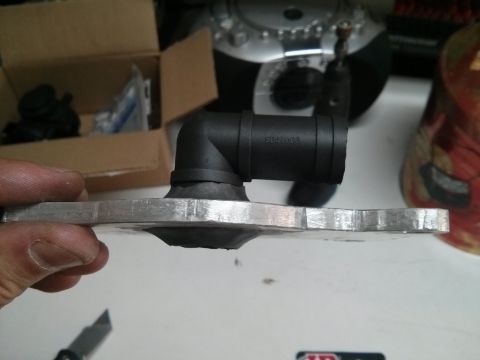 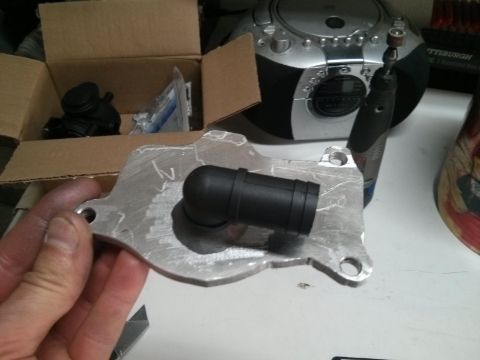 Let the epoxy cure for 1 hour or so... |
|
Appreciate
0
|
| 06-29-2014, 11:42 AM | #24 |
|
Private
 13
Rep 50
Posts |
Once the epoxy has cured, everything can be installed...
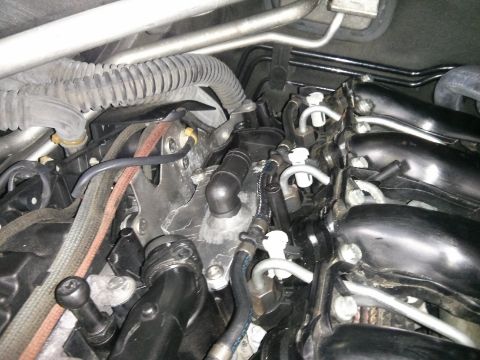 Hoses can be connected... 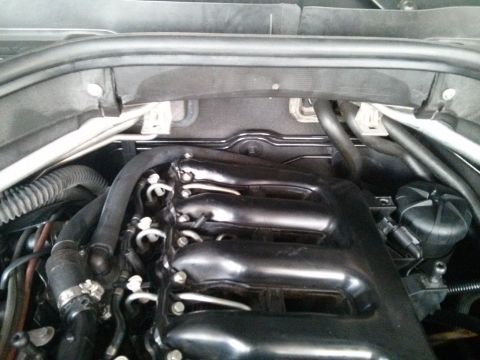 The disappointing part is that once everything is said and done, YOU CAN'T SEE IT!!!! Which is basically what I wanted... 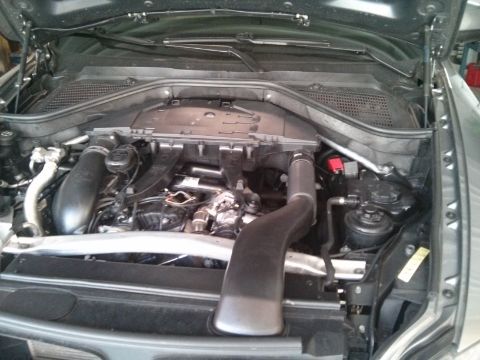 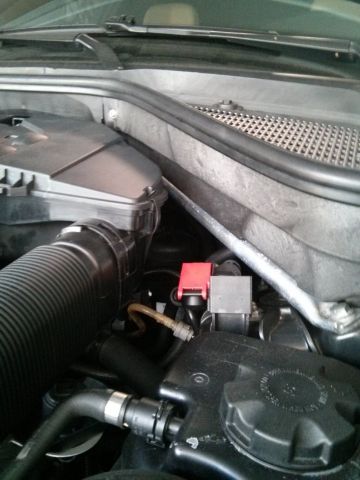 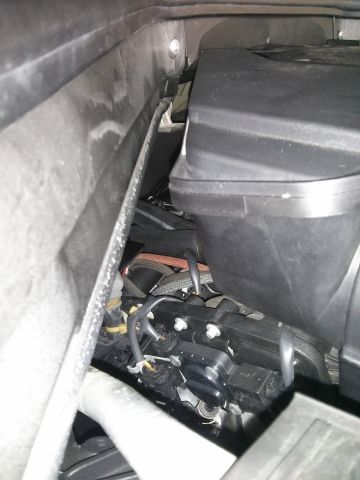 Last is the oil drain. The plan is to drain it back in the sump through the dipstick and I already have a couple of ideas on how to do that. For now, however, I decided to have a valve on the drain so I can also see how the filter performs and measure how much oil I get [there's nothing coming out of that valve, it's just some odd light effect...]. I tucked it away behind one of the plastic covers. 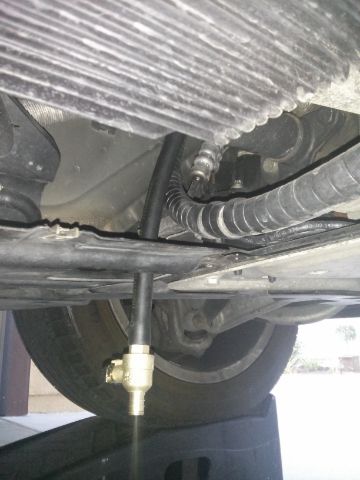 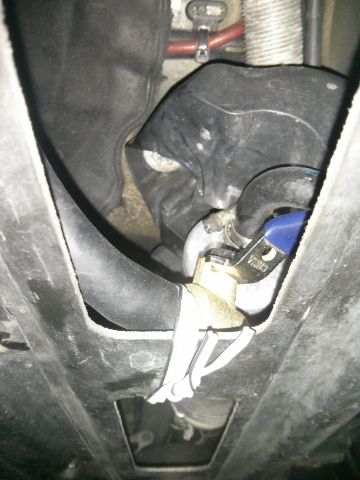 The only thing I'm missing is the filter itself: since I used it for Version 1.0 I had to order a new one... Last edited by ZetaTre; 06-29-2014 at 11:51 AM.. |
|
Appreciate
0
|
| 06-29-2014, 11:45 AM | #25 |
|
Private
 13
Rep 50
Posts |
And here's a video of the completely unscientific test showing that the fumes get sucked in indicating the crankcase is correctly under some vacuum...
I actually have a gauge I made to measure vacuum that I use to balance the throttle body on the motorcycle... I need to get it back from a friend so I can measure what sort of vacuum I get in the crankcase. 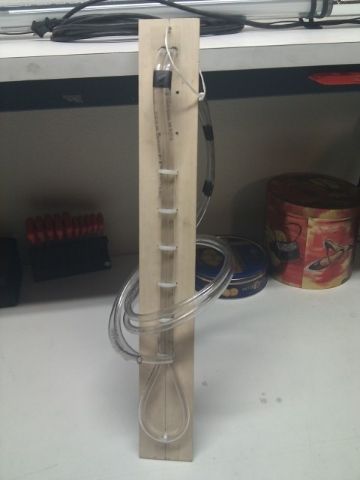 |
|
Appreciate
1
32valves113.50 |
| 08-11-2014, 04:31 PM | #26 |
|
Private
 13
Rep 50
Posts |
I just realized I haven't update this in a while.
After the original install and with the aid of the slack tube manometer I tracked down an issue: basically under high load + high RPM the depression in the intake is too high causing the pressure regulator valve on the ProVent to close this resulted in a pressure build-up in the crankcase. I also went with all around 1" lines and replaced the coolant hoses I was originally using with some high temperature duct I got from McMaster (High-Flow Duct for Dust p/n 5915T12, also rated for oil and chemicals since they are made of TPR). They have an exoskeleton and a very smooth bore. 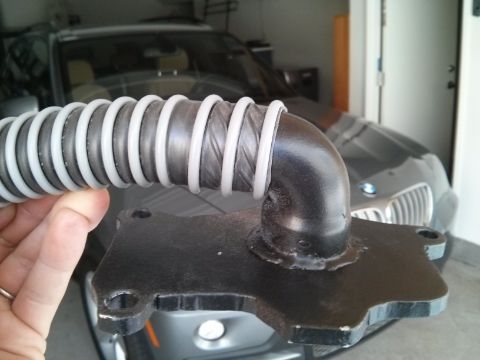 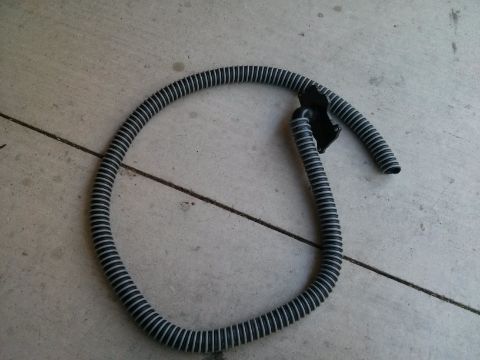 Once everything is back together it looks pretty cool... Granted again that with the airbox installed it goes un-noticed. 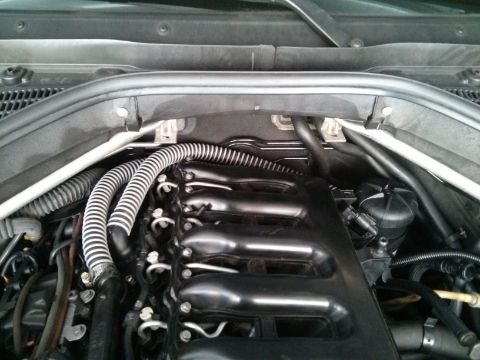 To address the pressure buildup I disassembled the ProVent 200 valve and drilled 5 holes where the pressure regulating valve is. The idea was to have same vacuum leak past the valve under all circumstances and force the valve to stay more open 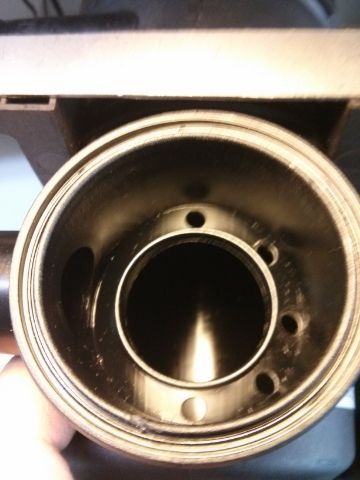 Took it out for a test and I finally get vacuum even under high load/high boost. With 5 holes it was too much vacuum (I almost had some water sucked in) so I ended up patching 2 with some epoxy and leaving only 3 open. The mileage on the system is now 1,864. I've been emptying it weekly: I have ordered a dipstick guide tube to modify and make a drain that gets the oil back to the sump. I thought I'd just show you a picture of how much oil has come out so far which is very impressive to me. 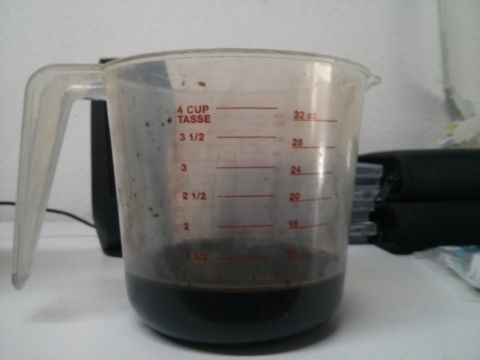 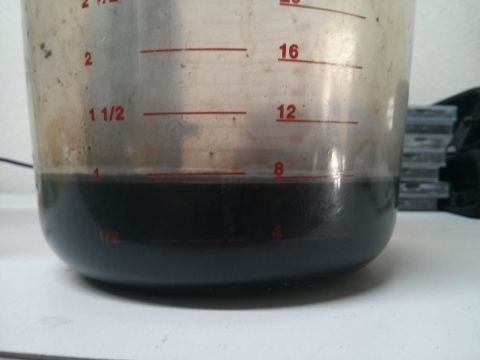 Over the oil change interval what I observe adds up to the shortage I see. In addition the line going from the ProVent back to the intake is finally dry with no oil. The oil coming out is just regular oil, there's no froth or other gunk... I removed the return line that goes to the intake and it's perfectly dry. The line I used are as new with no sign of deterioration from the oil or the temperature. I've also did some more backpressure test: the vacuum pressure shift within a narrow range: under regular driving condition at constant cruising speed I read about 60mmH2O, under high low and very low RPM (from 1000-1600) that's when I get the most pressure of 250mmH2O (I need to force this condition by putting the transmission in M6), under high load from 2000RPM to redline there is vacuum that increases to about 150-170mmH2O from 2000-3500 and than it steadily decline to a neutral pressure at redline. |
|
Appreciate
0
|
| 11-18-2014, 09:32 AM | #29 |
|
Major
 
244
Rep 1,294
Posts |
Odd that those of us with catch cans seem to be getting such vastly different levels of oil collected. After over 5000 miles I checked mine last night, I have only about a tablespoon of oil in there.
I'm using the Berger catch can mounted on the left side strut bar. My driving is 90% highway steady state. Very little cold driving stop and go. |
|
Appreciate
0
|
| 11-18-2014, 11:56 AM | #30 | |
|
First Lieutenant
  
67
Rep 375
Posts |
Quote:
|
|
|
Appreciate
0
|
| 11-18-2014, 12:53 PM | #31 |
|
Private
 13
Rep 50
Posts |
Actually yes,. I apologize for not updating this, but I've posted my project on several boards and I don't check them regularly. But thanks for reminding me.
I've made one additional change: I modified the dipstick tube to make an oil return line. I found at Lowe's the perfect tee to make a saddle on the oil dipstick guide to drain the oil. Link (the picture is not the right one): http://www.lowes.com/pd_125861-61002...ductId=3697658 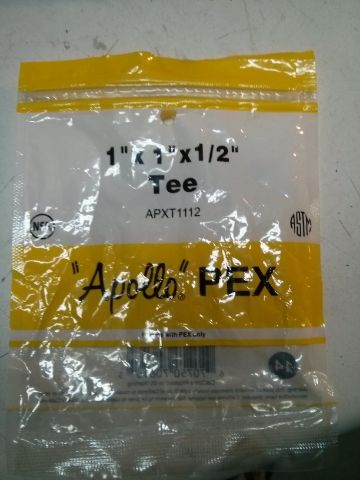 The tee is 1" x 1" x 1/2" Using a jig saw I cut lenghtwise the 1" section; with some epoxy and some clamps to add strength I attached it to the dipstick guide and once the epoxy cured I drilled through the 1/2" nipple to open the drain. Here's the final product: 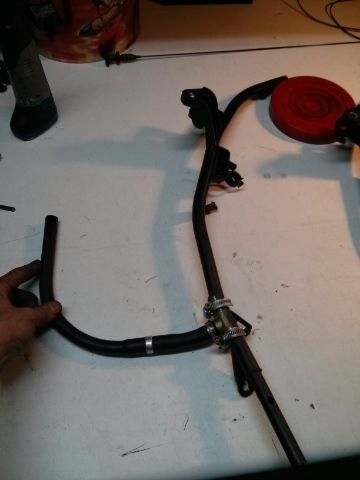 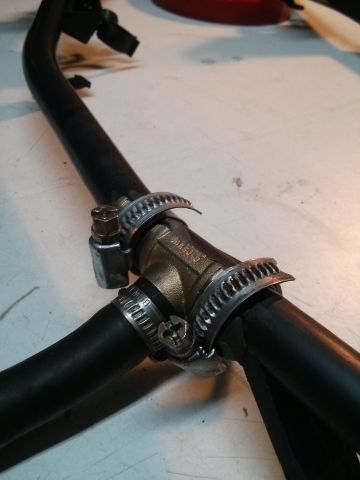 What you see there along the rubber drain is a check valve that allows oil to drain but doesn't allow fumes to travel up the drain. 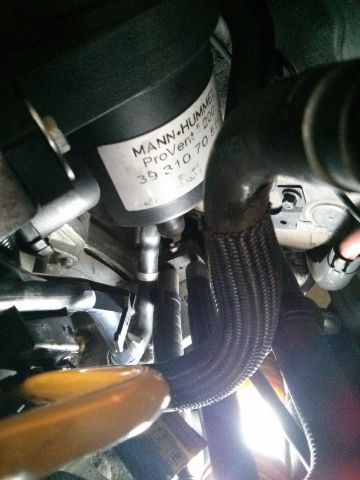 After noticing that the rubber hose had the tendency to kink a bit, I added a 90 degree elbow: 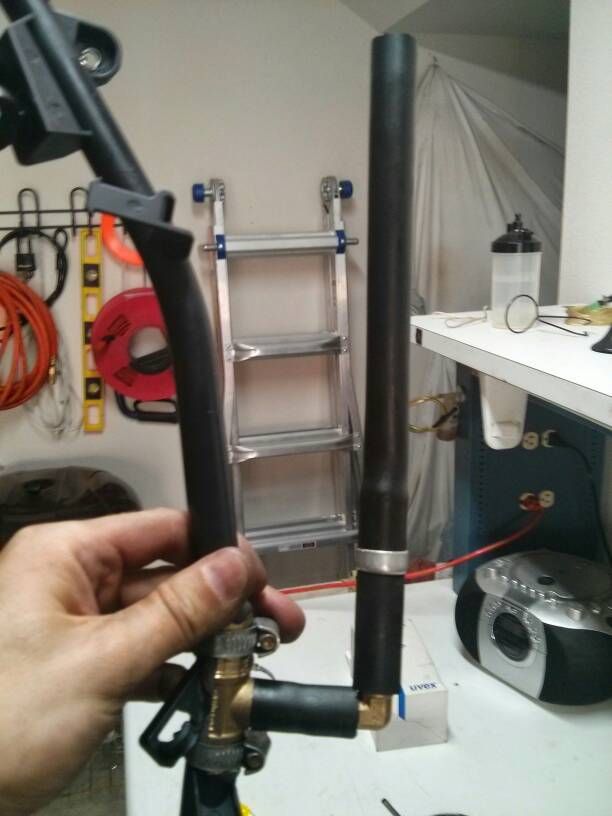 I have more than 10,000 miles on the setup and it has been performed extremely well. Oil shortage between oil change has completely disappeared (before this the car went through 1 1/4 quart of oil over 10K miles) and the track going from the separator to the intake is dry (before you could feel a film of oil). I guess this this a a way to see if other catch can work: if the return line is dry than it's doing it job if it's not, it's just another waste of [allegedly] good quality aluminum. I have not removed the charge pipe lately, but I expect it to be just as dry. The flexible lines are holding up extremely well and there's no oil leaks anywhere. |
|
Appreciate
0
|
| 11-18-2014, 02:29 PM | #32 |
|
First Lieutenant
  
67
Rep 375
Posts |
ZetaTre, you may want to use an in-line check valve for the drain line. Since the drain is above the oil line, pressure from inside the block may be defeating the purpose of the provent 200.
|
|
Appreciate
0
|
| 11-18-2014, 02:32 PM | #33 | |
|
Private
 13
Rep 50
Posts |
Quote:
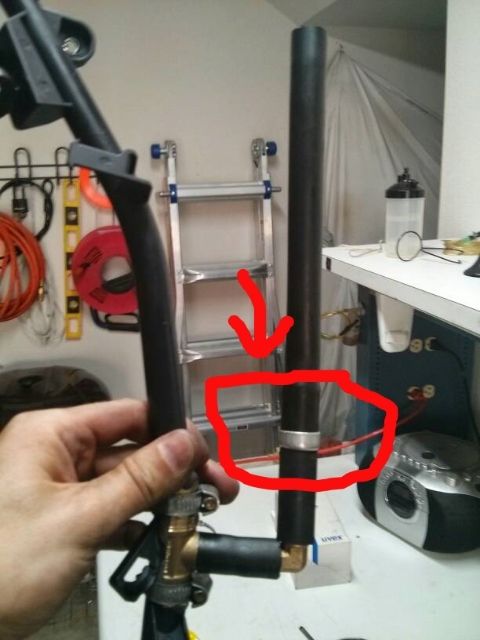 It is the genuine Mann+Hummel check valve (https://www.mann-hummel.com/fileadmi...nt_en_2013.pdf, p/n 24 008 43 621). It's made of metal. Btw, I sourced the ProVent and the check valve from http://www.diesel-filters.com/ The duct is from McMaster-Carr (p/n 5915T12) |
|
|
Appreciate
0
|
| 01-28-2015, 04:41 PM | #35 |
|
Private
 13
Rep 50
Posts |
Maintaining post across multiple forums is challenging. I apologize, but I totally forgot I had a post about it here too.
Here's few development... The ProVent is performing exceptionally: the intake is absolutely dry. I've check both the line going from the ProVent back to the intake and also removed the charge pipe in front of the throttle/EGR valve and there is absolutely no trace of oil. I'm extremely pleased with the results. I had however an issue with the hoses I was using which turned out to be too porous and oil perspires; this also cause a lingering smell whenever I parked the car in the garage. Someone has been able to machine a plate and I bought an aluminum elbow to weld. My current plate has a copper elbow soldered to a plate I cut using a jig saw: it works well as a proof of concept, but doesn't look too pretty... 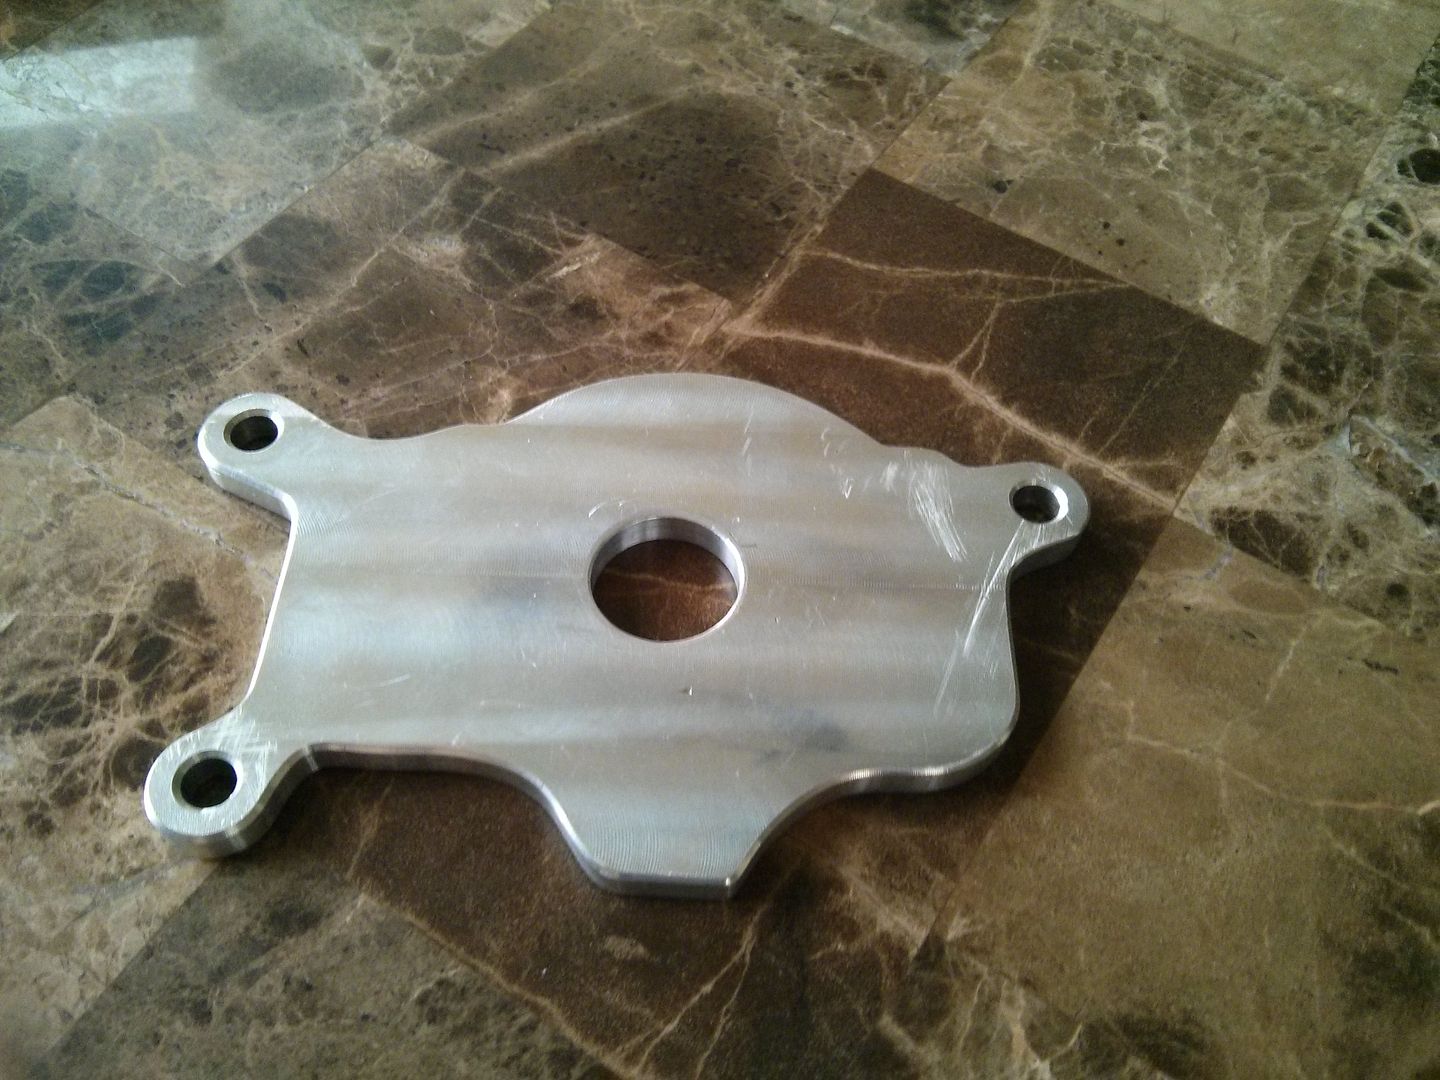 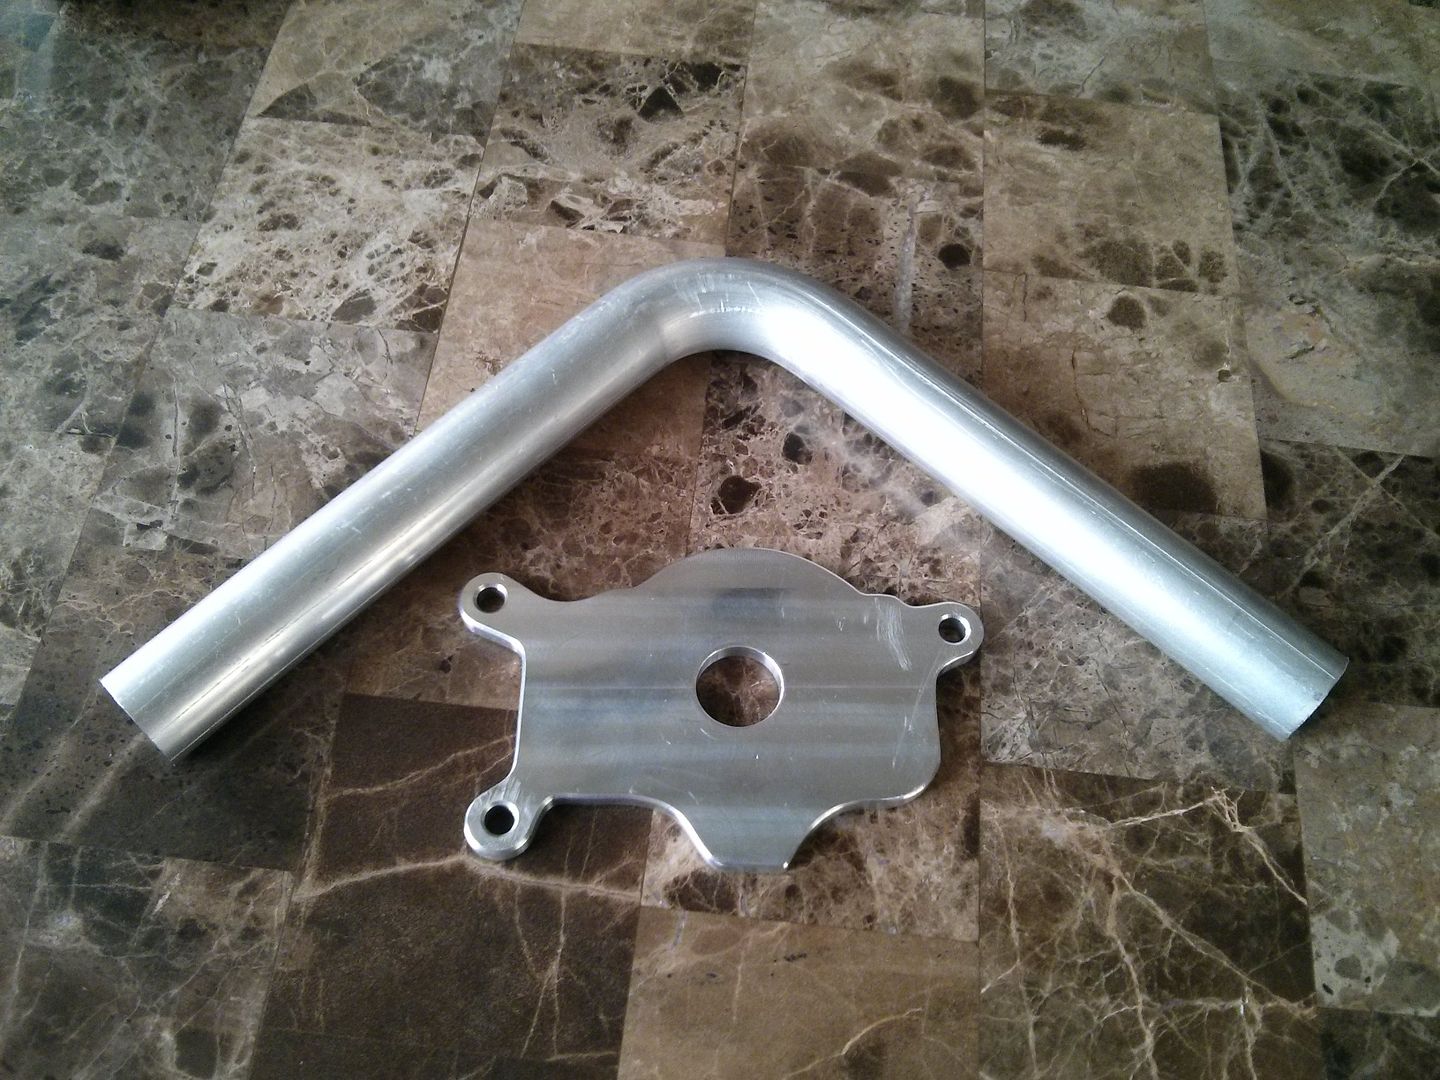 The elbow is made by HPS: HPS 1" 90 Degree Bend 6061 Aluminum Tubing 16 Gauge w/ 6" Leg & 1.5" CLR I bought mine from Amazon since I have free shipping with Prime: Amazon.com: HPS (AT90-100-CLR-15) 1" 16-Gauge 90° Bend 6061-T6 Aluminum Elbow Tubing: Automotive Here's some WIP pix: 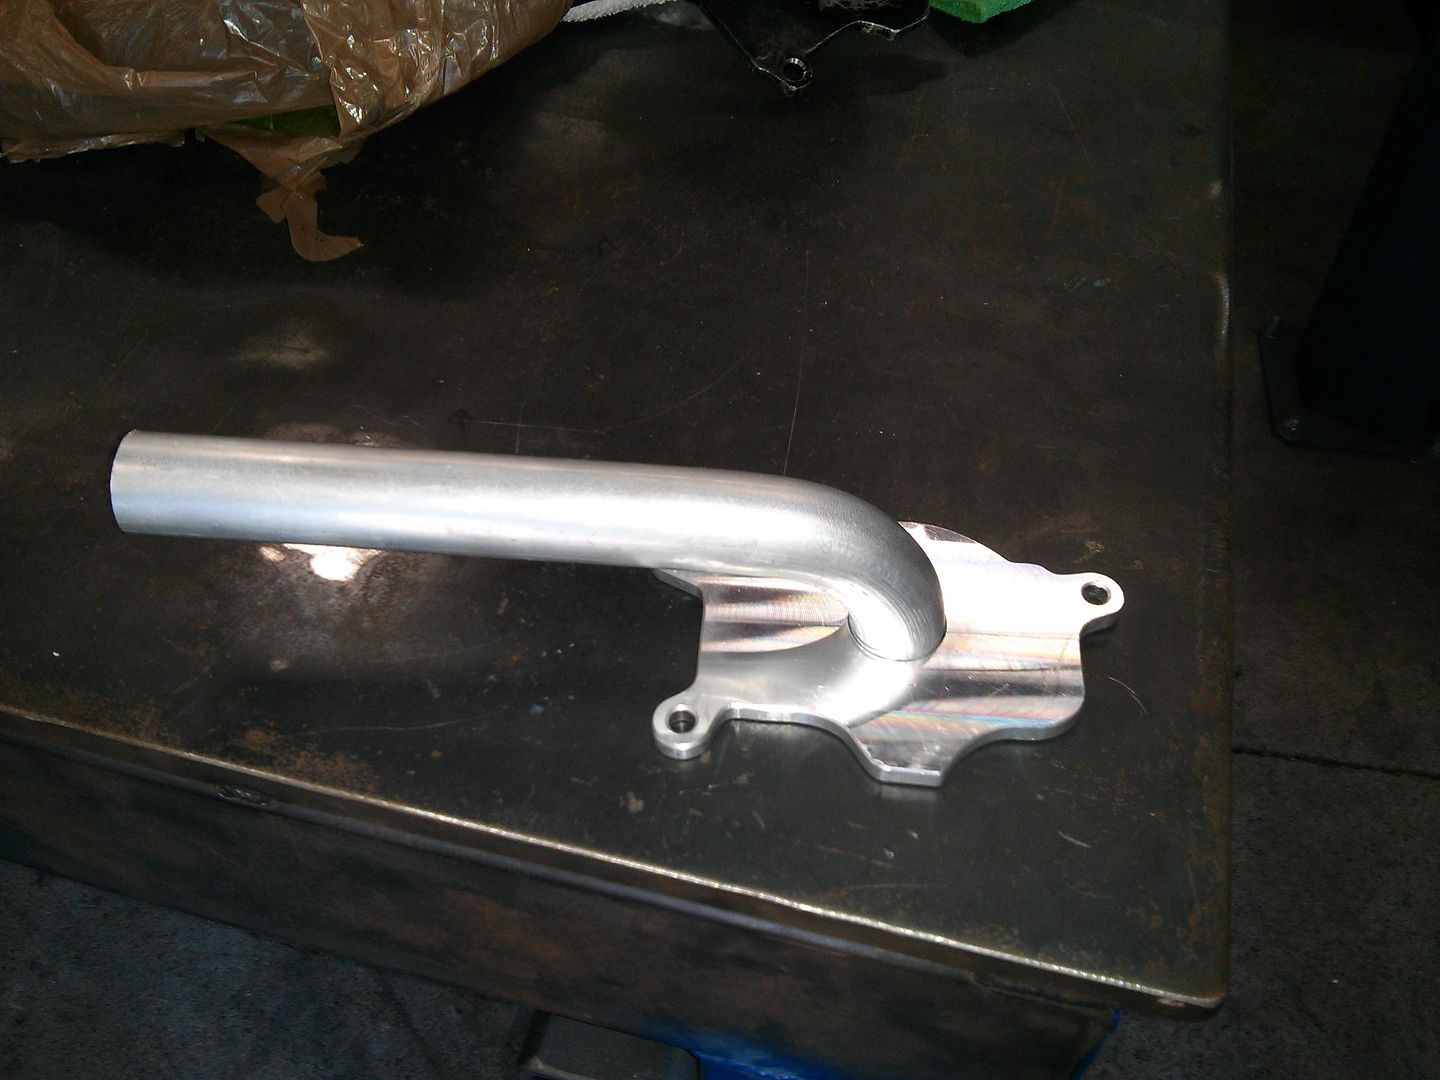 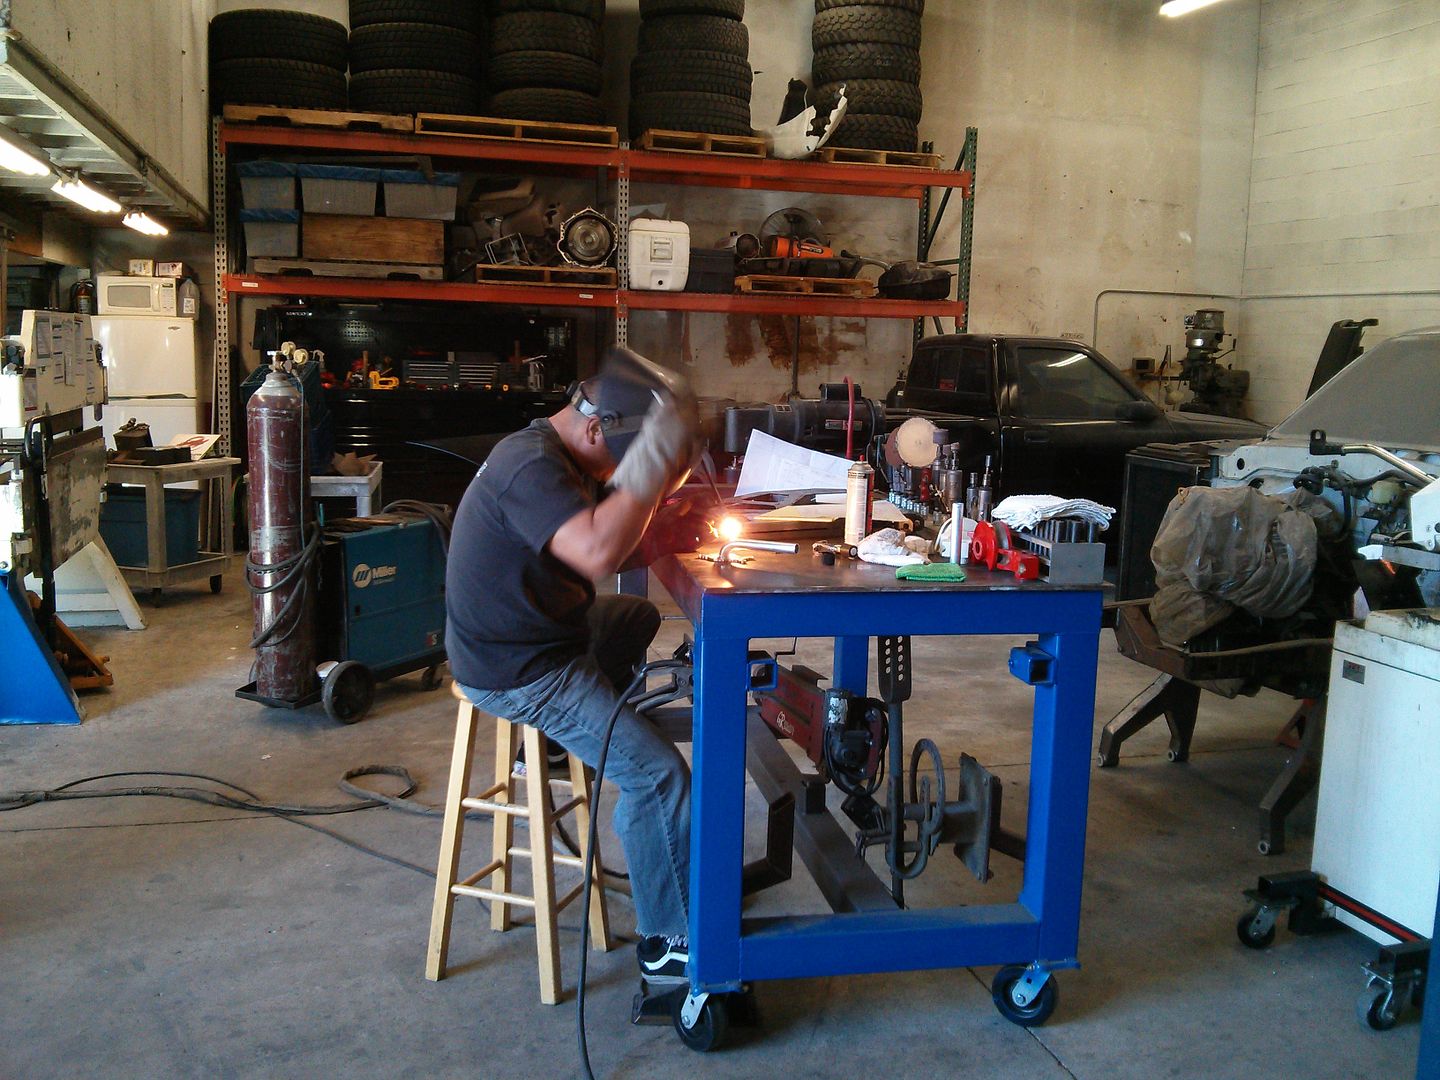 Here's the final product: 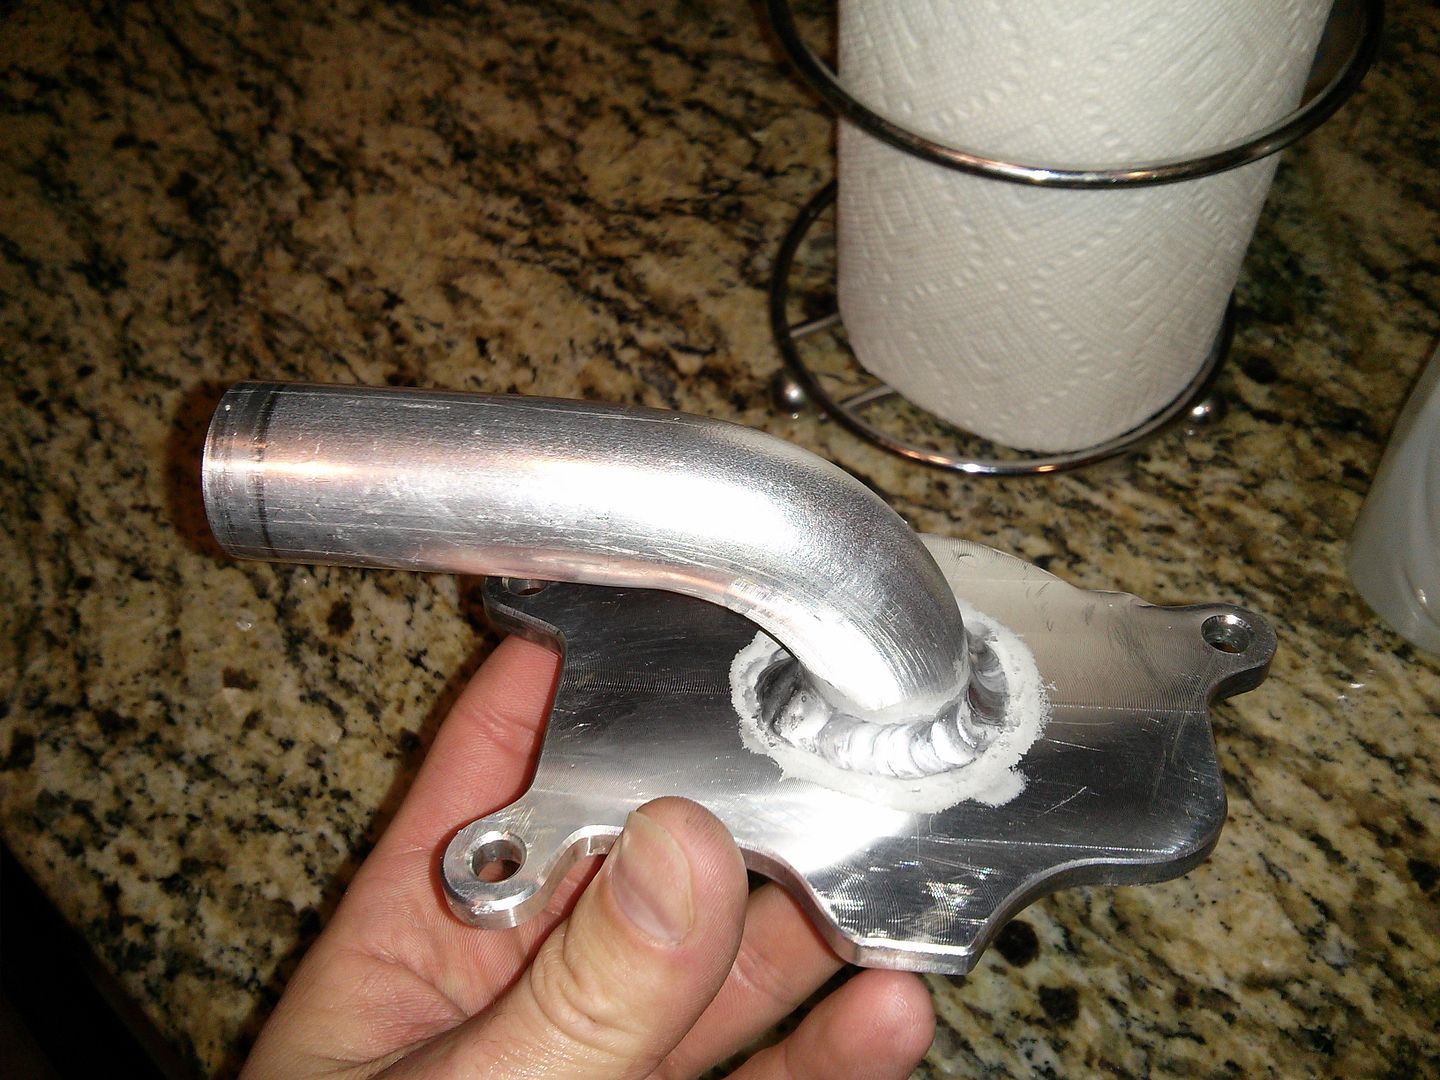 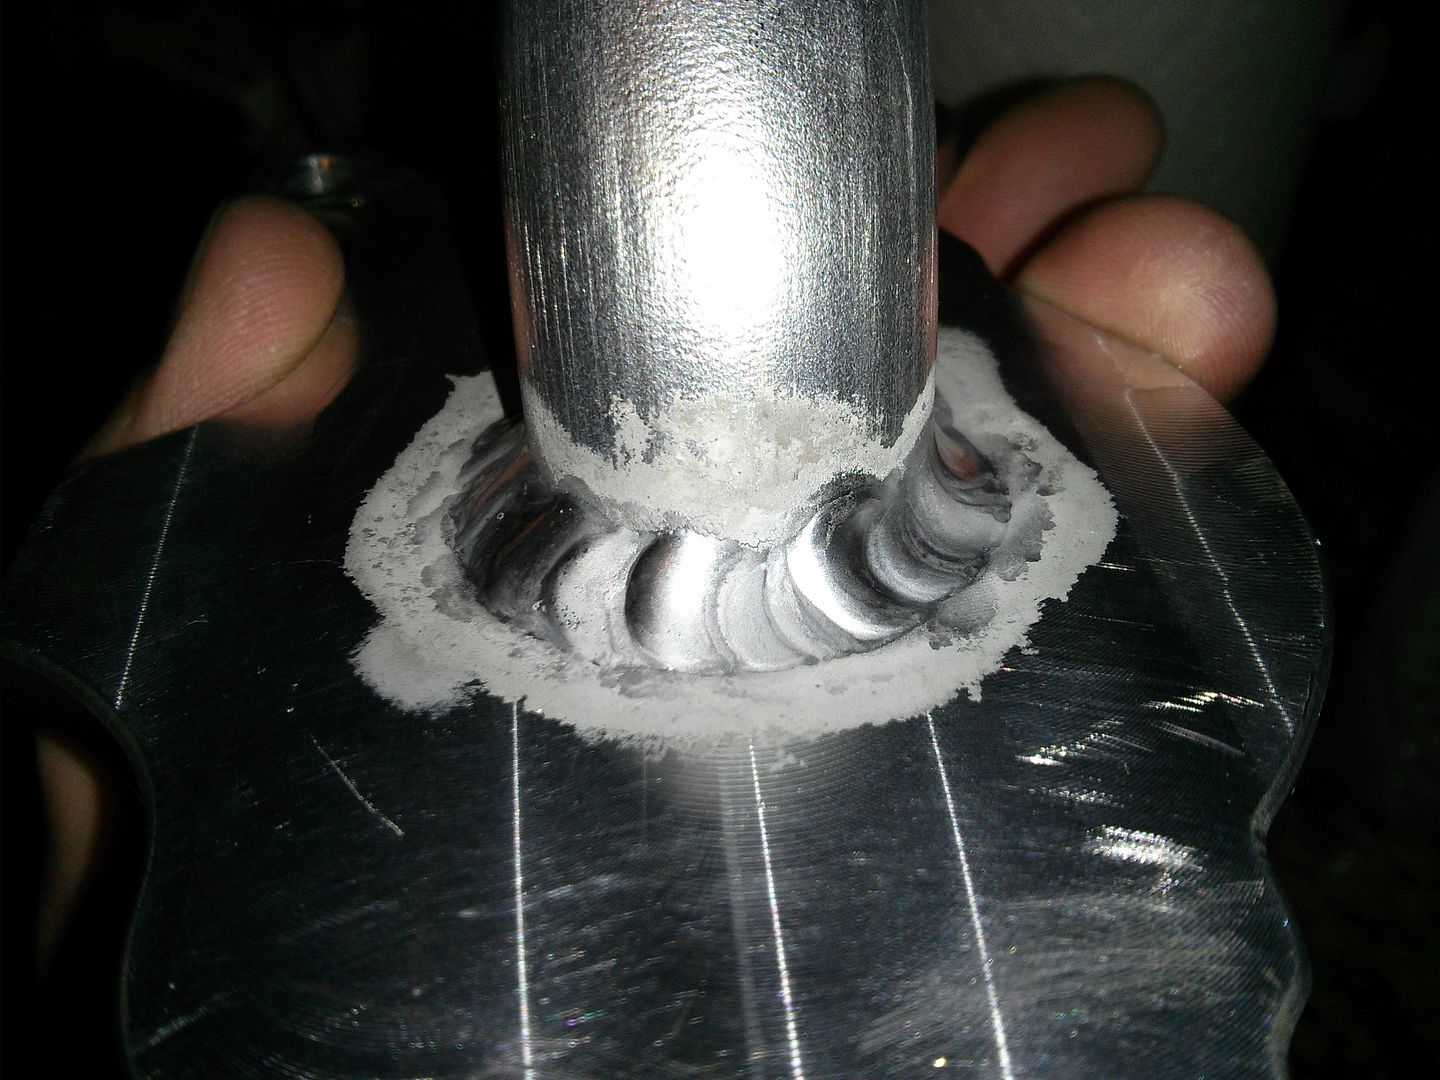 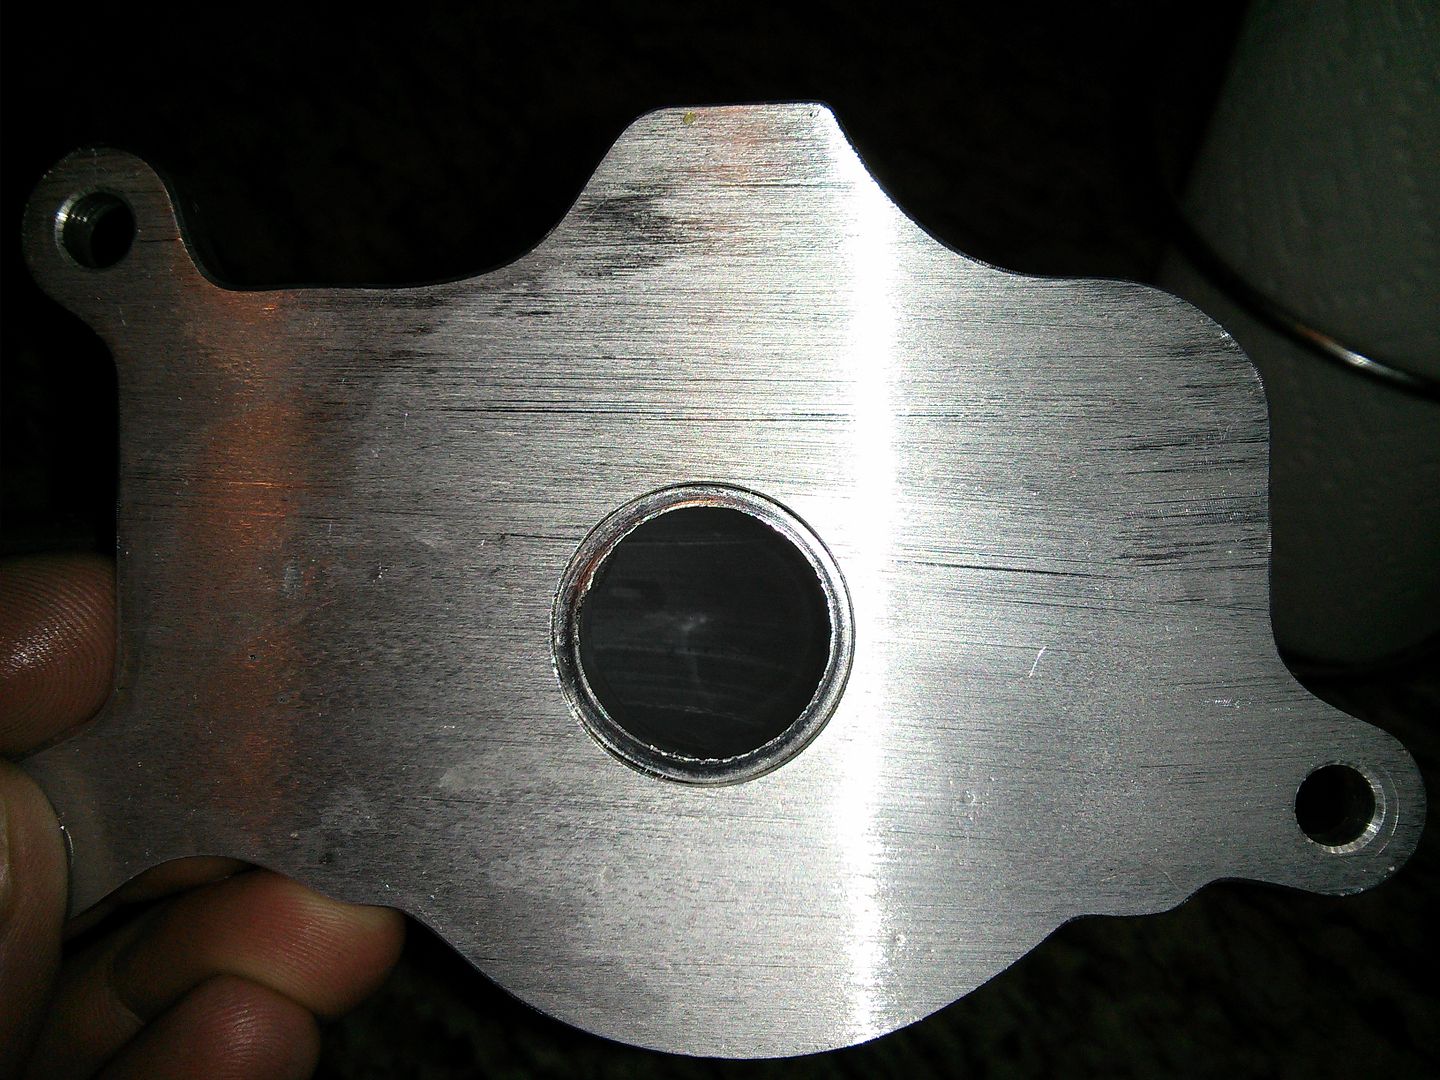 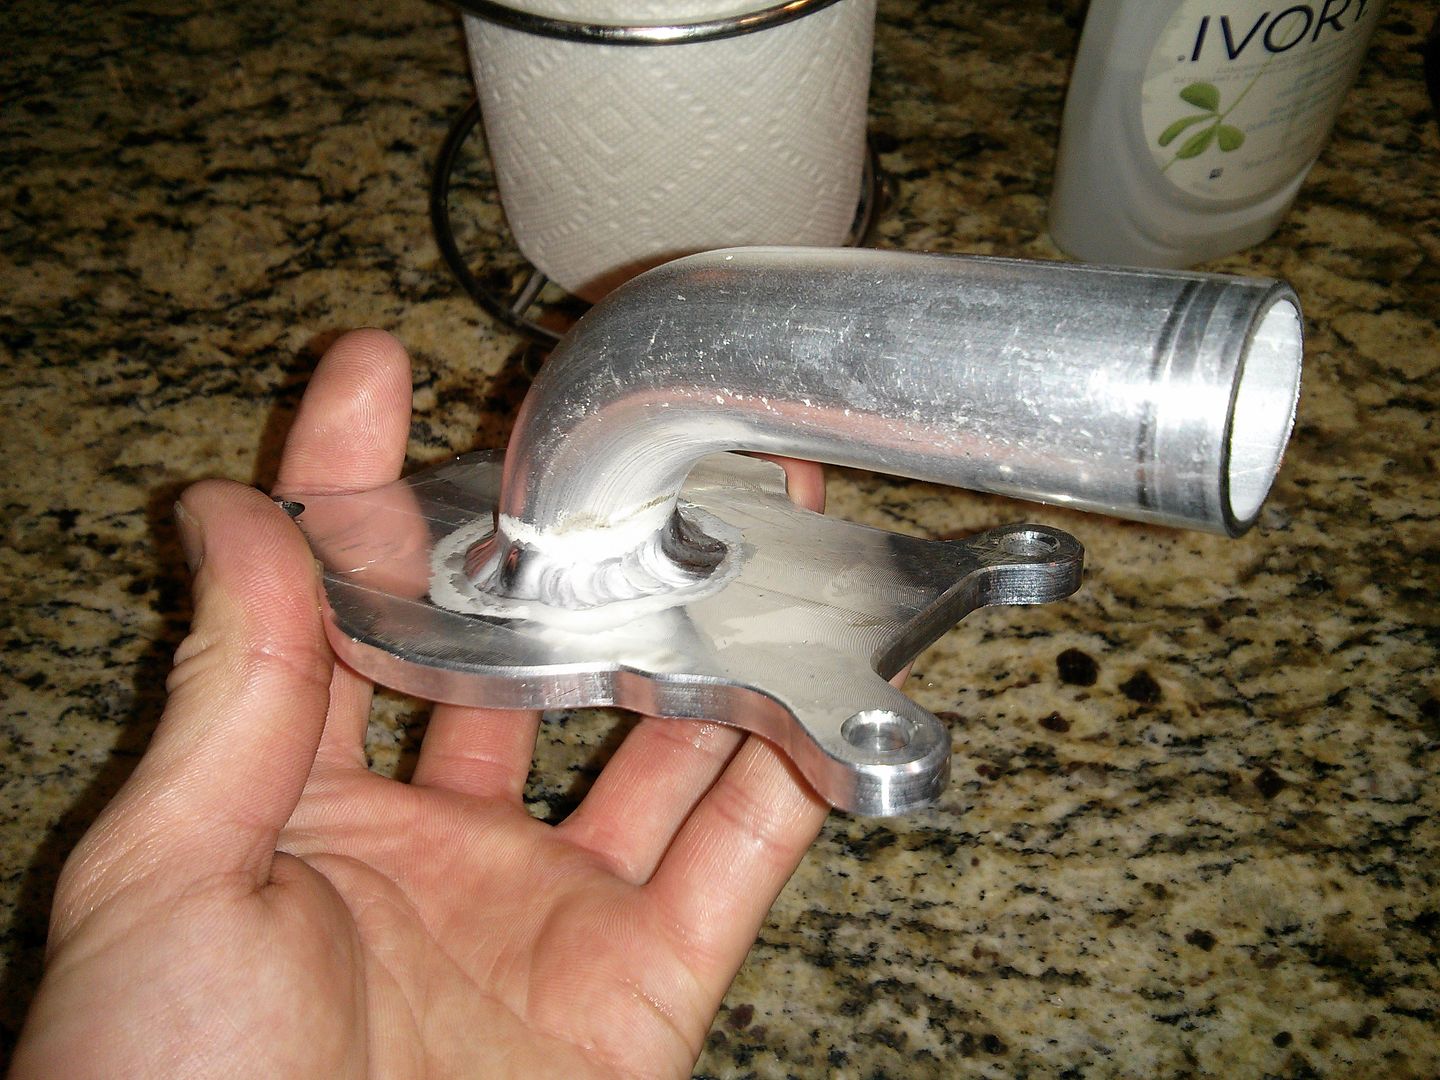 I used a rattle can of flat black Rustoleum High Heat to finish it. That's after cleaning it with some acetone and warming it up in the oven at 170F. Since my wife loves me no matter what she let me use the oven in between coats... 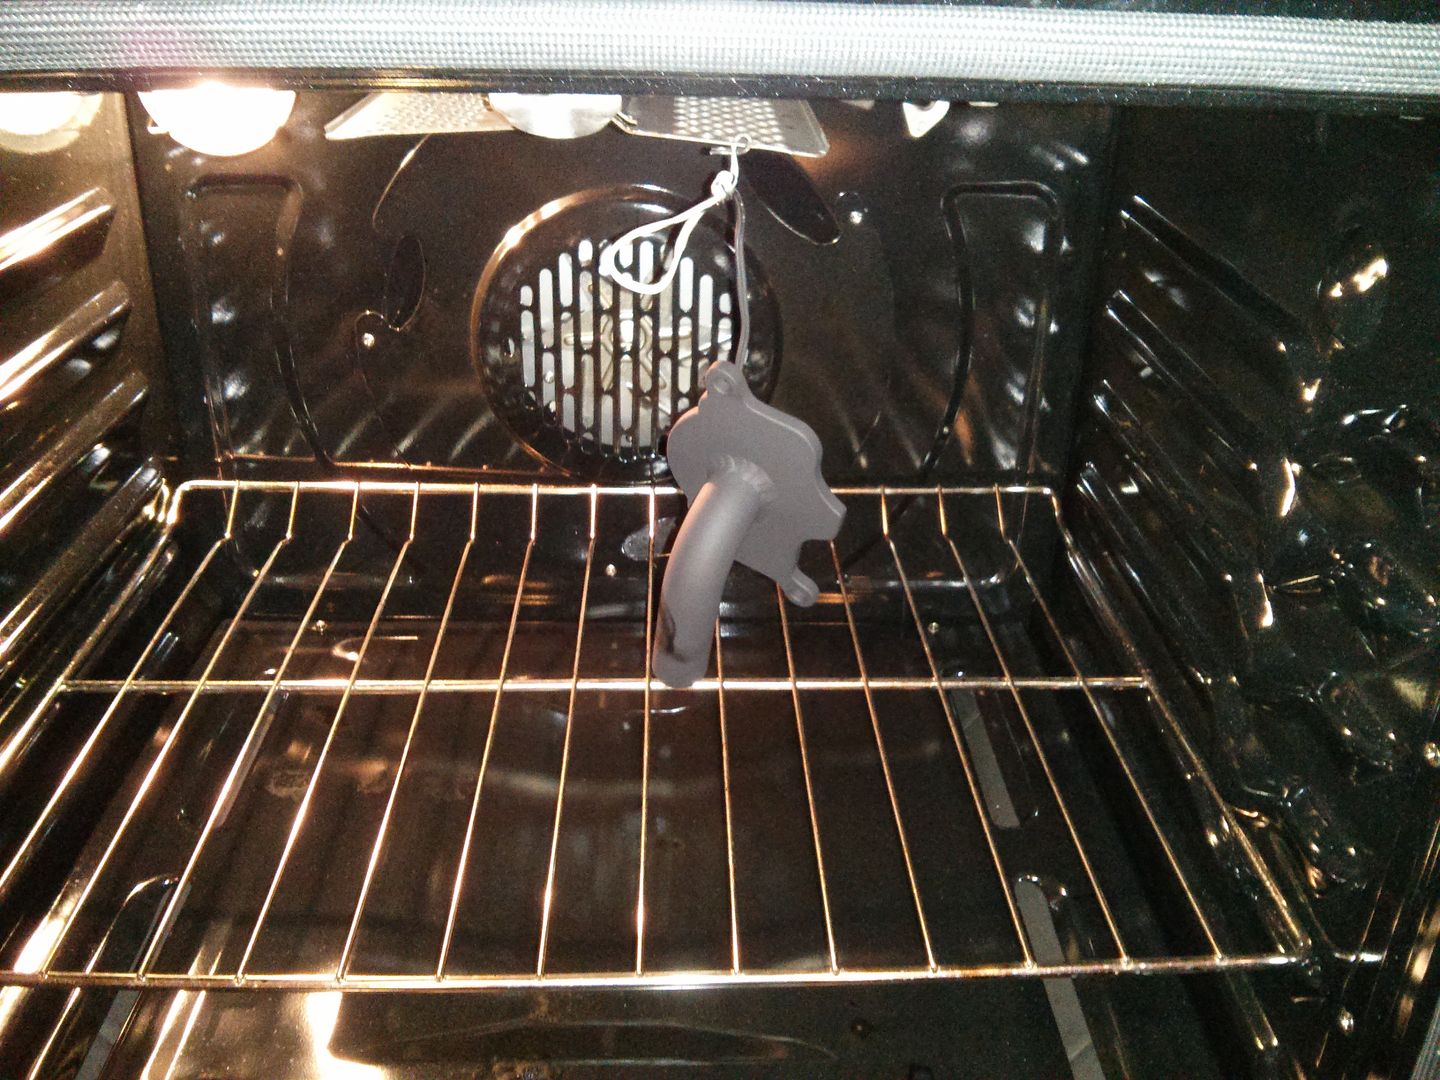 And the final product: 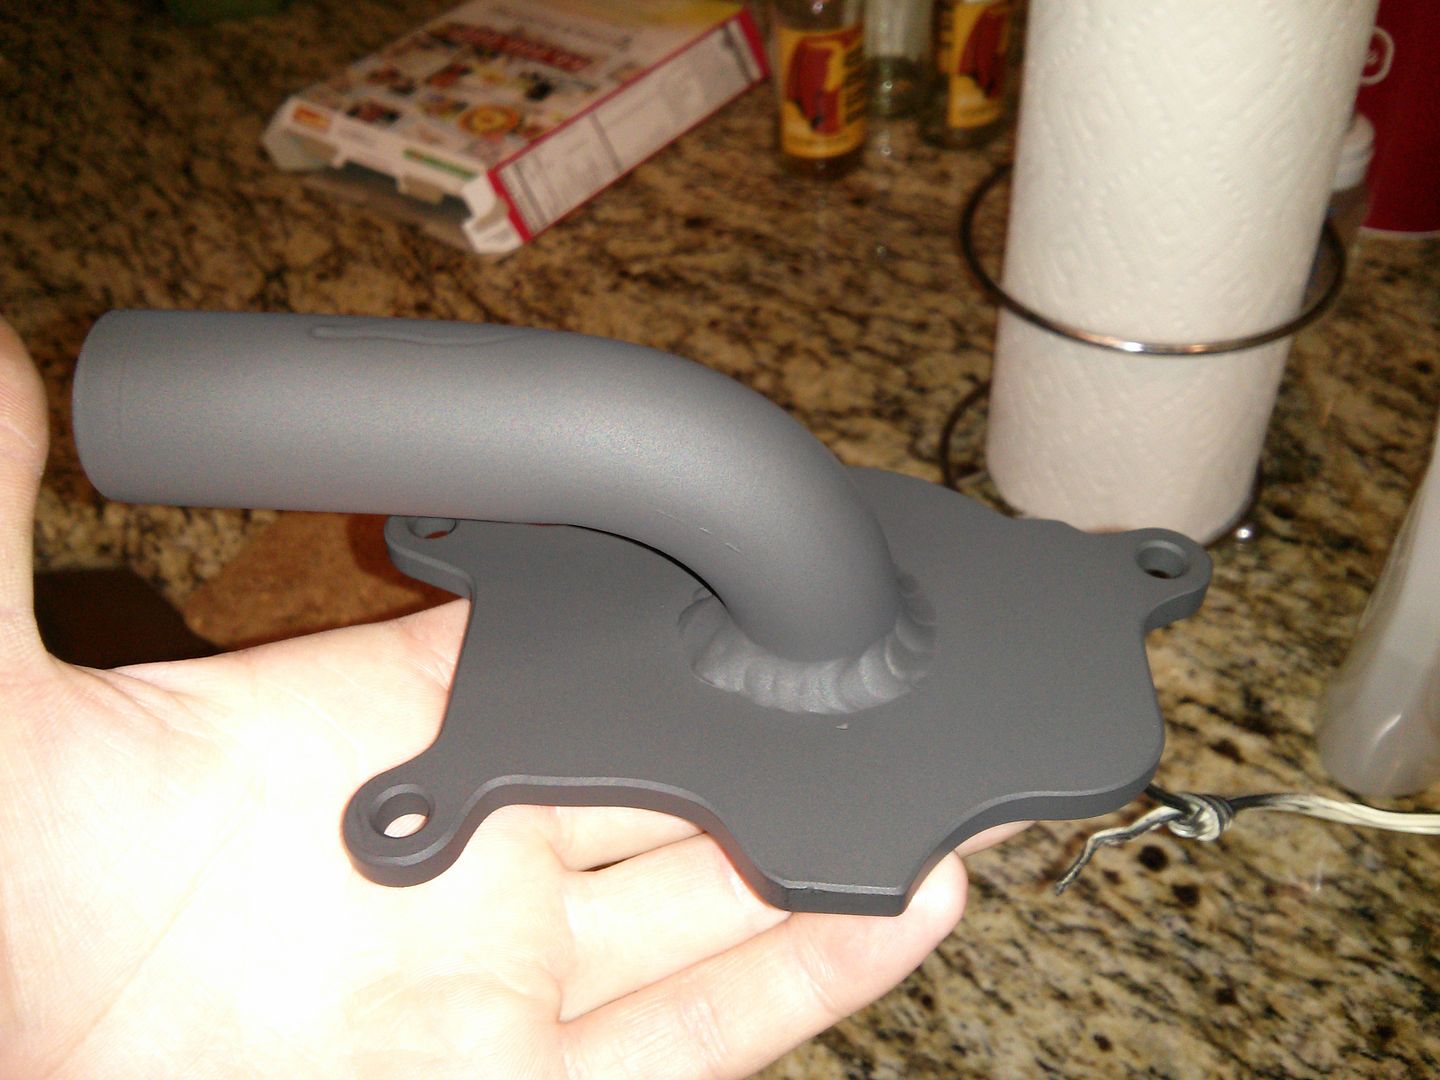 For the hoses I ended up using a length of heater hose I got from Napa. At $3 per foot is what I call cheap... I'm unsure if it is rated for oil or not or if it will deteriorate but if it does we'll cross that bridge when needed. Given the mounting position I've chosen the two pieces are 23" and 29.5" long respectively 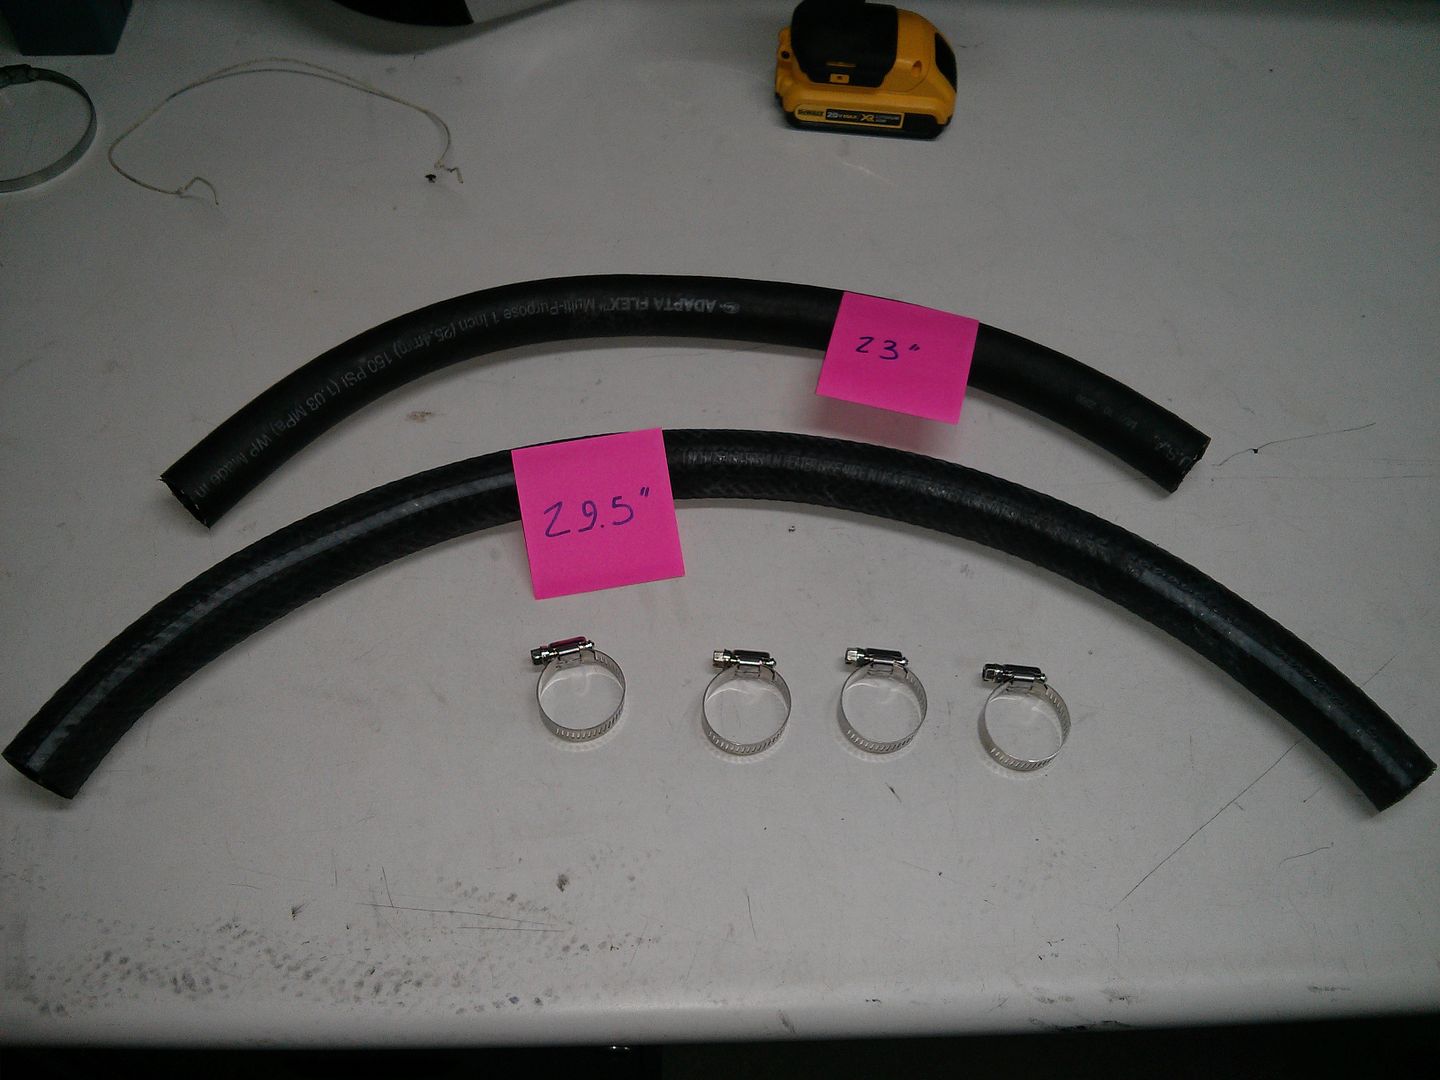 Here's also a couple of picture of the plate installed showing how long the tangent needs to be. 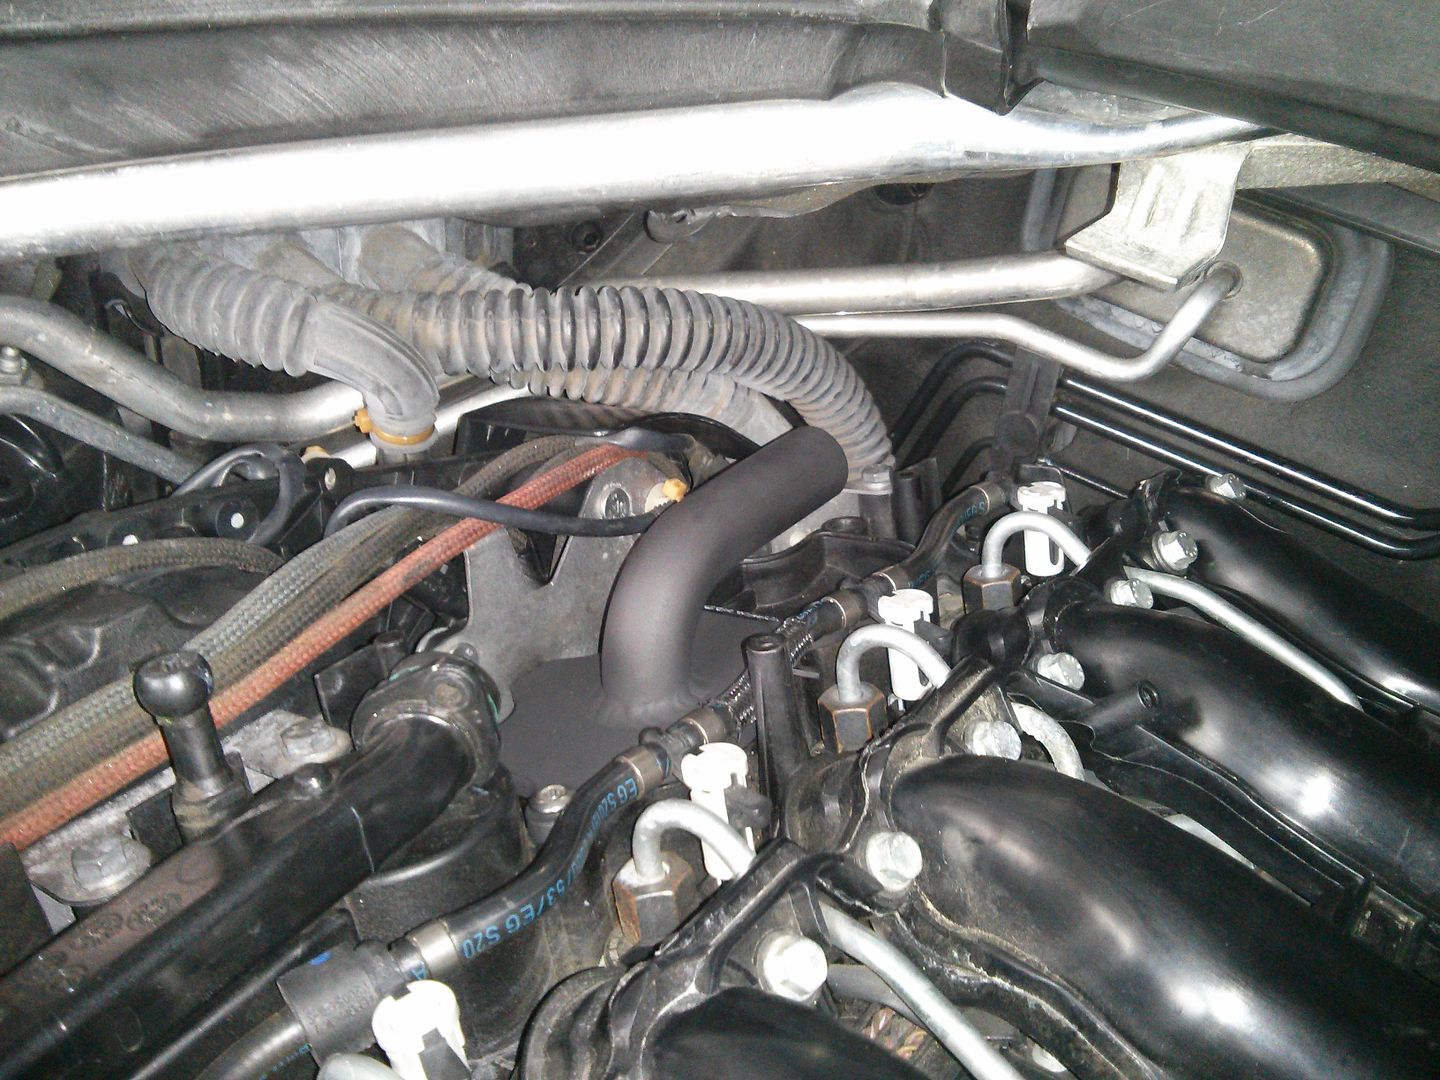 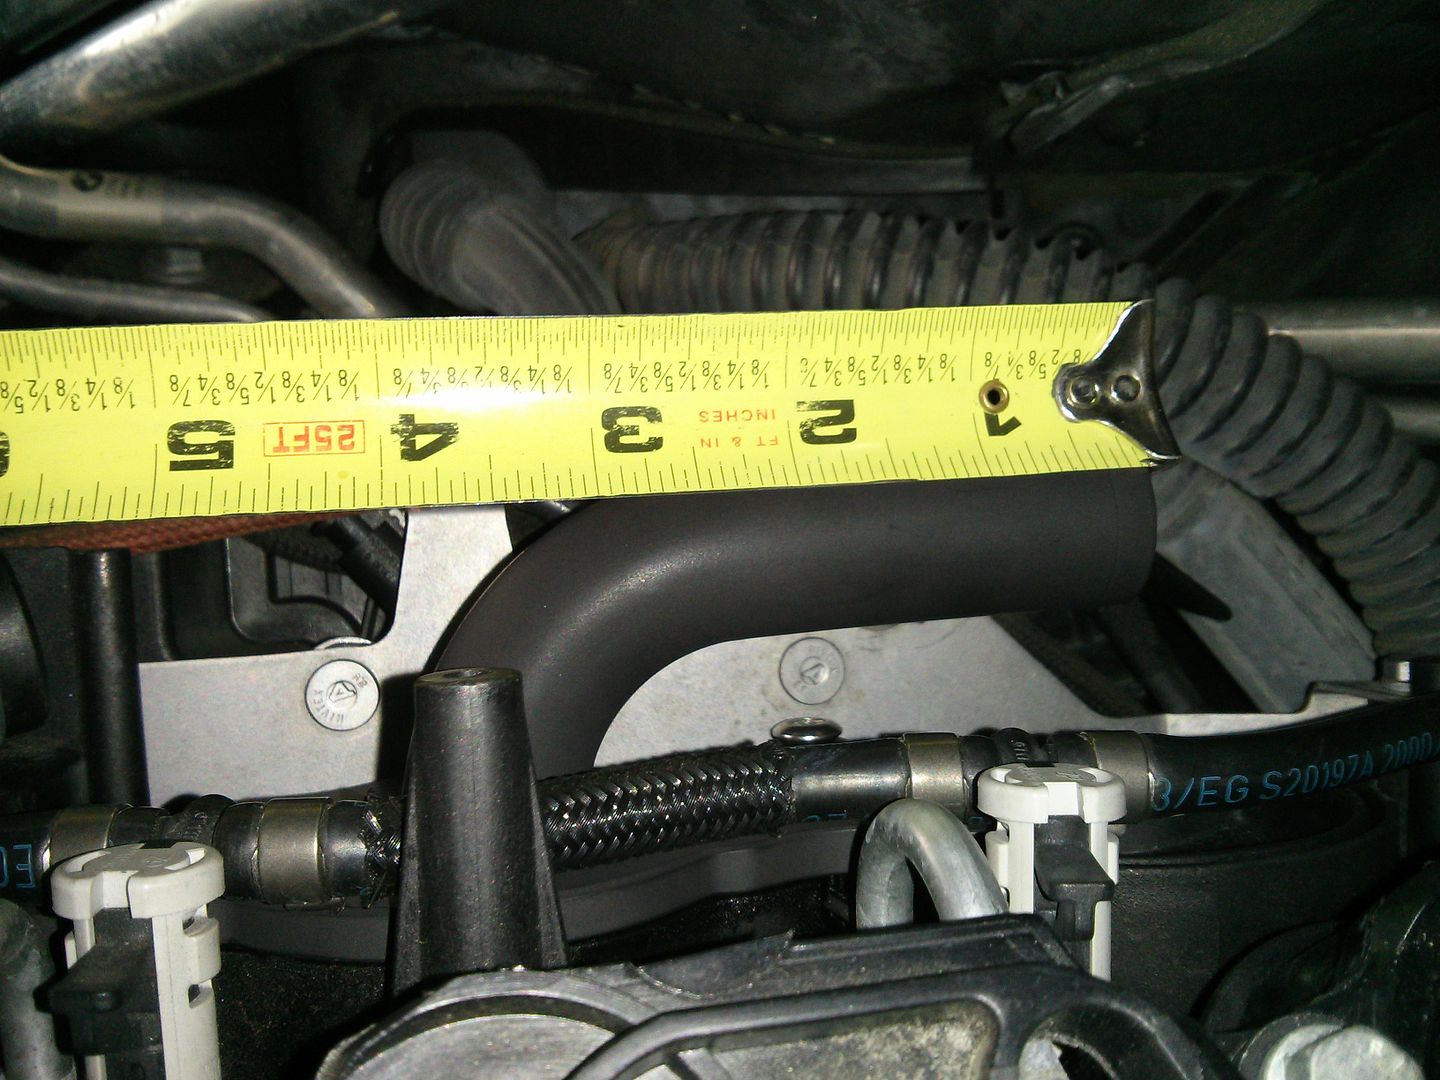 Last edited by ZetaTre; 01-28-2015 at 05:45 PM.. |
|
Appreciate
0
|
| 01-28-2015, 04:45 PM | #36 |
|
Private
 13
Rep 50
Posts |
Since I had some people showing interest in the takeoff plat, I started a "gauging interest" thread to see if there's enough interest to do another batch. You can read all about it here: http://www.xoutpost.com/bmw-sav-foru...rator-35d.html
Since I'm unsure whether the same positioning for the ProVent is possible on the 335d I'd recommend 335d owner to consider just the plate, not the elbow so you can stay flexible on the orientation. Like I said elsewhere, I am not interested in commercializing this product. I'm simply making it available to everyone and pass on the information the fabricator. If he's interested he may do another batch. |
|
Appreciate
0
|
| 01-29-2015, 02:55 AM | #37 | |
|
Second Lieutenant
 
64
Rep 296
Posts
Drives: E90 335d | i3 REx
Join Date: Jul 2011
Location: Orange County
|
Quote:
Awesome work. I read through the interest thread in xoutpost and want to add myself to the list for the plate only. Would you do that for me? If I end up needing to sign up to finalize all the details (address, cost reimbursement, etc.), then I'll do it at that time. If you'd rather I just create an account now, then I'll do that it a couple days, but just want to let you know that I'm in.
__________________
2011 E90 335d M Sport | KW V3 | M3 Bits (arms/bushings/sways) | JBD | Apex ARC-8 w/PSS
2015 i3 REx | Solar Orange | Tera World | Tech |
|
|
Appreciate
0
|
| 01-30-2015, 03:35 PM | #39 | |
|
Second Lieutenant
 
64
Rep 296
Posts
Drives: E90 335d | i3 REx
Join Date: Jul 2011
Location: Orange County
|
Quote:
I may hit you up that in the future to take a look. Definitely doing this after CPO is done. Perhaps another SoCal 335d meet? I think I missed the last one if it ever happened.
__________________
2011 E90 335d M Sport | KW V3 | M3 Bits (arms/bushings/sways) | JBD | Apex ARC-8 w/PSS
2015 i3 REx | Solar Orange | Tera World | Tech |
|
|
Appreciate
0
|
| 11-06-2015, 02:10 PM | #40 | |
|
Brigadier General
 778
Rep 3,559
Posts |
Quote:
I would like to buy one of those aluminum plates like remlemasi did. I'm also a 335D guy so I would like the plate without the elbow welded on as well. Not sure if this is a hassle without me being an xoutpost forum guy. I'm very flexible if you will advise what the easiest way for you is please. Thanks |
|
|
Appreciate
0
|
| 07-18-2016, 09:46 AM | #41 |
|
Private First Class
 32
Rep 106
Posts
Drives: 2011 BMW 335D
Join Date: Jun 2016
Location: League City, TX
|
ZetaTre,
I would like to thank you for this informative write up. I spent my weekend adding a Provent filter to my 335D, but decided to redirect the original CCV at the front of the engine because I was concerned that there may not be enough clearance between the hood and the engine to tie in with the plate and elbow. However, as I was reviewing how to measure the vacuum, it occurred to me that despite having drilled 3 holes (to bypass the valve in the ProVent filter), that I have not made any changes that would result in an increased CCV vacuum. So my question for ZetaTre (or anyone else who has performed this mod): Did there appear to be anything in the original CCV (that was removed to install the take-off plate), that would have served to regulate the amount of vacuum (or if perhaps excess vacuum in the OEM design might be contributing to the amount of oil residue being pulled into the intake)? |
|
Appreciate
0
|
| 07-18-2016, 12:29 PM | #42 | |
|
Private
 13
Rep 50
Posts |
Quote:
The Provent valve is not entirely disabled, but the addition of a few holes won't allow it to close it entirely. |
|
|
Appreciate
0
|
| 07-18-2016, 11:04 PM | #43 |
|
Private First Class
 32
Rep 106
Posts
Drives: 2011 BMW 335D
Join Date: Jun 2016
Location: League City, TX
|
I debated making a plate, but ended up just cutting the plastic tubing that runs along the top of the valve cover (just prior to the where the jumper plug is located). I used mostly 1" hose (other than a few inches of 5/8" tubing to tie into the plastic tubing that was cut). As per your lead, I driledl 3 holes in the ProVent, but since I didn't delete or alter the OEM CCV, I now have 2 valves (which I suppose might cause an issue).
I have a manometer fabbed up, but short of reversing everything to get baseline measurements, how would one determine what the original numbers were or what the target numbers should be? Is this engine specific? |
|
Appreciate
0
|
| 05-18-2017, 04:21 PM | #44 | |
|
Private
 
11
Rep 96
Posts
Drives: 2010 335d, 2018 540d
Join Date: May 2013
Location: Vancouver, BC
|
ProVent question
Quote:
Also, how did you route the hoses and where did you place the ProVent? |
|
|
Appreciate
0
|
 |
| Bookmarks |
|
|