
|
|
 |
 |
 |

|
 |
BMW Garage | BMW Meets | Register | Today's Posts | Search |
 |

|
BMW 3-Series (E90 E92) Forum
>
Do you need to remove the front bumper when installing FMIC?
|
 |
| 07-06-2013, 01:35 PM | #24 |
|
New Member
5
Rep 29
Posts |
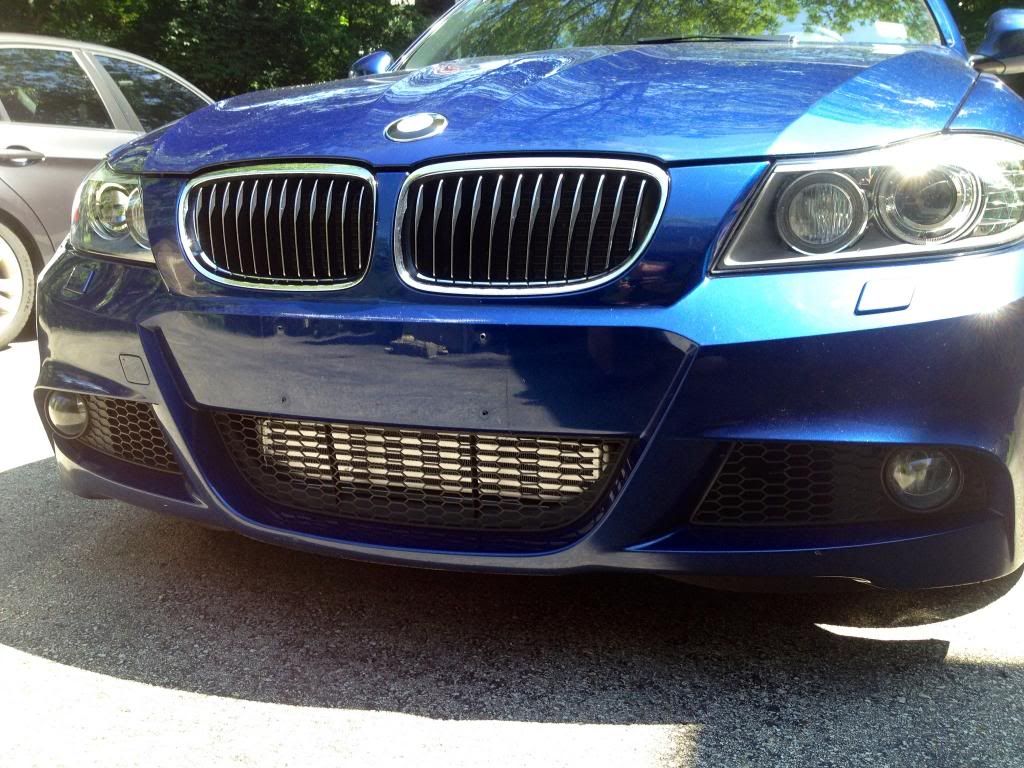
I installed my 7" vrsf with the bumper on, I had no issues navigating it up in there. I have an m-sport bumper and I did it with the car on jack stands. With going back and forth between test fitting and trimming plastic, it took me about 3 hours to do mine.
I read that you should avoid taking off the bumper if you can (or at least be very careful) if your car has headlight washers, which is why I left my bumper on. |
|
Appreciate
0
|
| 07-06-2013, 06:01 PM | #25 |
|
Lieutenant
   163
Rep 468
Posts
Drives: BMW 330i G20
Join Date: Aug 2007
Location: Sweden
|
Ok, I just don't understand how you possibly could do it with the front bumper on (although I have the aero-front over the OEM front but I don't think that makes a difference). There was simply no way to slide it in there even though we first tried trimming those two vertical pieces of plastic..
In a video on youtube they install the "Big Tom Intercooler" and cut away a lot of plastic and that's exactly what we had to do to make it fit. And then I'm not just talking about trimming but rather cutting away the whole lower part of that plastic frame.. Could there possibly be some difference in the construction between Euro cars and American? Oh well, nevermind. Now it's on there and will be there for a looong time  It was fun though doing that work and I finally got those brighter fog lights installed It was fun though doing that work and I finally got those brighter fog lights installed  |
|
Appreciate
0
|
| 07-07-2013, 04:24 PM | #26 |
|
Captain
    191
Rep 677
Posts |
I just installed my 7 inch VRSF and removing the bumper cover made it much easier.
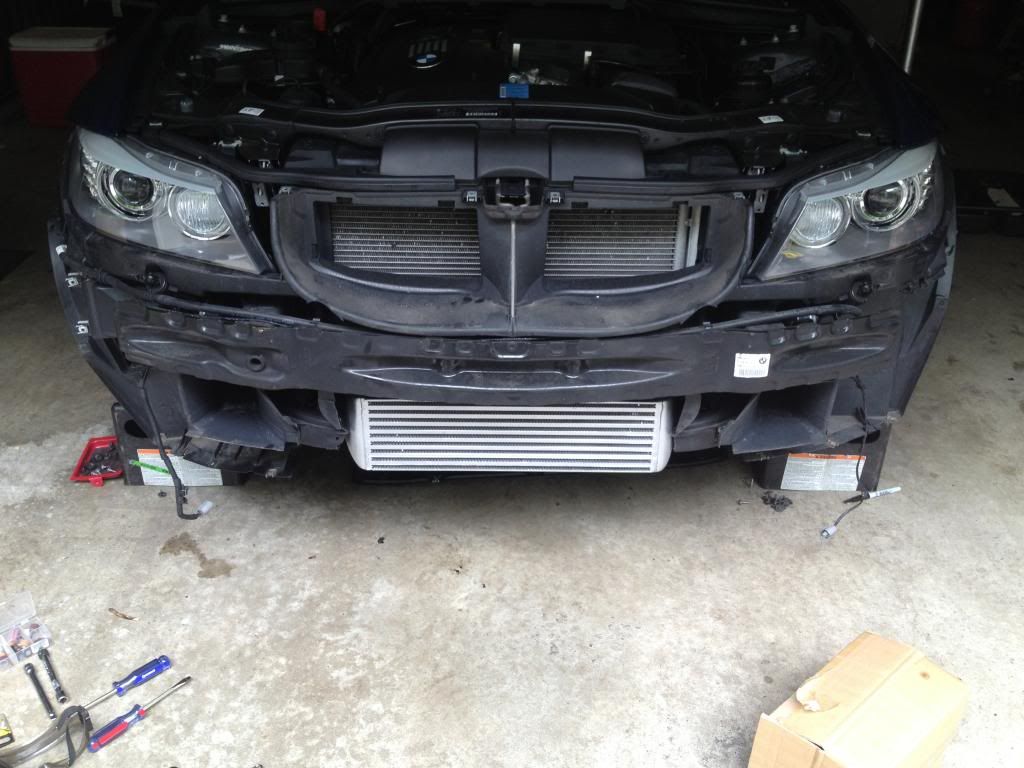
As others said, I would recommend just cutting the entire bottom part of the radiator support off. As you can see, if you were to leave it on, you would only have a thin strip of the bottom section left.  Another thing to consider is that you have to cut out the plastic sections that curved around the front of the stock intercooler. I had not seen any other install that mentioned that, but the VRSF would not fit with them in place. The passenger side was not a problem, but on the driver side, you have to be mindful of the radiator drain and a weather stripping that is in close proximity. I wedged a small socket extension between the weather stripping attached to the radiator support piece and the intercooler mount. Also make sure you don't cut into the threaded section where the support screws go, because that is what holds the intercooler up. I used a dremel tool for the cutting. I used a small cutoff wheel for the turbo side metal band and one of the drill bit shaped cutting tools to cut the plastic. As a tip for the metal band- I was expecting it to pop or expand or do something when I cut through it, but it didn't. So check it frequently with a flat head screwdriver. All of the clamps were accessible with a deep well socket and various extensions and u-joints except the clamp on the turbo pipe. I just used a 10 mm spanner. If you have a ratcheting spanner, you are golden, otherwise count on doing like a million 1/8 turns. Get the intercooler installed and in place before you do a final tighten for the clamps to make sure everything is lined up properly. Except the clamp from the turbo pipe onto the silicon hose- get that one tightened up before you install because you won't really have room to get to it once the intercooler is in place. It is also a straight shot, so no alignment issues. Without any sort of guidance, I tightened all clamps until there was about an inch of thread showing past the nut. So far so good. Another tip is to make sure your clamps are out of the way of everything else so they don't hit anything. If you use the upgraded lower charge pipe, make sure it is aligned to stay out of the belt and the fan. It took me just at three hours from start to finish to install. If I had a lift and a ratcheting spanner, it would have easily been doable in about two.  |
|
Appreciate
0
|
| 02-22-2015, 04:58 PM | #27 |
|
Major
 
353
Rep 1,403
Posts |
Installing mine soon and debating by this thread whether or not to remove the FB or leave it. I'll likely be doing it in my garage so no lift... I'm thinking without a lift based on this thread removing the FB is somewhat necessary unless i buy the ramps..
|
|
Appreciate
0
|
| 02-22-2015, 05:03 PM | #28 |
|
Colonel
 
671
Rep 2,084
Posts |
You dont have to remove fb. See no reason. I have the 7" vrsf. Just watch out for the ambient sensor. O wait may be for cutting, you may need to.
__________________
335i e92 TPC 19Ts
|
|
Appreciate
1
|
| 02-22-2015, 05:05 PM | #29 |
|
Captain
    25
Rep 755
Posts |
You don't need to remove the front bumper to install the FMIC.
__________________
Car: 2007 e90 335i 6MT - sports, premium, cold weather, light, and smoker's package. Performance Mods: Cobb AP v3, ETS 7" FMIC, Injen DCI, Michelin PSS, CDV delete, rear spoiler, BMW PE w/ Magnaflow tips, PTF pro-tune, VRSF downpipes, ER chargepipe w/ Tial Q, APEX 18" EC-7 wheels, MP outlet/ inlet, MMP Stg. 3 turbos. Other mods: BMW cargo liner, 20% window tint, BMW alarm system, Weathertech floorliner, Lux E90 V6 bulbs, Philips X-treme Vision H7 bulbs, Blackvue DR650GW-2CH.
|
|
Appreciate
1
|
| 02-22-2015, 05:15 PM | #31 |
|
Major
 
353
Rep 1,403
Posts |
I know just wondering if it's easier without a lift apparently it's just as easy without lol thanks for the reply brother
|
|
Appreciate
0
|
| 02-22-2015, 05:16 PM | #33 |
|
Major
 
353
Rep 1,403
Posts |
|
|
Appreciate
0
|
| 02-22-2015, 05:18 PM | #35 |
|
Captain
    30
Rep 780
Posts |
|
|
Appreciate
1
|
| 02-22-2015, 05:28 PM | #37 |
|
Captain
    30
Rep 780
Posts |
|
|
Appreciate
1
|
| 02-22-2015, 05:31 PM | #38 |
|
Major
 
353
Rep 1,403
Posts |
|
|
Appreciate
0
|
| 02-22-2015, 05:45 PM | #40 |
|
Major
 
353
Rep 1,403
Posts |
|
|
Appreciate
0
|
 |
| Bookmarks |
|
|