

|
|
|
|
 |

|
 |
BMW Garage | BMW Meets | Register | Today's Posts | Search |
 |

|
BMW 3-Series (E90 E92) Forum
>
DIY: Ski package for E91
|
 |
| 07-04-2011, 10:55 AM | #1 |
|
New Member
2
Rep 12
Posts |
DIY: Ski package for E91
The following guide describes how to install a "ski package" (ski bag cover) into 2011 3-series wagon. Some of the steps should be applicable to all E9X that have folding rear seats. I have a ski rack but having back seat opening into trunk makes my car more versatile. BMW makes a storage bin that can be used instead of ski bag cassette to cover the hole when armrest is out.
 OEM Parts required: =============== * Torx bolt P/N: 07-14-6-962-306 (4 pieces) $19 * Ski bag cover P/N: 52-20-7-161-210 BLACK $80 * Cover plates P/N: 52-20-7-142-264 BLACK (2 pieces) $8 See catalogue here. In my case ski bag cover set already included cover plates, check with your vendor. Tools required: =========== * Set of torx wrenches of T40-T45-T50 sizes ("Star"). Large T50 was the hardest to find. Check your local Sears store. * To cut the steel opening I used Dremel rotary tool with metal cutting disk attachments (I spent two EZ-465 disks). Time required ========== 2-4 hours depending on how comfortable you are with dremel working on steel. Warning: ======= Follow these instructions on your own risk. Don't apply excessive force when dealing with plastic locks. Some metal-work skills are recommended. You won't be able to turn back after step 8. Steps: ==== 1. Rear seat is held by two snapping clips. Grab rear seat cushion and lift it upwards. You should be able to release clips with moderate force. Do the same from another side. If unsure, watch this guy do it (little changed since E34). 2. Rear seat cushion that it is loosely fastened by middle seat belt you will need Star T50 wrench to unscrew the bolt. 3. Remove rear seat cushion and unscrew similar T50 bolts that hold down two remaining seat belts. Be careful with wires that run underneath the seat. There will be a lot of traffic in this area so I suggest covering these wires with some duct tape. 4. Once you removed rear seat cushion you will need to take care of side bolsters on both sides of the seat. Take a look at the picture. I think the simplest way of pulling them out is the following. Each side bolster is held in place by upper clip and two 1-2" pins at the bottom. Squeeze your hand under the plastic cover that contains seat belt spring mechanism. Grab the bolster cushion and pull it forward towards you with moderate force. Once it pops out you can simply lift the cushion to release bottom pins. 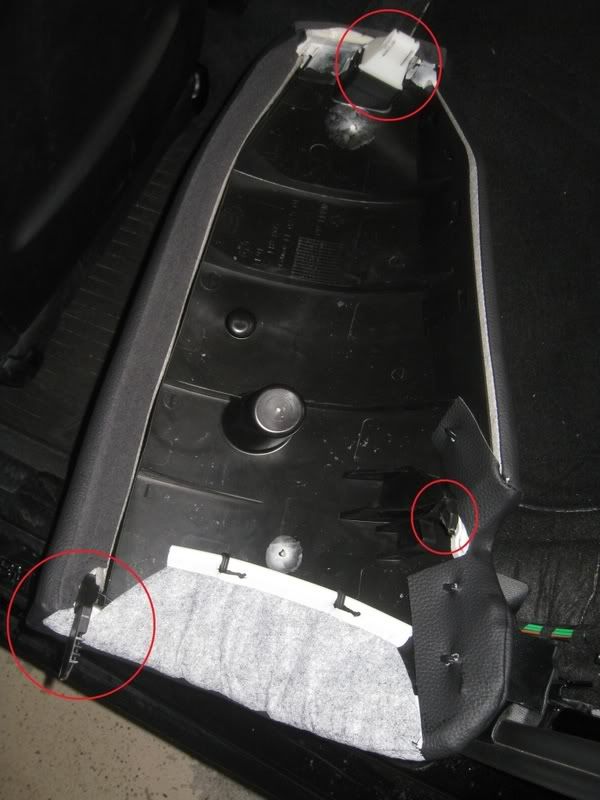 5. Fold down rear seats and unscrew bolts holding two L-shaped brackets that attach folding seat axles on both sides. 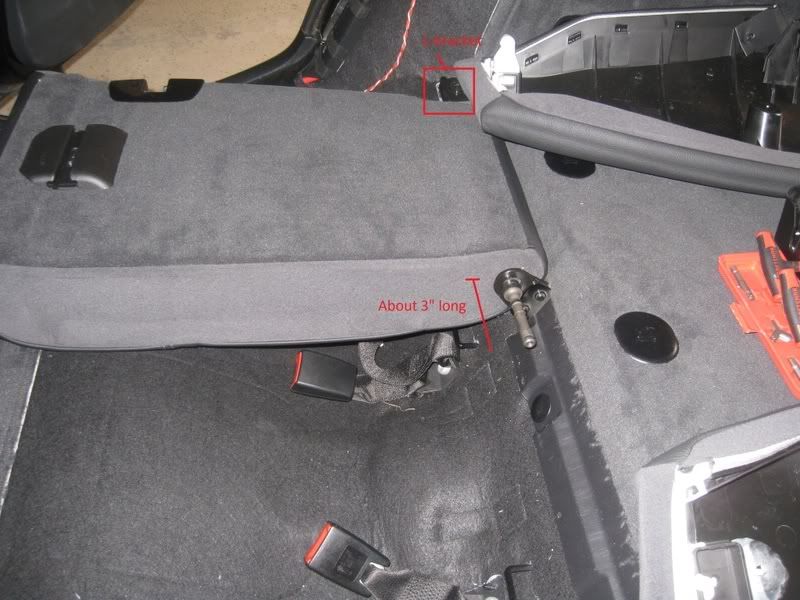 6. Now you will remove bigger 2/3 seat section from the car. Make sure both seats are folded down. Grab the bigger section and pull it apart from the smaller section. It swivels on axle that is about 3 inches long. See the picture above. This step may be tricky. Try some wiggling. 7. Remove armrest: it held by a single side bolt (T40?) Warn: Once you complete the next step there is no way back :-) 8. Remove plastic cover behind armrest. It is held by four of plastic rivets that will likely be damaged during dis-assembly. 9. To get better access to the future opening area you need to partially detach seat material. It is held in two places by pieces of wire snapped into little hooks. 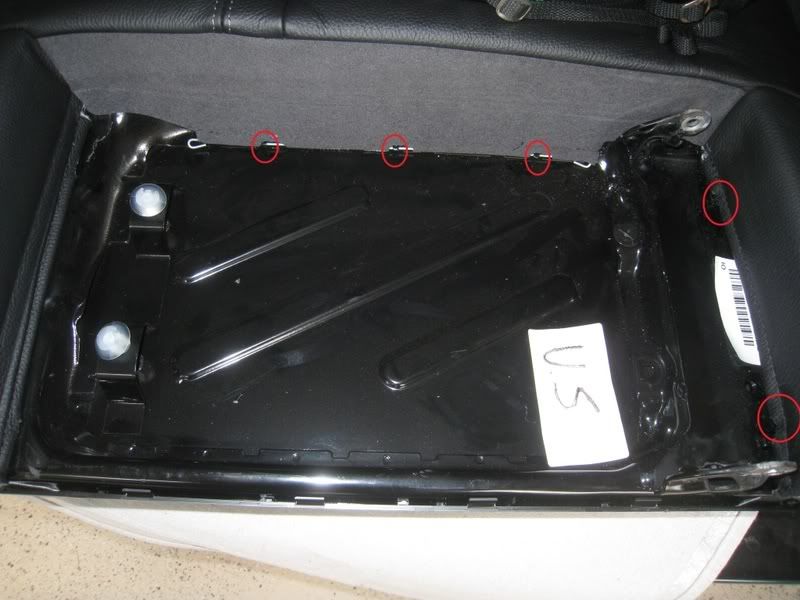 10. Study steal surface for future opening - there is no perforation but you will figure out where car designers wanted this opening to be. I suggest drilling a few small holes along the perimeter of the future cut (from the cushion side), then flip the seat and "connect the dots". 11. Use utility knife to cut felt cloth material on the back of the seat. Be very careful how much you cut. I suggest starting with a smaller opening at first and gradually enlarge it during fitting procedure. 12. I suggest covering most of the seat in protective plastic and securing it using masking tape. 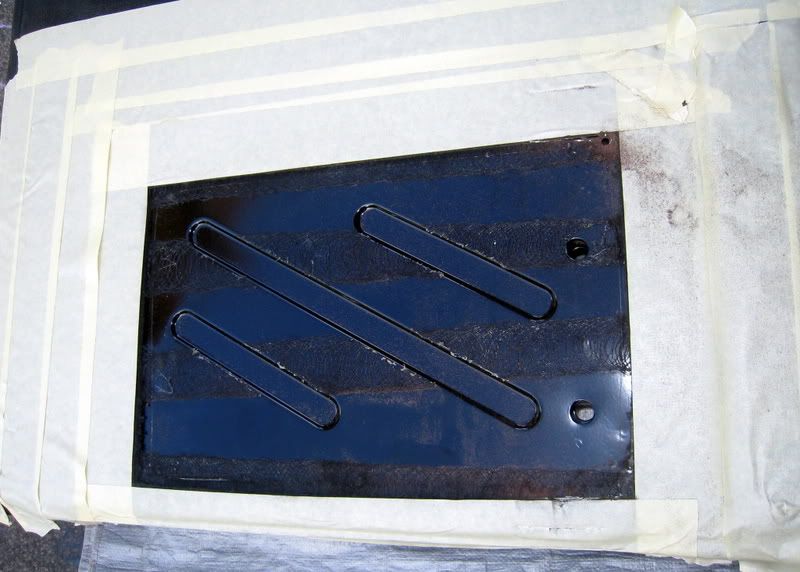 13. Cut the steel plate with dremel tool to make opening. Make sure you removed all glue from the metal before you start. 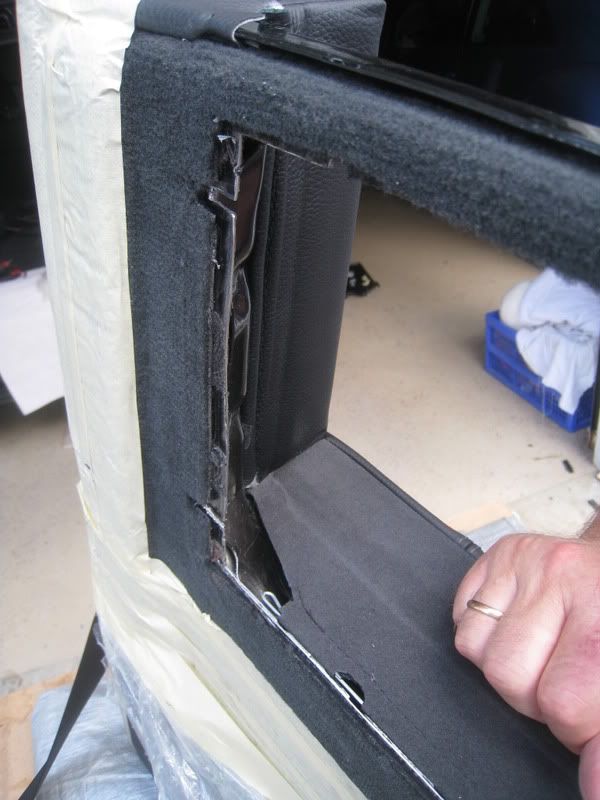 14. Fitting procedure. I had to make some additional dremel cuts during fitting procedure. (shown in red above).I also shortened plastic pillars on the back cover as shown below (by about 1/8"). 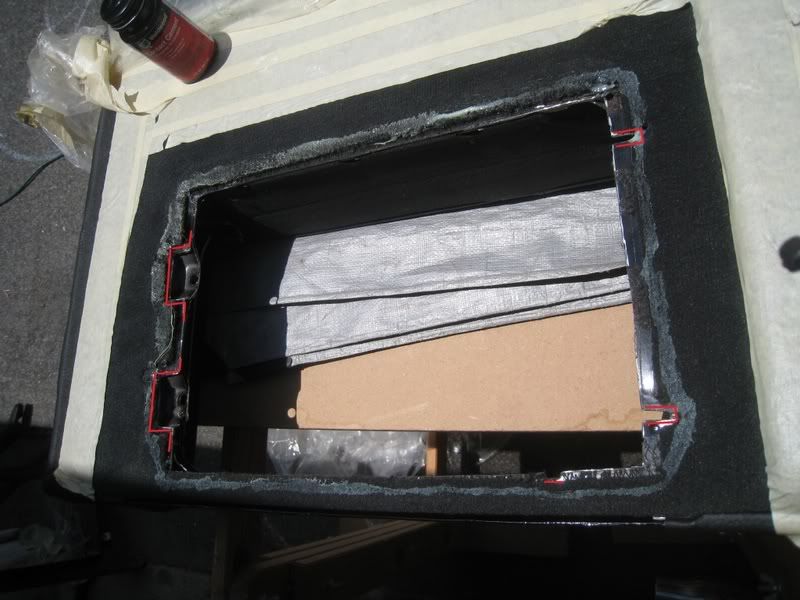 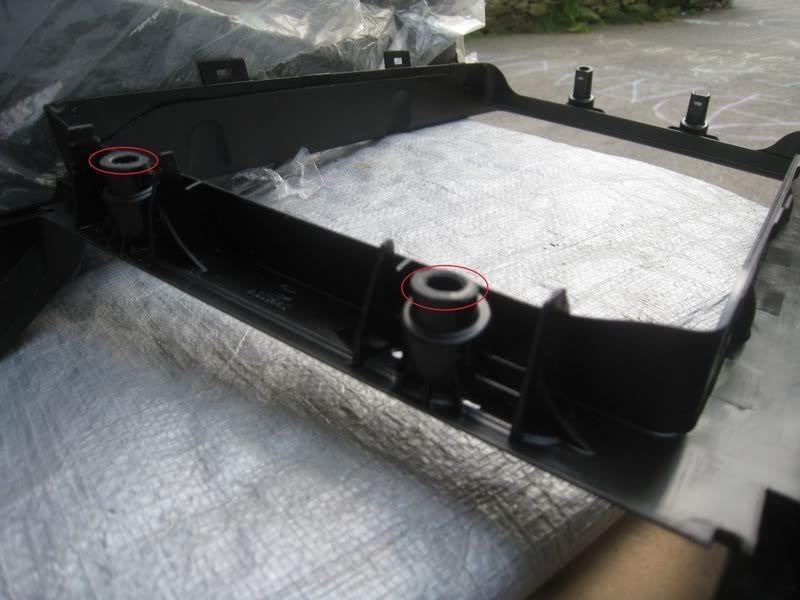 Once both sides of ski bag opening cover meet together nicely, secure them with 4 bolts. I also used some glue on back side but now I do not recommend it (it made some mess). 15. You are done with installation. Assemble seats back by following steps 1-9 in reverse order.  Enjoy! |
| 03-23-2012, 11:04 AM | #3 |
|
Major
 
90
Rep 1,404
Posts |
Excellent write up Andy. This ski pass through hole DIY is something I and other E9X have been looking for a long time. When using the search feature, I think most of us have missed this DIY due to the title.
Much thanks
__________________
Name: Blanca | 07 E92 | AW-Blk | ZSP | Alcon BBK | M3 Bits | VM RR Links | Koni | UUC Sways | V5 | Dinan CAI | ETS IC | Fge DV | ER CP | Cyba | Raden. Exh | Mod Step | Trunk Drawer | Perf LED Wheel | Illum Dr Sills | IS Shifter | Parrot | Philps D1S | 6000k fog | MTECH RR | CSL Trunk | Aero | Roof Spoiler | PSS on BBS RS-GT 19s
 |
|
Appreciate
0
|
| 04-07-2012, 08:49 AM | #4 |
|
Old Timer
2
Rep 69
Posts |
Great write-up
This is an excellent write up. I have written many technical manuals for the printing industry and this write up is clear, concise and to the point with perfect illustrations.
Now that you gave me the spring fever itch, I want to do this for my 09' E90 with fixed rear seats. I have no pass thru or ski package option. Has anyone attempted this on a fixed rear seat setup? I hate being the first to try but than again someone has got to be!  |
|
Appreciate
0
|
 |
| Bookmarks |
|
|


