

|
|
|
|
 |

|
 |
BMW Garage | BMW Meets | Register | Today's Posts | Search |
 |

|
BMW 3-Series (E90 E92) Forum
>
DIY: Front License Plate Hole Filling
|
 |
| 10-06-2012, 07:34 PM | #1 |
|
Private
 8
Rep 83
Posts
Drives: 2009 AW/CR E93 335i 6MT
Join Date: Sep 2012
Location: NJ
|
DIY: Front License Plate Hole Filling
I really hate my front plate and didn't want to use bumper plugs (UGLY)... Also, I did not want to just simply fill them and touch it up because there will be an obvious color difference. Therefore, I took a more aggressive approach toward filling them:
I was really expecting 2 holes, but I guess my dealership and the previous owner's dealership both decided to put holes at different locations... (4 total).. Also the mount has been on SOOO long... there is a rectangular surrounding the area. Materials you need: 40 or 80 grit sandpaper 600 grit sandpaper 1500 grit sandpaper Primer Base Coat Clear Coat Any type of filler (I used Bondo Body filler and Bondo Spot Putty) The four holes... 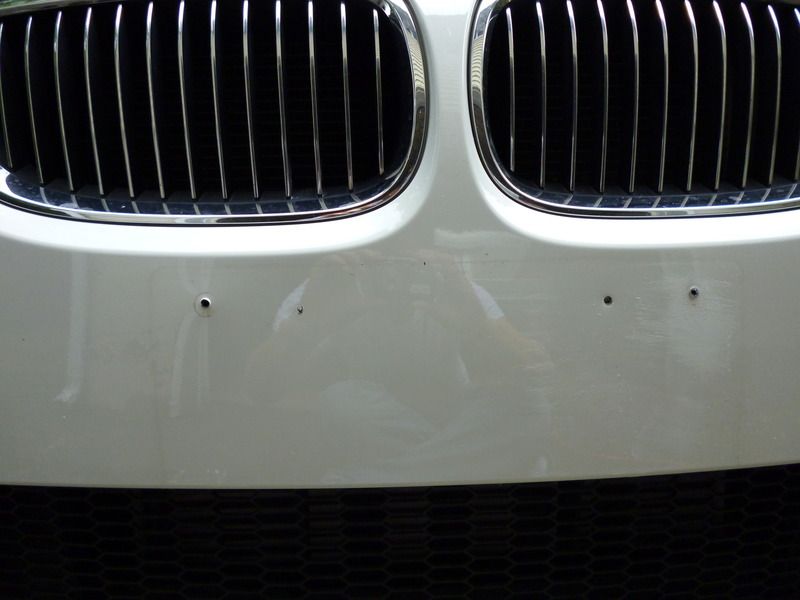 Close up: 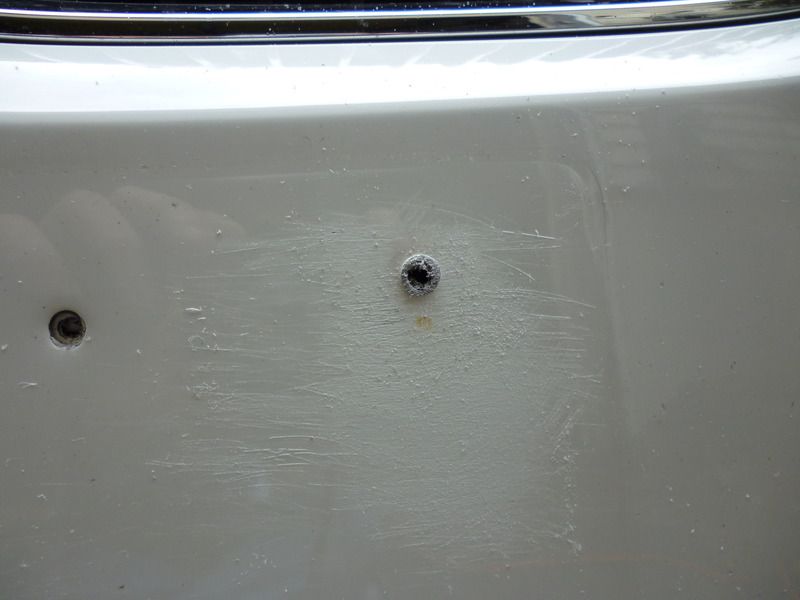 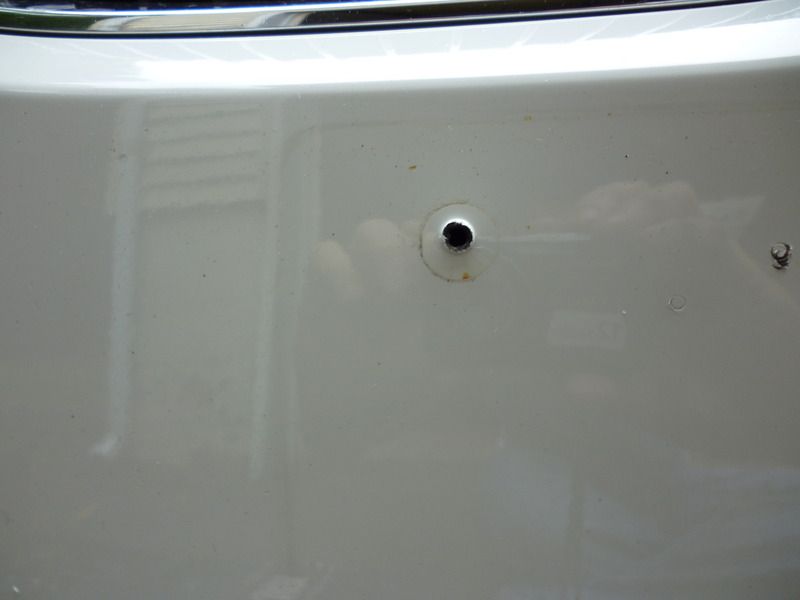 Using 80 grit sandpaper, sanded the ones that obnoxiously sticks out. And then used 600 grit. I also sanded everything around the holes with 1500 grit sandpaper so it blends the clear coat better. 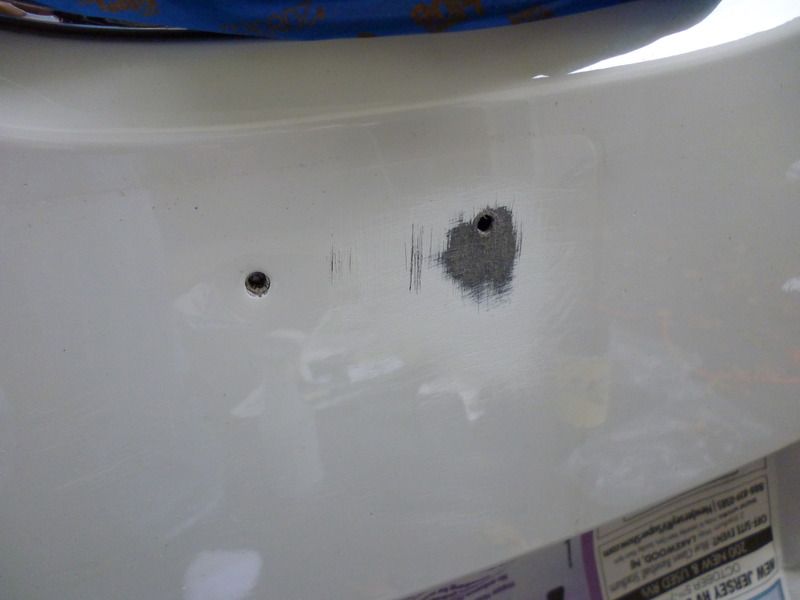 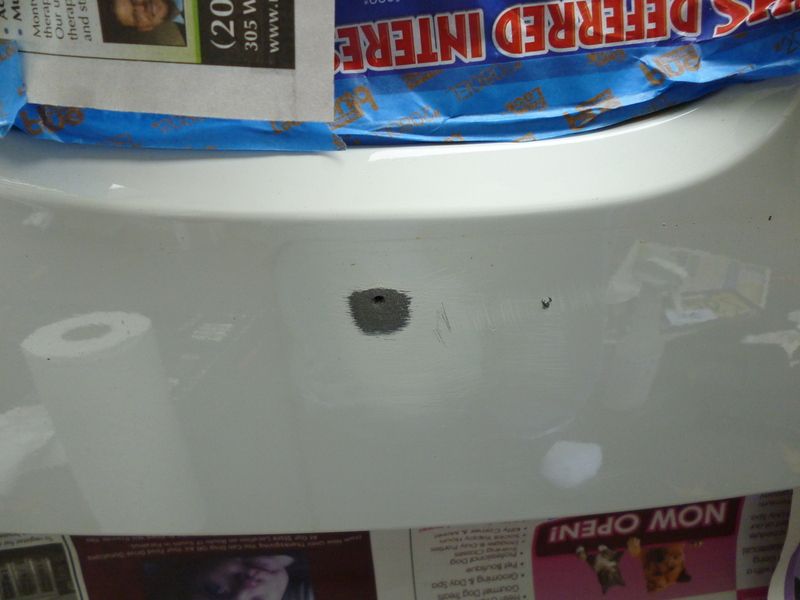 Filled with Bondo Body Filler initially, then finished off with Spot Putty for minor imperfections.. sanded with 600 grit 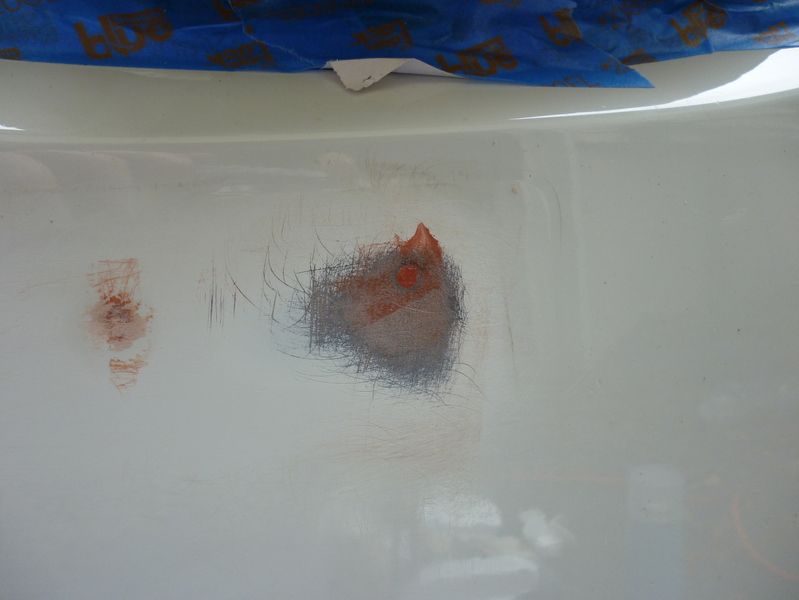  Primed, 1st Coat, allow 5 minutes between each coat. 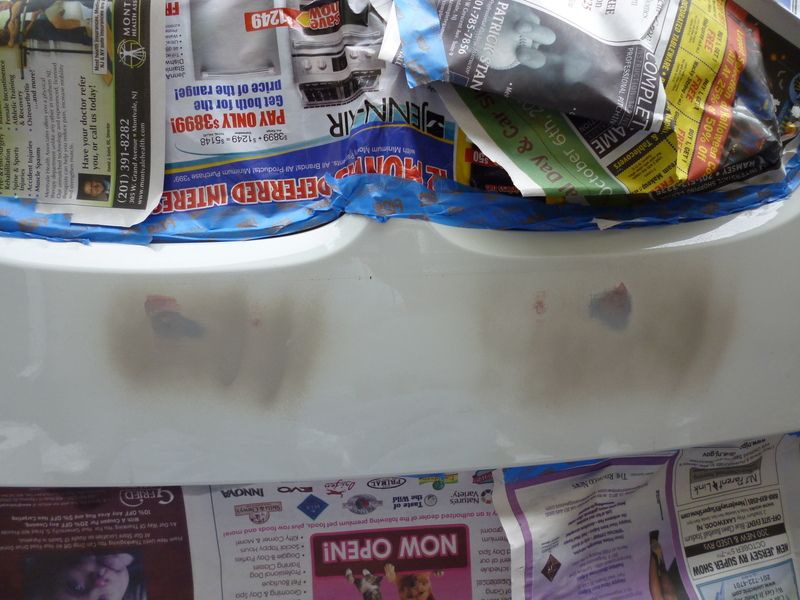 Primed, 3 coats, wait 30 minutes before sanding and applying base coat. Sanded down with 600 grit sandpaper (Think I could've done this better, but O Well) 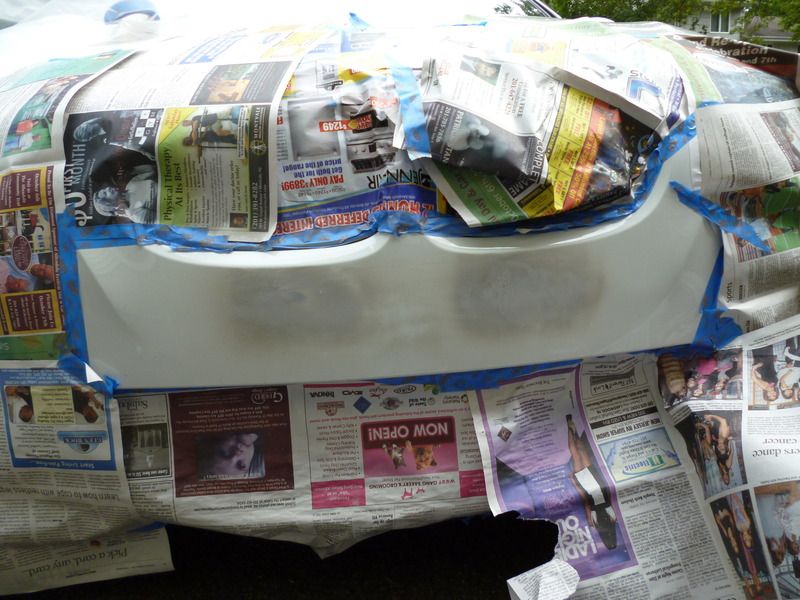 First Coat of Base Color 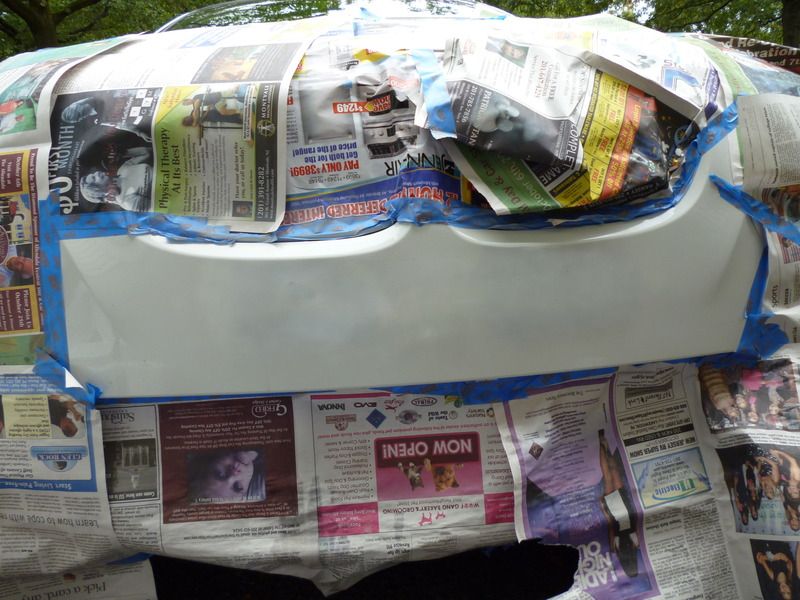 After 3-4 Coats of Base Color (5 minutes in between each coat), Wait 30 minutes before applying clear coat 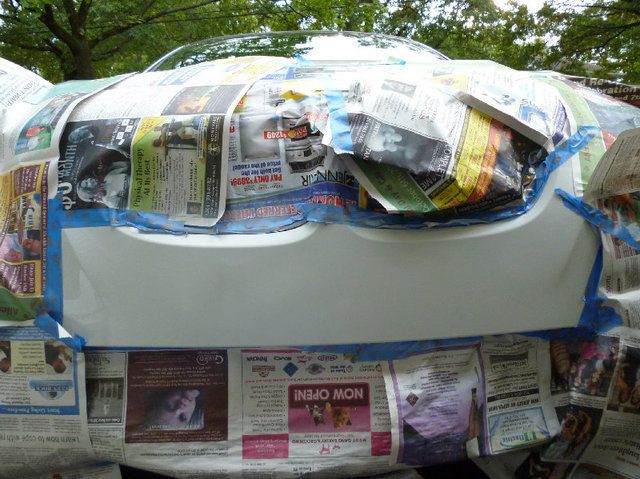 After 3 Coats of Gloss Clear Coat, 5 minutes between each coat. 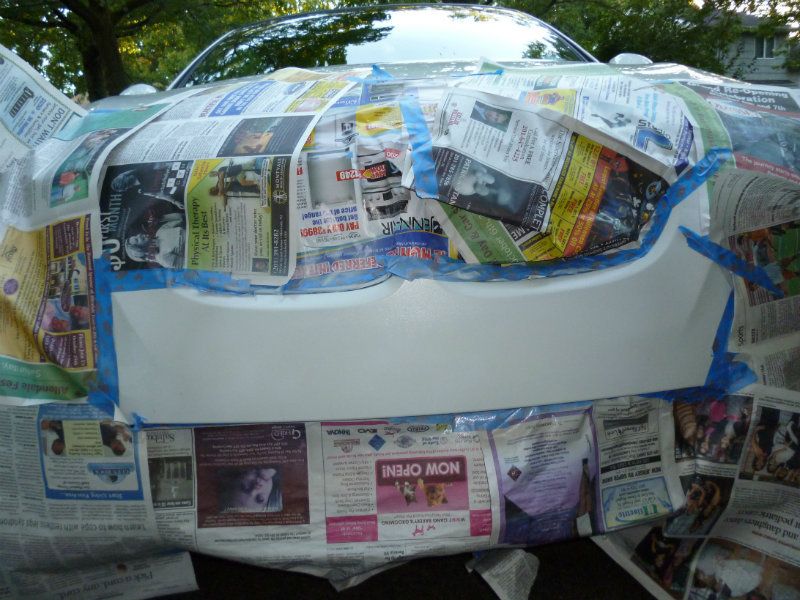 DONE! (not really, really should polish it so it blends more, but I'll do that later on) 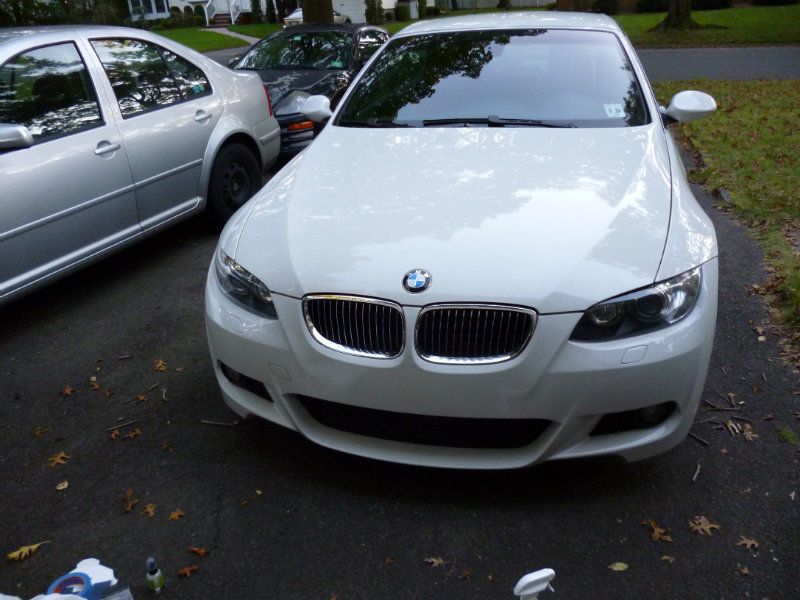 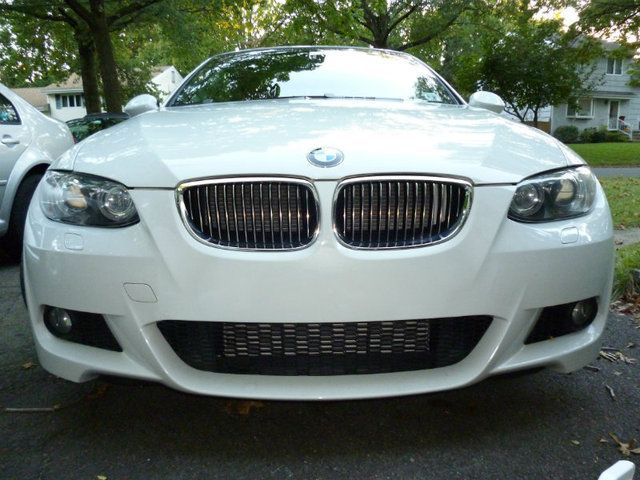 Some of you might ask why I didnt post close up of final product... I did take a pic of it.. but its just a white picture... Hope this helps everyone that wants to get rid of bumper holes but refuse to use ugly bumper plugs! Last edited by rylak; 10-08-2012 at 02:32 PM.. |
| 10-07-2012, 03:45 PM | #2 | |
|
#


17
Rep 56
Posts |
Quote:
awesome DYI man I'm deffintly going to do this cause I don't want though bumper plugs either. Thanks! |
|
|
Appreciate
0
|
| 10-08-2012, 10:30 AM | #3 |
|
Lieutenant

98
Rep 513
Posts
Drives: 2006 325i (SOLD)
Join Date: Oct 2011
Location: Stoughon, WI
|
Where did you order your paint from? I am assuming you used automotive spray paint?
__________________
Regards,
SnyperX |
|
Appreciate
0
|
| 10-08-2012, 11:30 AM | #4 |
|
Private
8
Rep 83
Posts
Drives: 2009 AW/CR E93 335i 6MT
Join Date: Sep 2012
Location: NJ
|
I ordered mine from automotivetouchup.com
GREAT color match! and their videos were great as well. Also, looking back at it... I should've taped around the holes and then sand them, so the sanded areas would not appear so big... however, i didn't want to deal with cleaning up the glue and stuff afterward prior to spraypainting |
|
Appreciate
0
|
| 10-08-2012, 11:40 AM | #5 | |
|
Private
8
Rep 83
Posts
Drives: 2009 AW/CR E93 335i 6MT
Join Date: Sep 2012
Location: NJ
|
Quote:
|
|
|
Appreciate
0
|
| 10-08-2012, 12:06 PM | #6 |
|
Second Lieutenant
8
Rep 229
Posts |
hey did u have any painting experience? this is the first time? from the picture it looks PERFECT. if someone looks at your bumper can they tell you painted over it?
|
|
Appreciate
0
|
| 10-08-2012, 12:26 PM | #7 | |
|
Private
8
Rep 83
Posts
Drives: 2009 AW/CR E93 335i 6MT
Join Date: Sep 2012
Location: NJ
|
Quote:
I drove it to work, alot of my friends and coworkers can't even tell I painted it. It looks great. I do think you should probably polish it afterward to make it shinier. I would say just make sure u sanded it down perfectly smooth after filling, or else texture will appear after you put your colors on. Hope that helps. |
|
|
Appreciate
0
|
| 12-02-2012, 10:42 PM | #9 |
|
Enlisted Member
 3
Rep 48
Posts |
Awesome DIY!
I took my car to "The Bumper Doctor" and they wanted $950.00 for that plus a lower corner scrape and some shotty touch-up on the rear bumper from the previous owner. I couldn't believe it. Tried to charge an hour labor for bumper removal  . Admins: please make this thread sticky!! . Admins: please make this thread sticky!!Anyway, long story short the automotivetouchup.com paint match is probably perfect. I'm a first timer and I got extremely close on my first try using their rattle cans with Space Gray and the 2K urethane clear coat. I say *might* be perfect because I ruined my work with the clear coat by spraying it too close and it ran everywhere. Then I tried sanding it too soon and the cc peeled  The parts I didn't completely barf on look awesome. One tip though: the OP mentioned polishing... you're going to want to do that to get mirror finish. I'm surprised the videos don't show that. The parts I didn't completely barf on look awesome. One tip though: the OP mentioned polishing... you're going to want to do that to get mirror finish. I'm surprised the videos don't show that.I have to redo a lot of it, but I'm leveling up to a compressor and HVLP sprayer mainly to be able to judge how much material I've used. The rattle cans are very capable though. I'm just having a lot of fun on this project so why not? |
|
Appreciate
0
|
| 12-02-2012, 10:52 PM | #10 |
|
Private
8
Rep 83
Posts
Drives: 2009 AW/CR E93 335i 6MT
Join Date: Sep 2012
Location: NJ
|
thanks for the support!
Actually, I've gotten alot better with this lol. I actually do several things differently now. For one, i would not have taped up the nose like how i did int he pics shown above. |
|
Appreciate
0
|
| 12-02-2012, 11:06 PM | #12 | |
|
Private
8
Rep 83
Posts
Drives: 2009 AW/CR E93 335i 6MT
Join Date: Sep 2012
Location: NJ
|
Quote:
I havent done it in a while, but I will take pictures and edit it next time. Also, I'm not sure how this will turn out on other colors besides white. The color difference might be more noticeable. |
|
|
Appreciate
0
|
| 12-03-2012, 05:24 AM | #13 | |
|
Enlisted Member
3
Rep 48
Posts |
Quote:
|
|
|
Appreciate
0
|
| 12-06-2012, 02:00 AM | #15 | |
|
Enlisted Member
3
Rep 48
Posts |
Quote:
 |
|
|
Appreciate
0
|
| 12-06-2012, 02:03 AM | #16 |
|
Private
8
Rep 83
Posts
Drives: 2009 AW/CR E93 335i 6MT
Join Date: Sep 2012
Location: NJ
|
jesus, u're really painting like crazy lol
|
|
Appreciate
0
|
| 12-07-2012, 04:33 AM | #17 |
|
Enlisted Member
3
Rep 48
Posts |
FYI: after a day or so of curing the A52 Spacegrau metallic is an absolutely perfect match.
When I redo I'm going to leave the base coat for at least 24 hours to cure before going with the clear coat. |
|
Appreciate
0
|
| 03-09-2013, 06:33 PM | #18 |
|
First Lieutenant
10
Rep 302
Posts |
This all looks awesome and I really want to do it. But my car came with clear decal over all areas that would get wear on them from driving.
i.e. bumper, behind wheels, front of hood, and mirrors. If feel like I wouldnt want to paint those. Would have to take them off and buy new ones if i even could. Any ideas? |
|
Appreciate
0
|
| 03-09-2013, 11:10 PM | #19 |
|
Private
8
Rep 83
Posts
Drives: 2009 AW/CR E93 335i 6MT
Join Date: Sep 2012
Location: NJ
|
yea, i wouldnt recommend painting those. lol
|
|
Appreciate
0
|
| 03-09-2013, 11:47 PM | #20 | |
|
First Lieutenant
10
Rep 302
Posts |
Quote:
I may just get the right touch up. Get screws with the wide flat washer heads. And paint them and screw them in. Would look better than the horrible holes. And should blend pretty well. |
|
|
Appreciate
0
|
| 03-10-2013, 07:36 AM | #21 |
|
Second Lieutenant
23
Rep 217
Posts |
my DIY
I've always had to plug these holes.. ok no laughing guys..works 100%
(and I'm OCD ) Dave's NO SANDING fix ! Ok first get a tube of caulking--(small 1.69 tube, not one with a caulking gun-- (usually white- non silicone) If you have a white car- you can stop here =) second: add touch up paint - with brush * the caulking normally shrinks.. and leaves a dimple- which kind looks like a factory- drill here small impression if you needed to add the tag back. (you could always add more caulk if you hate the dimple- * for the holes that have pulled out impressions from a screw- use a good exacto and trim before applying (caulk then tu paint) |
|
Appreciate
0
|
| 05-22-2013, 09:46 AM | #22 |
|
New Member
0
Rep 22
Posts |
Has anyone done this on a red, or darker car? I really need to do this as I have 5 holes in my front bumper from the last owner. I have a crimson red 328i and was just wondering how the blend will look. Will the front part of my bumper be more brighter than the rest of the car? Luckily, I think this car was garage kept and barely driven, (54,000 on a 2007) so no fading of the paint. Im just curious how it will look blending. After watching the videos on the automotive touchup site I do feel confident doing it, just want to see if anyone has done this on darker car, preferably a crimson red. Also, how much of the bumper should I leave exposed for painting/blending? OP, you say you wouldn't have taped up the bumper the way you did, how would you tape if doing it again?
|
|
Appreciate
0
|
 |
| Bookmarks |
|
|

 i still want to do this but im too scared to do it myself lol..


