

|
|
|
|
 |
|
 |
BMW Garage | BMW Meets | Register | Today's Posts | Search |
 |

|
BMW 3-Series (E90 E92) Forum
>
Orion Detailing Co. - Toronto/GTA
|
 |
| 07-01-2013, 12:24 PM | #1 |
|
Banned
11
Rep 47
Posts |
Orion Detailing Co. - Toronto/GTA
Hey Bimmerposters,
First of all Happy Canada Day! Second I am happy to announce that I am now an official sponsor on Bimmerpost as of today and want to thank Jason for helping me out! I'm pretty sure I have already worked on some of your BMWs so I am not new to some of you. For those of you who don't know me, Orion Detailing Co. is a business I started out of my home garage 5yrs ago doing mainly Paint Corrections.  I am not going to clutter the Canadian section with a bunch of threads but am going to make this thread my official thread that I share write ups on, pics of what's in the shop, maybe some funny stuff sometimes, etc. Looking forward to meeting you guys and working on your Bimmers! Cheers, Wes Ps. Oh yeah, if you are on Facebook add me as a friend https://www.facebook.com/wes.robles Or Linkedin http://ca.linkedin.com/pub/wes-robles/38/907/729 |
| 07-01-2013, 01:01 PM | #2 |
|
Brigadier General
 
416
Rep 3,051
Posts
Drives: 2009 BMW 335d
Join Date: Jan 2012
Location: Toronto, ON, Canada
|
Where is the shop located?
Edit: Damn, you guys are right near me. Are you guys off Laird just N of Wicksteed? Would like to get out and see you tomorrow morning. |
|
Appreciate
0
|
| 07-01-2013, 06:36 PM | #4 |
|
Lieutenant
 8
Rep 514
Posts |
You're the first detailing guy I've found that's not all the way out in mississauga, or some random faraway asscrack in a corner of the province. I am pleased.
|
|
Appreciate
0
|
| 07-01-2013, 08:31 PM | #5 | |
|
Brigadier General
416
Rep 3,051
Posts
Drives: 2009 BMW 335d
Join Date: Jan 2012
Location: Toronto, ON, Canada
|
Quote:
|
|
|
Appreciate
0
|
| 07-01-2013, 10:20 PM | #6 | |
|
Banned
11
Rep 47
Posts |
Quote:
|
|
|
Appreciate
0
|
| 07-01-2013, 10:21 PM | #7 |
|
Banned
11
Rep 47
Posts |
Here is an old write up on an M3 done back at my house.
Walk around 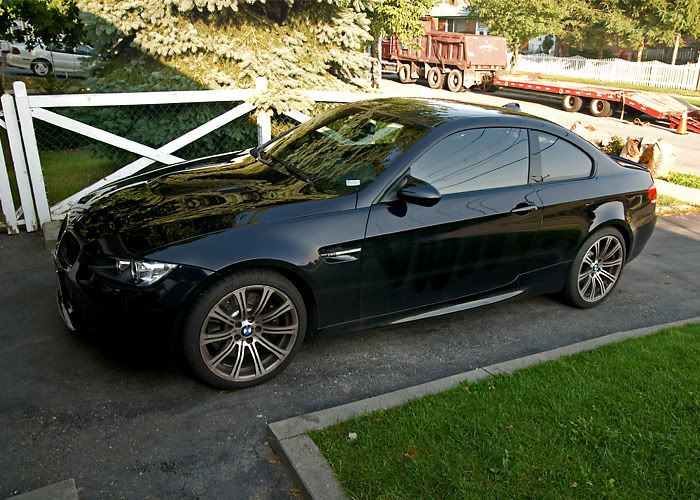 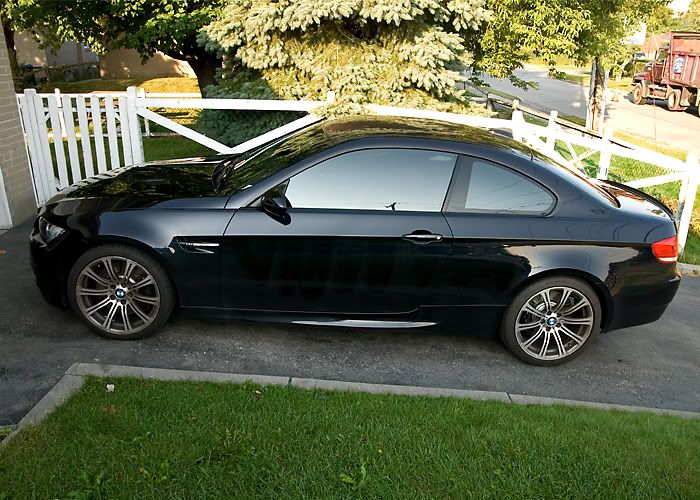 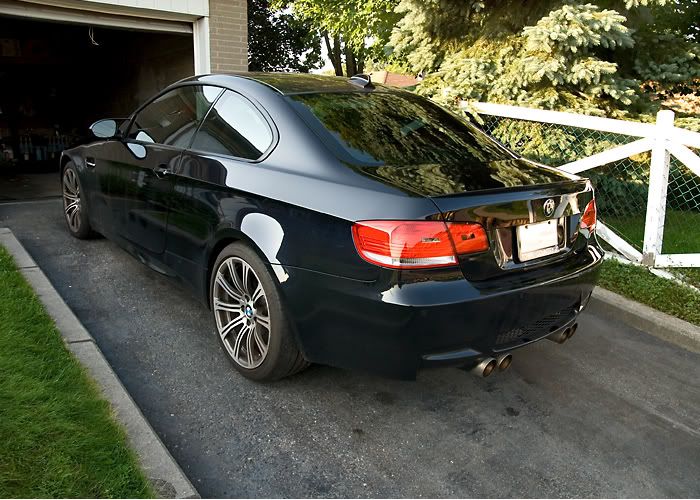 Started with my usual routine beginning at the wheels. Soaked the rims and tires in P21s Wheel Cleaner Gel version. This stuff is great because it is non-acidic making it safe for ceramic brakes, polished or anodized rims, etc. 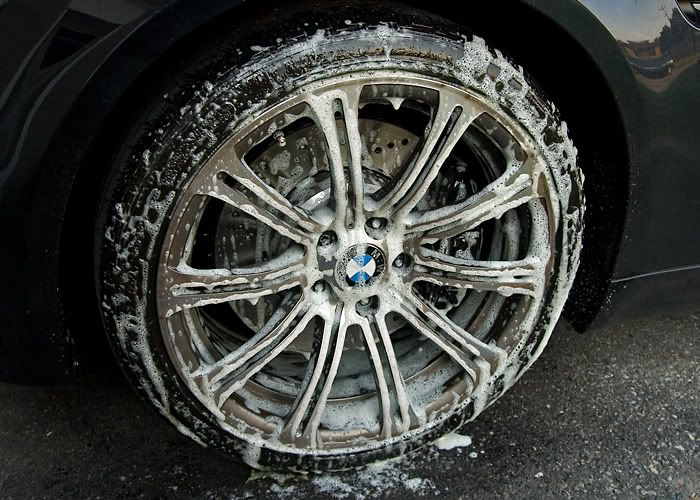 After going around the car I came back to my first rim and started working the inner rim with my EZ-Brush. 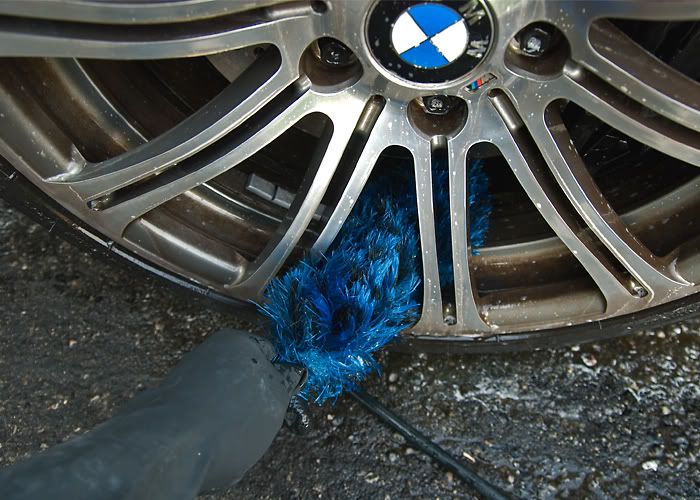 Dirt agitated. 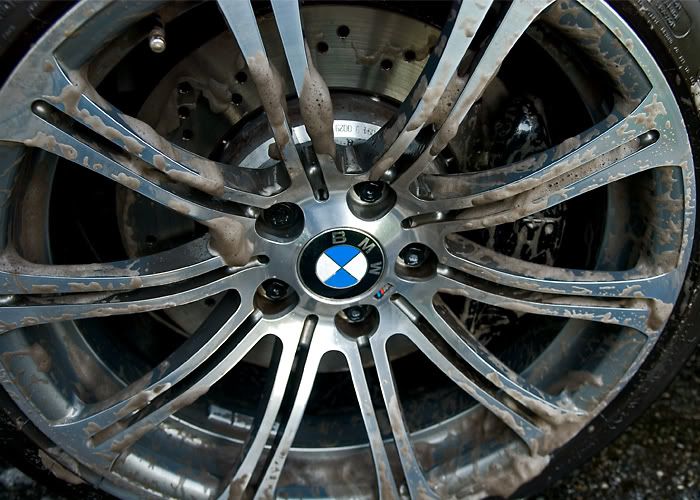 Cleaned the face and inbetween with a microfibre mitt. 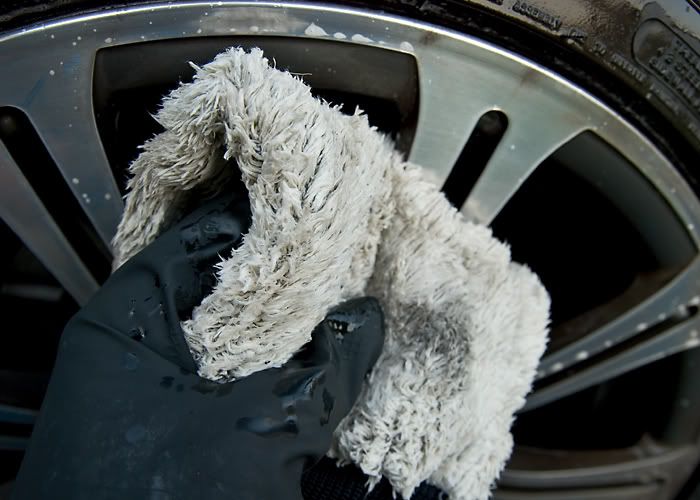 And all clean. 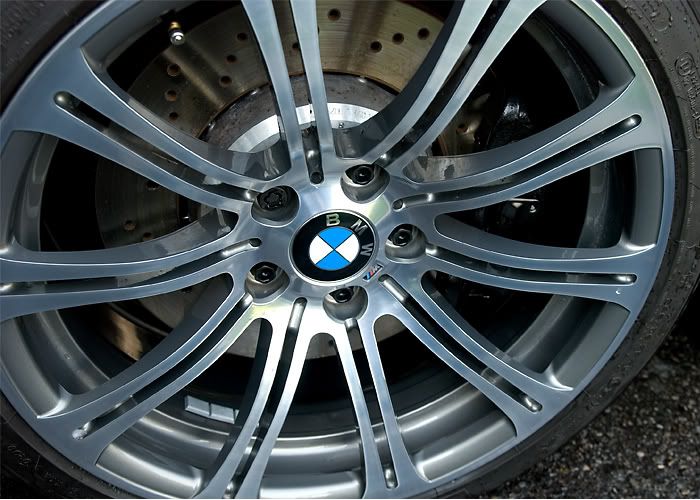 I also cleaned the fairly new Akrapovic Exhaust. 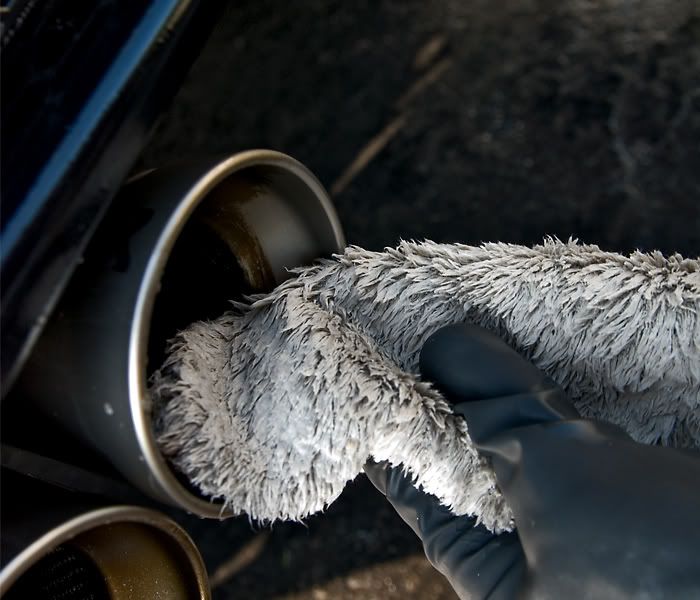 Still a little wet but looking very sexy none the less. 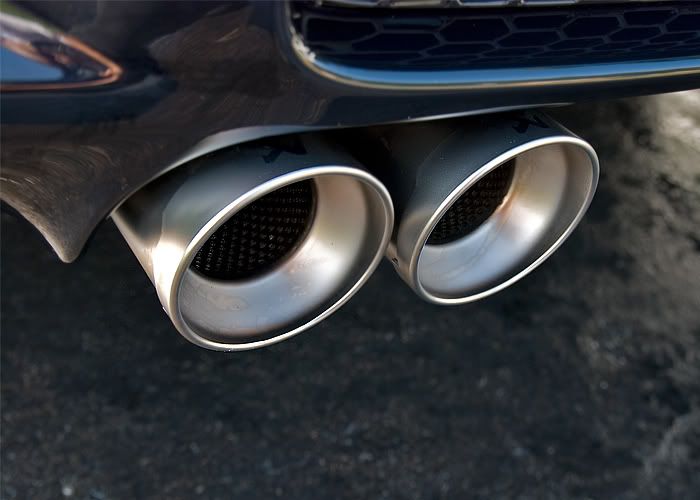 Finally with all of that out of the way I began to rinse down the car. 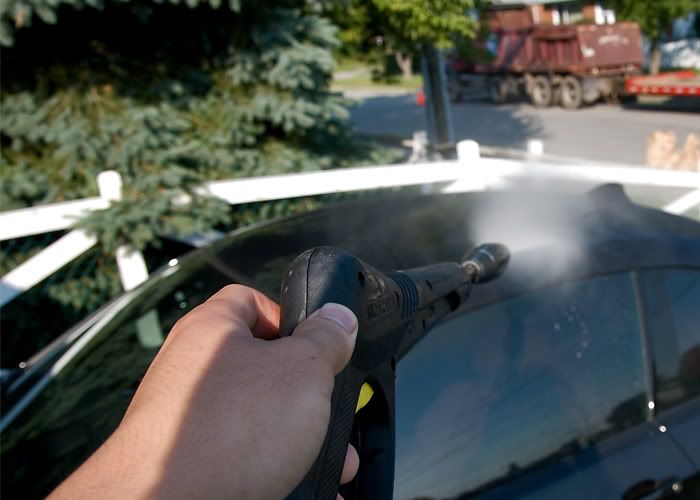 I noticed some beading and with this being a fairly new car I suspected that the dealer had put their "protection" on it wither it be a sealant or wax. In general though most dealer's products contain silicones which when it comes to polishing if not stripped off can be a huge hindrance to the correction of the paint because when you begin to polish rather than correct and cut into the paint it creates a sort of hydroplaning effect. So out came the Prep Wash cut 50/50 with water which is a silicone remover.  So with the Prep Wash dwelling on the paint. I began to wash the car using the 2 bucket method(left soapy water/right clean water for rinsing my mitt every panel), Chemical Guys Citrus Wash and Gloss, and a Natural Sea Sponge. 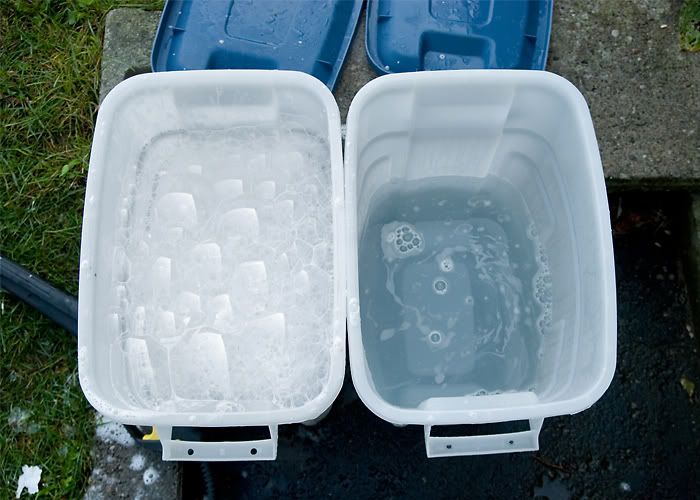 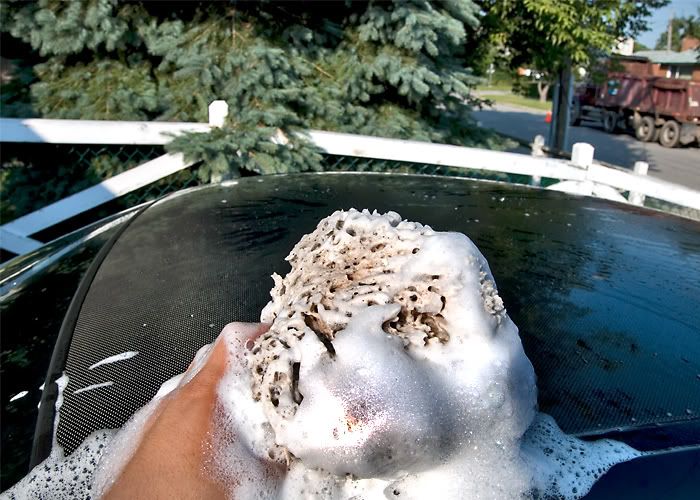 Dried off the car with my trusty waffle weave towels(these things are great because of the absorbency which is much better then regular leather or synthetic chamios). 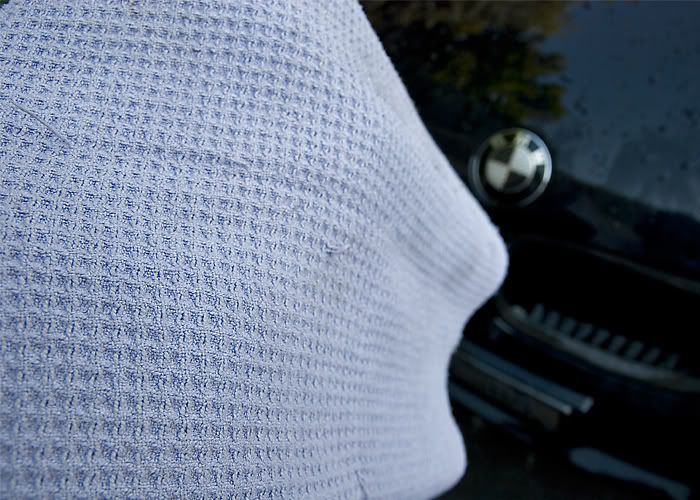 And then pulled it into my garage to start the claying with yellow Riccardo Clay. 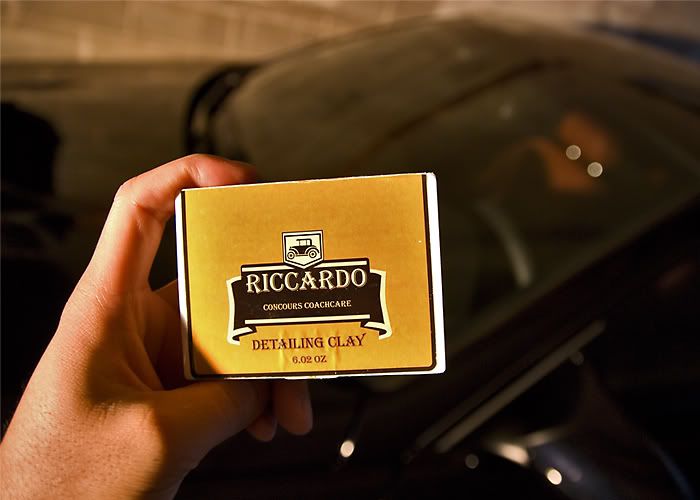  A little bit dirty for a 2 month old car. 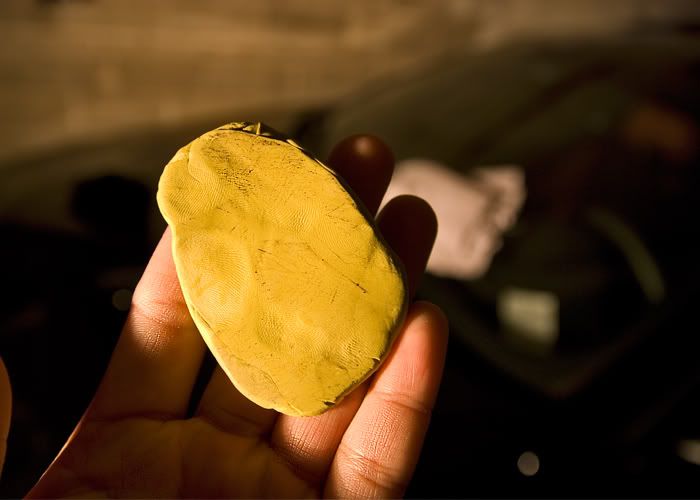 After claying I took some measurements of the whole car with my paint depth gauge in microns and found everything to be pretty healthy with no signs of repaint. 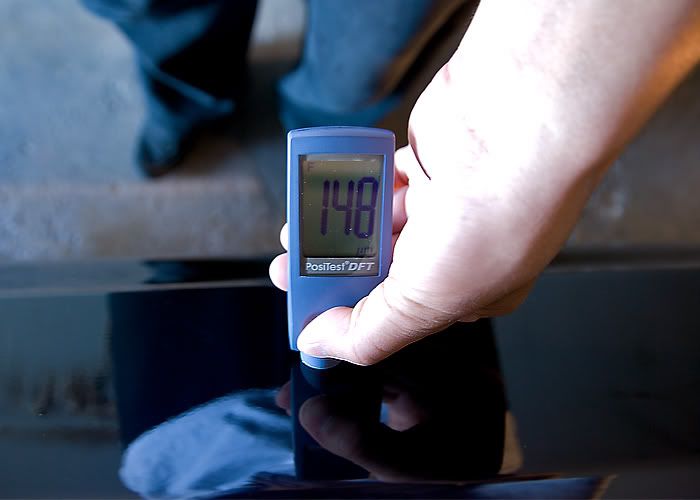 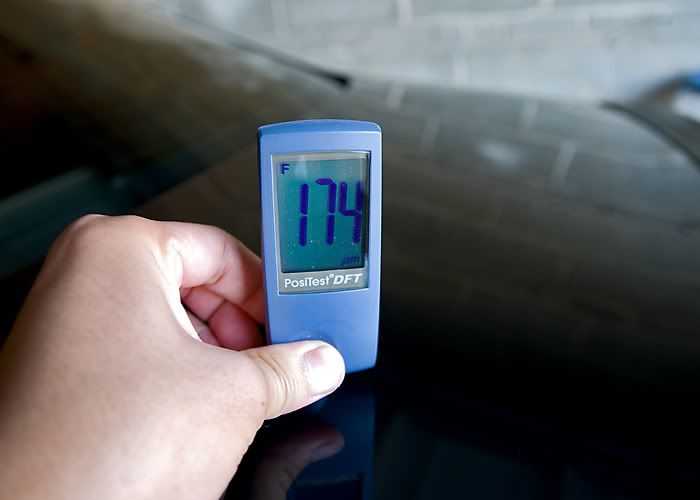 So now the fun begins. With the way the swirls were looking I was not expecting to do anything more then a 1 stage polish. Tools and product for the day were my Flex 3401, Lake Country Green Pads, and Menzerna Power Finish. Here are the before and after results. Before 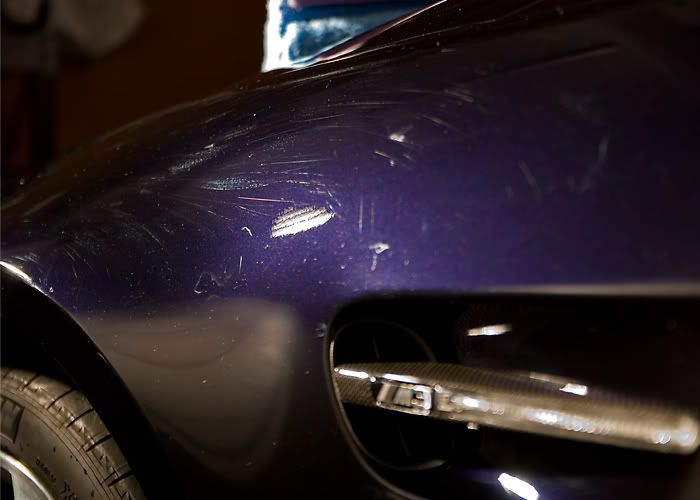 After 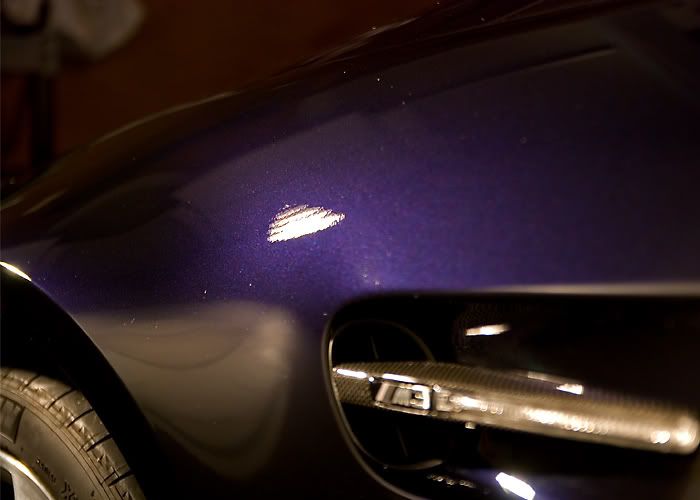 Before 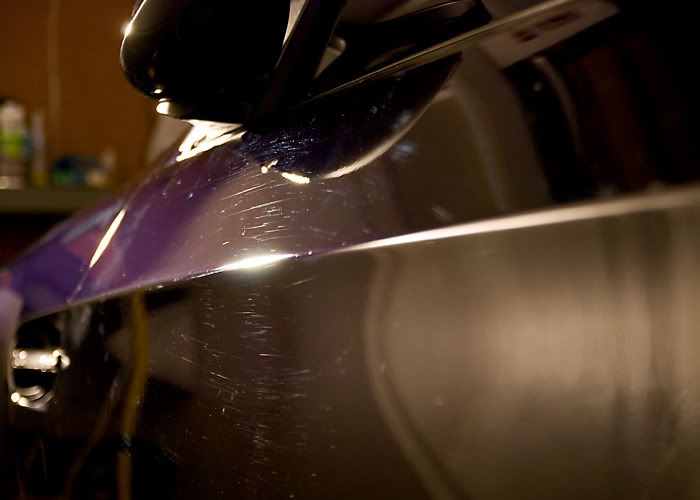 After(forgive me, until looking at the picture afterwards I realize I didn't wipe off all of the polishing residue which you can see close to the bottom right corner) 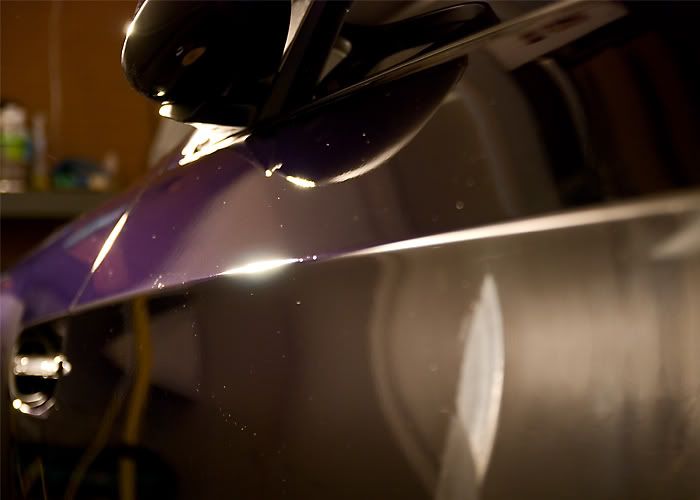 Driver's side done and looking very glossy already with no wax. Also I forgot to mention that I masked off trim with blue painters tape and was doing this as I went along. 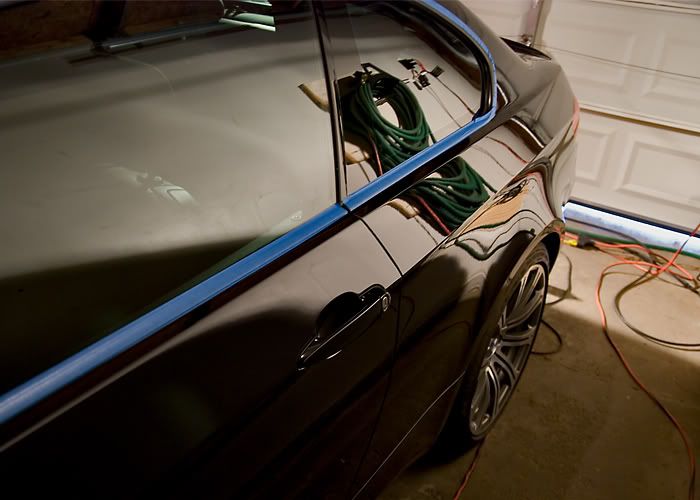 Before 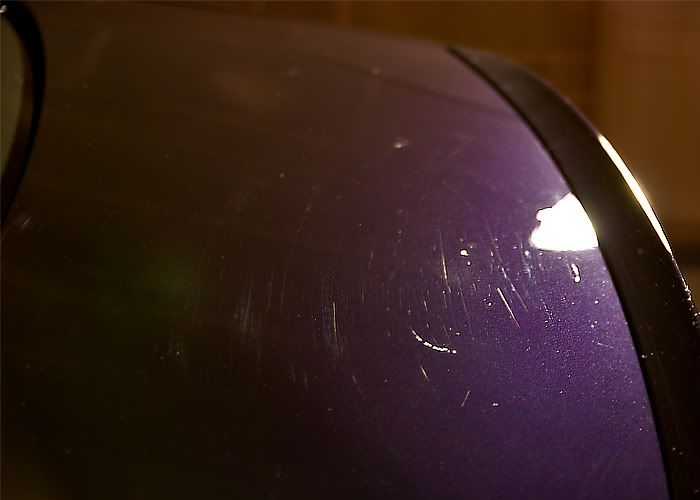 After 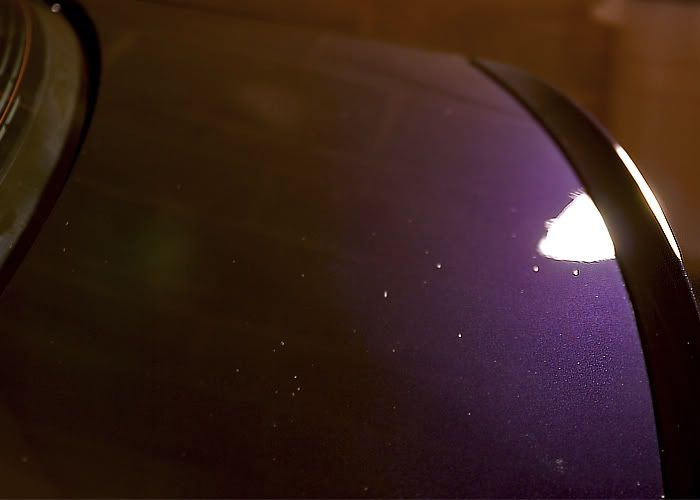 Before 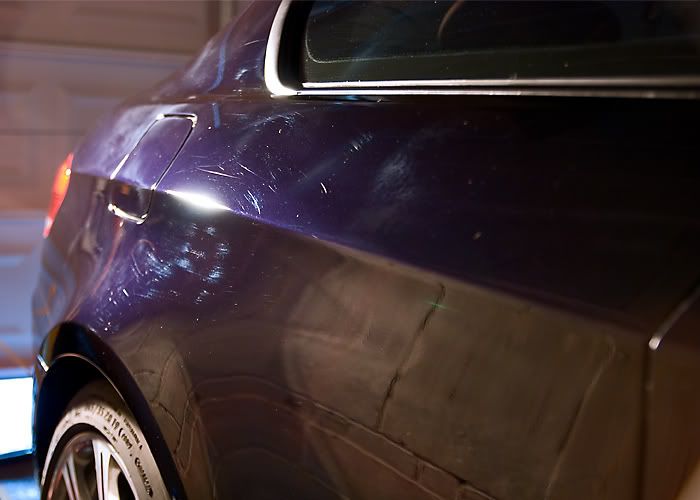 After 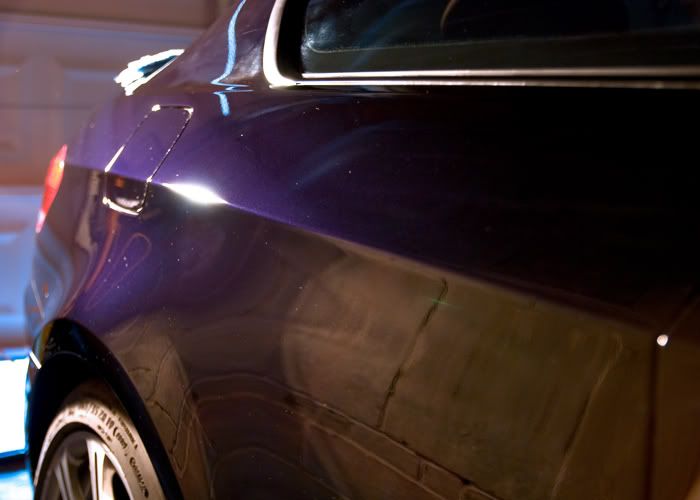 With the polishing finished I unmasked the car. 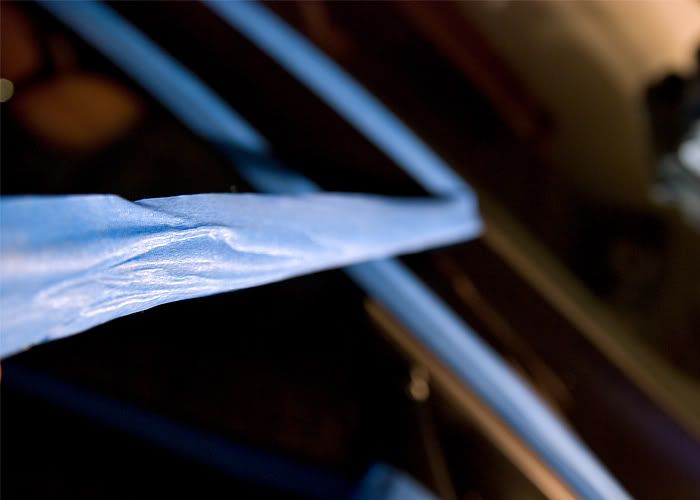 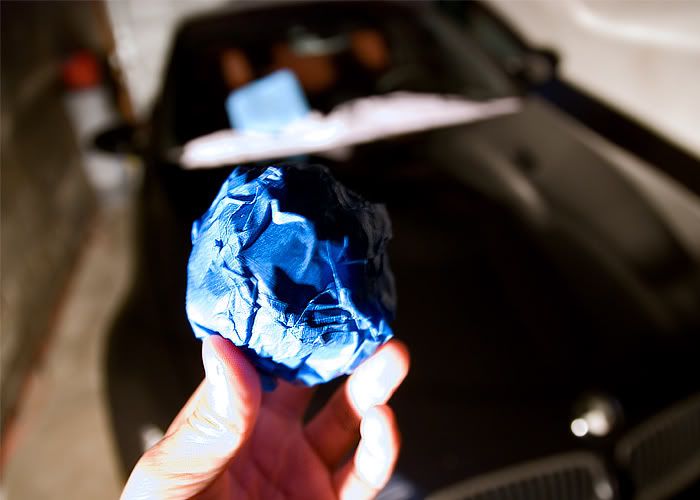 Cleaned off the polishing oils using IPA Alcohol cut 50/50 with water and a plush microfibre. 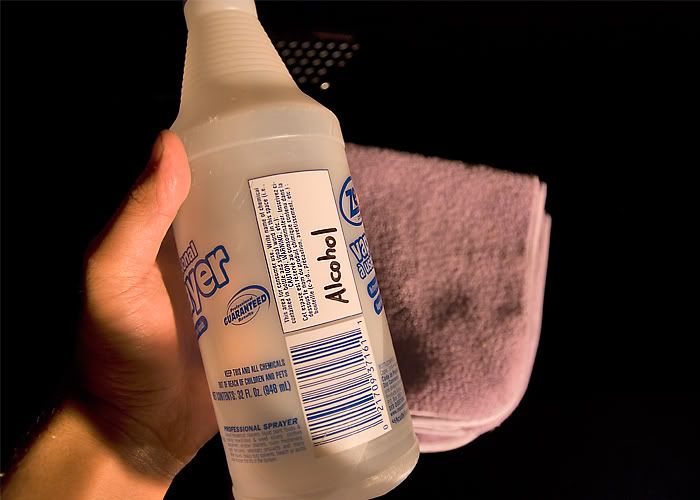 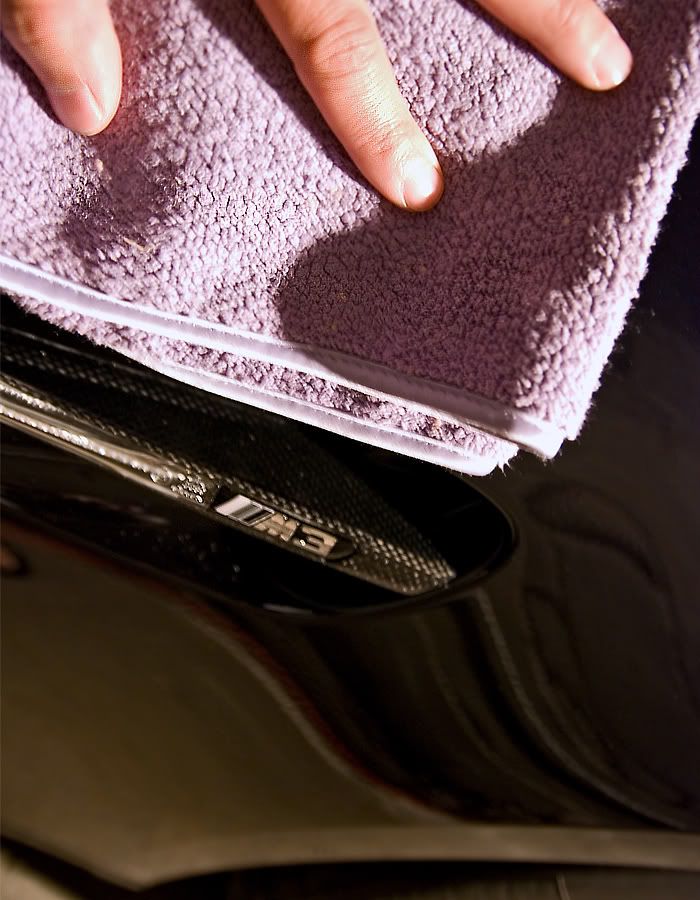 Checked over my work with my 3M Sun Gun which is 99.3% similar to the sun.  Jerez Black looking like how it's suppose to look... perfect. 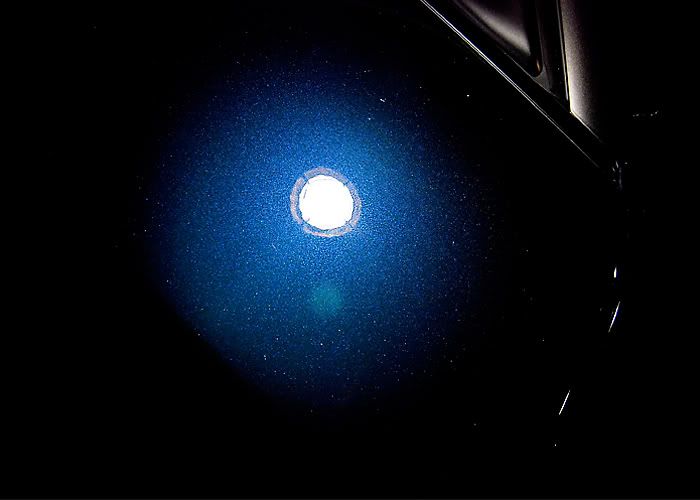 Protected the finish with Swissvax Concorso wax. 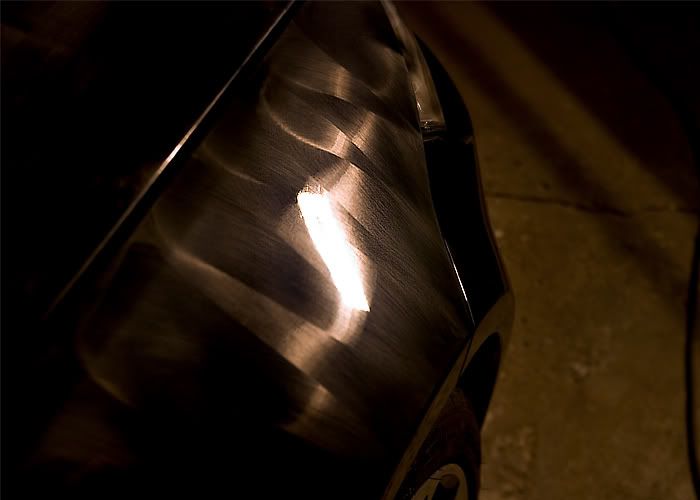 While the wax was curing I dressed the tires with Blackfire Long Lasting Tyre Gel and cleaned the windows with my Glass master Pro and the new Stoners Invisible Glass with rain repellant. And now the eye candy. Clean Akrapovic Exhaust. 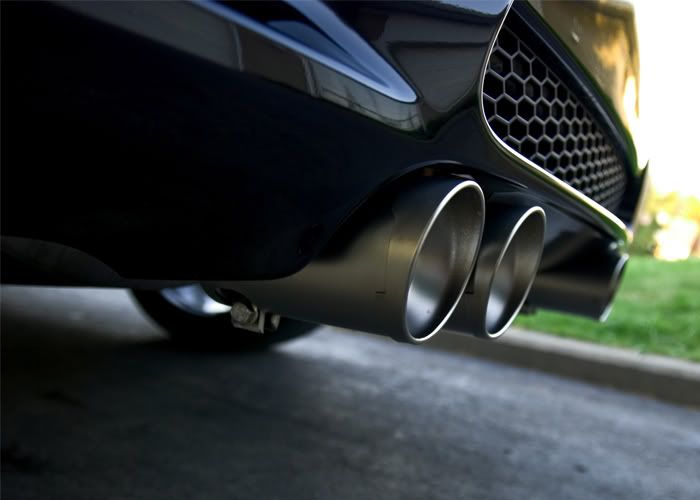 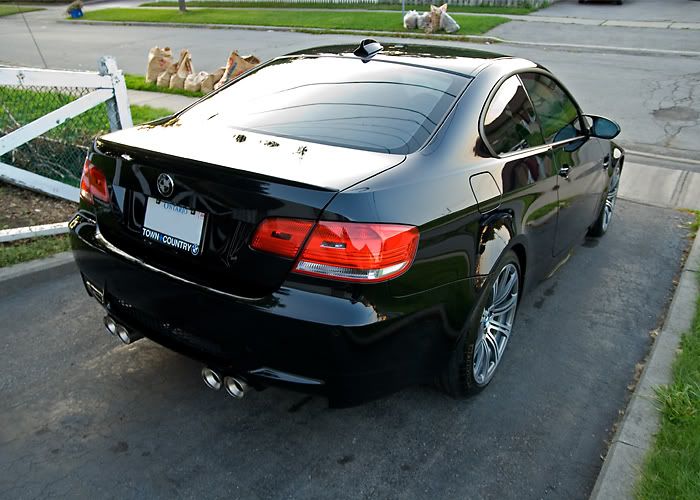 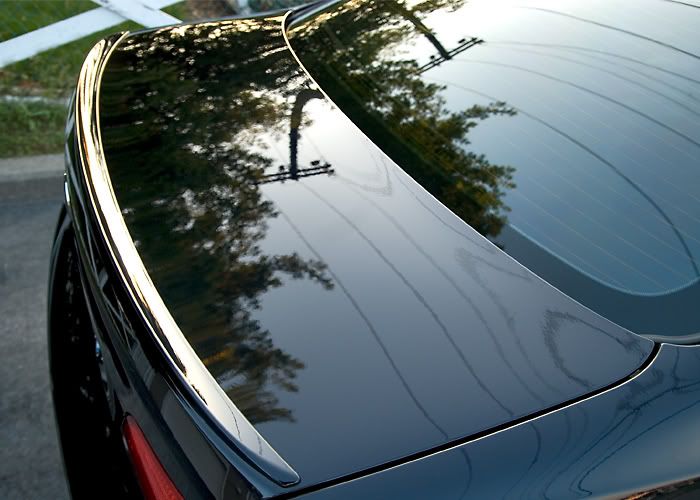 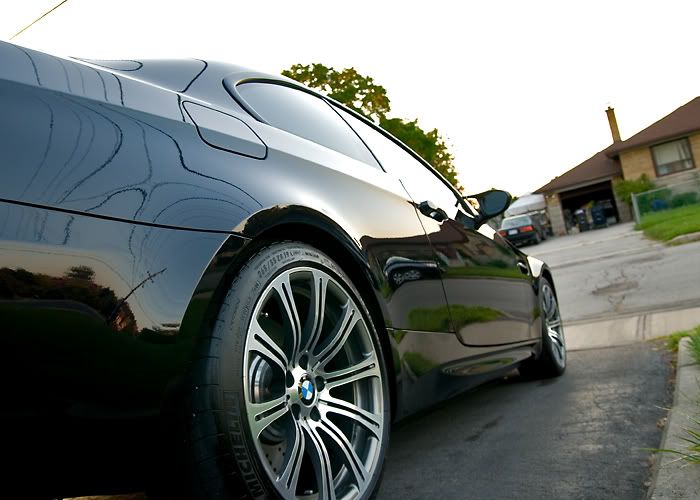 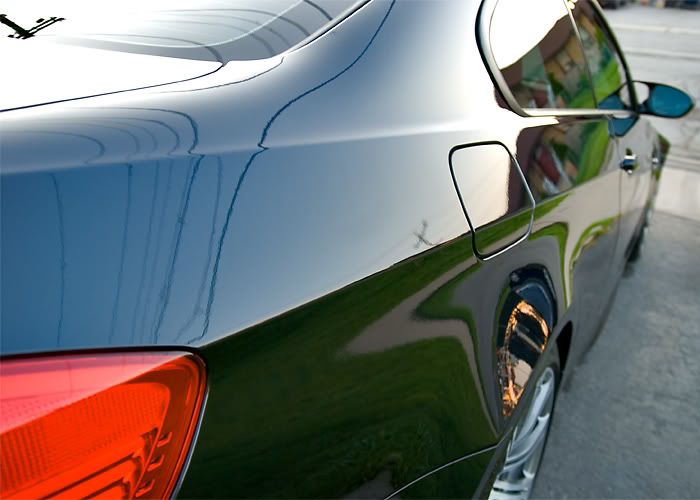  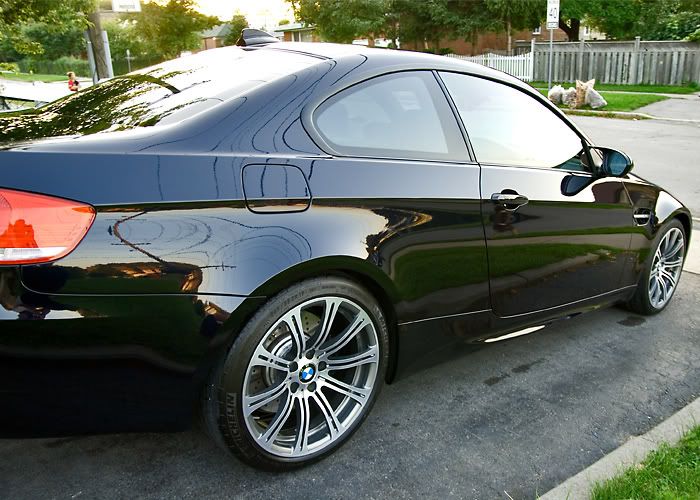  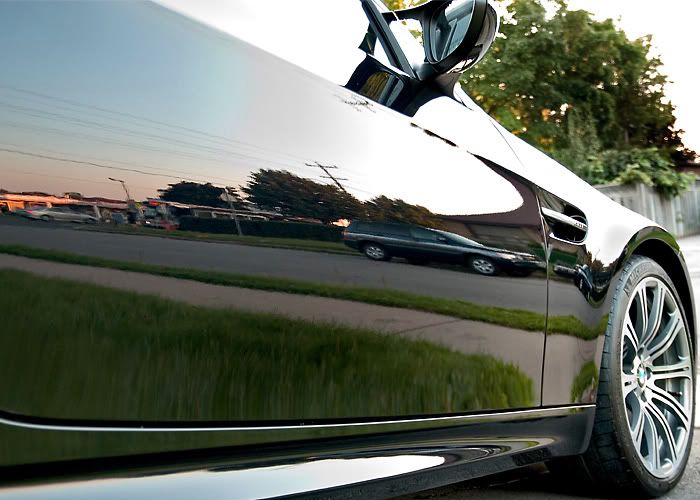 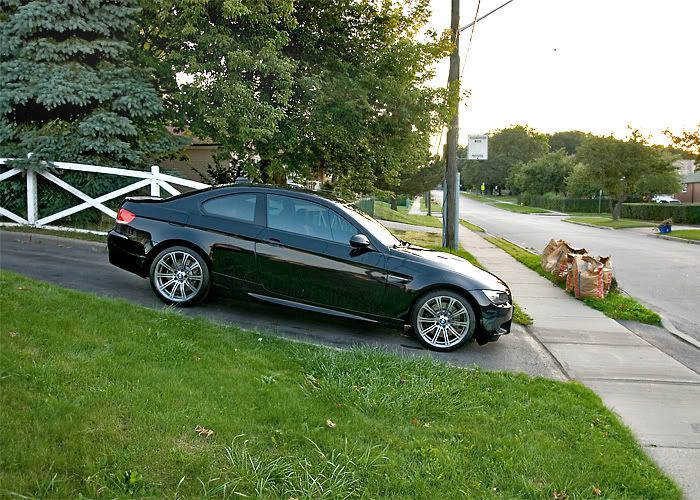 Reflection shot on the carbonfibre roof. 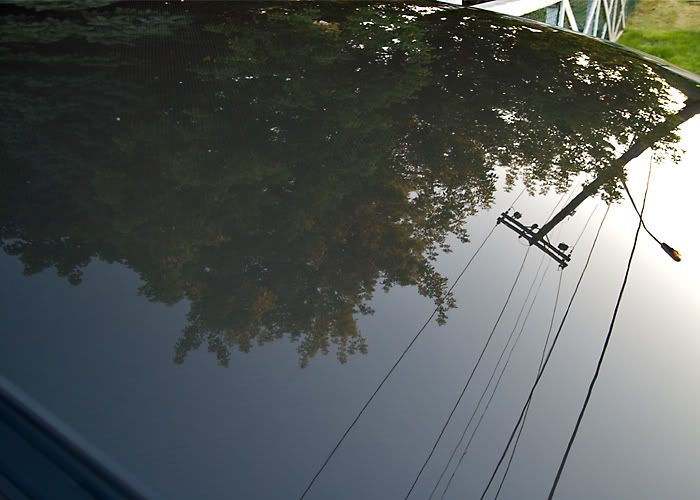 Closer shot of the weave. 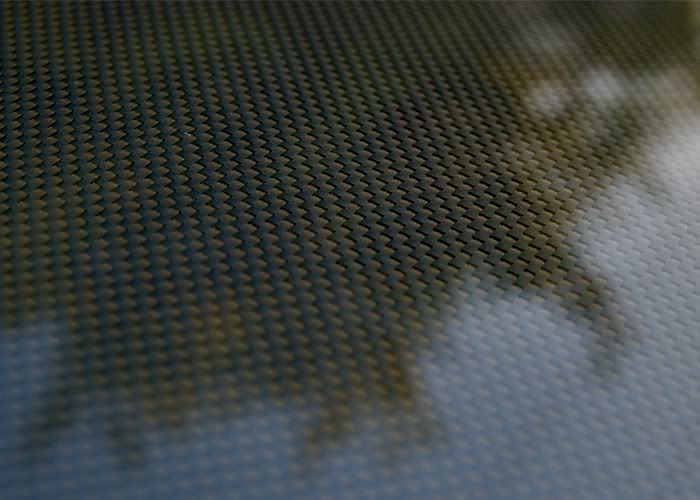 Carbonfibre side grills 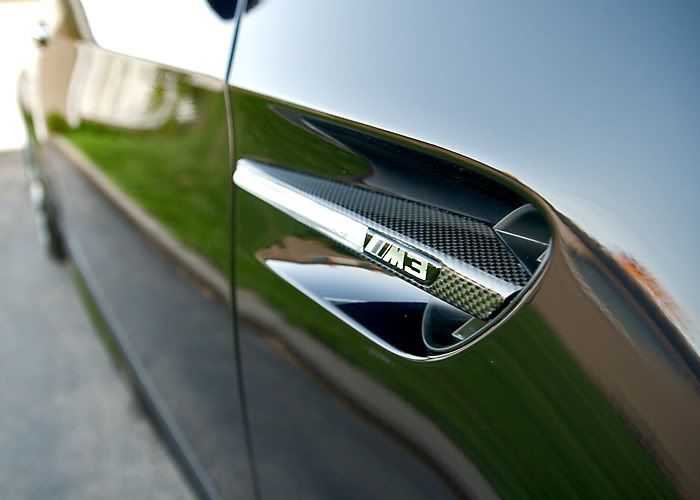 lol, I'm trying to be artsy fartsy with this shot.  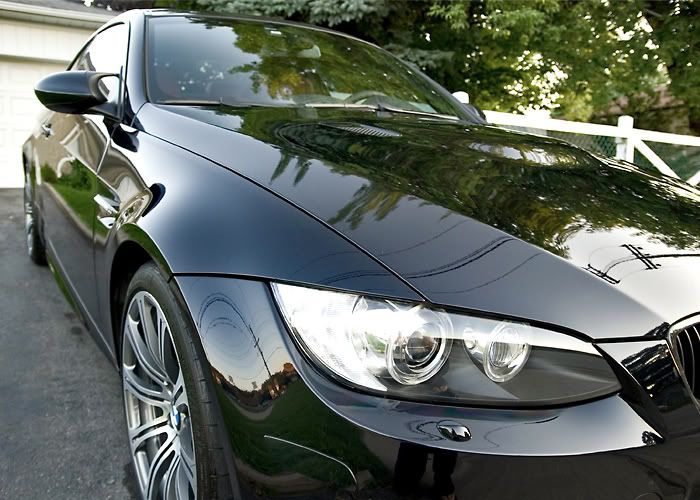 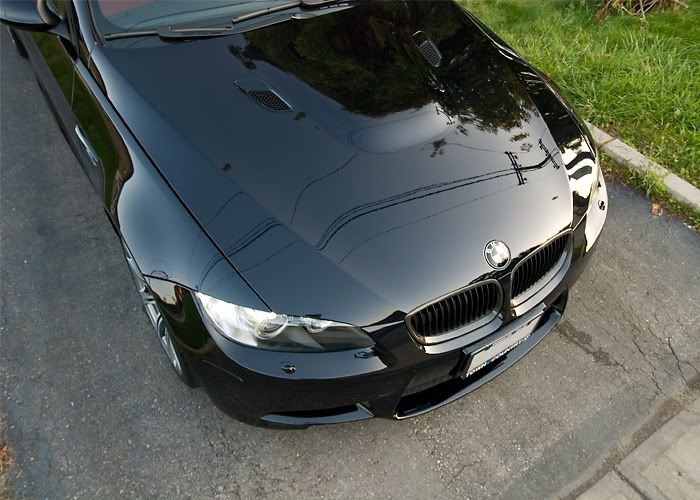 lol pt.2, there is no purpose to this shot I'm just trying to be artsy fartsy again. Ruji eat your heart out Wes_R is coming. 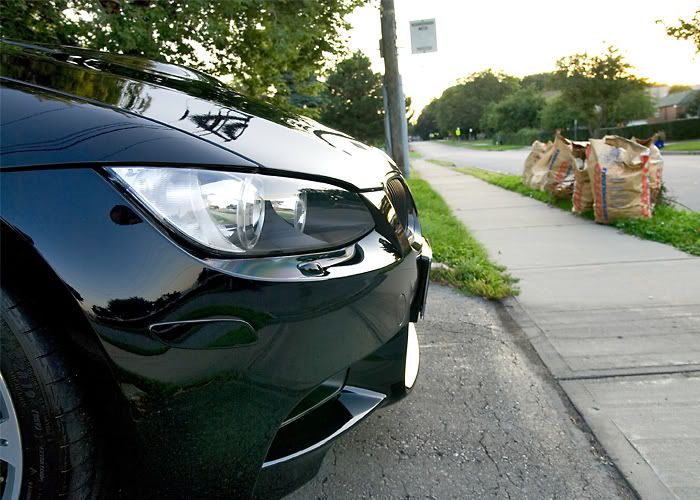 Carbonfibre front grill and didn't take pics of it but carbonfibre emblems also. 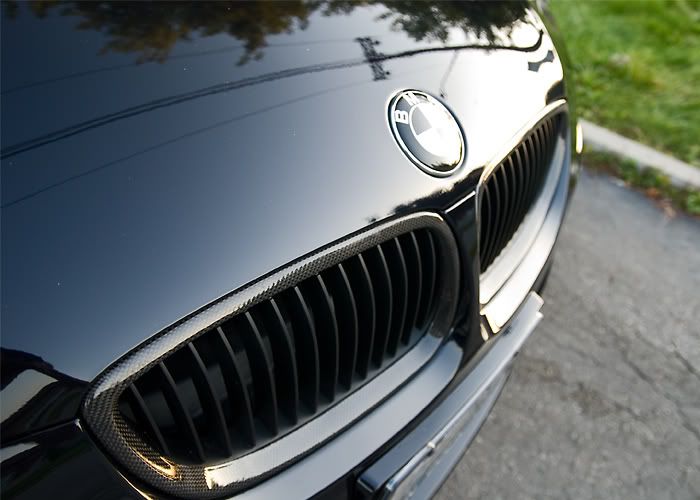 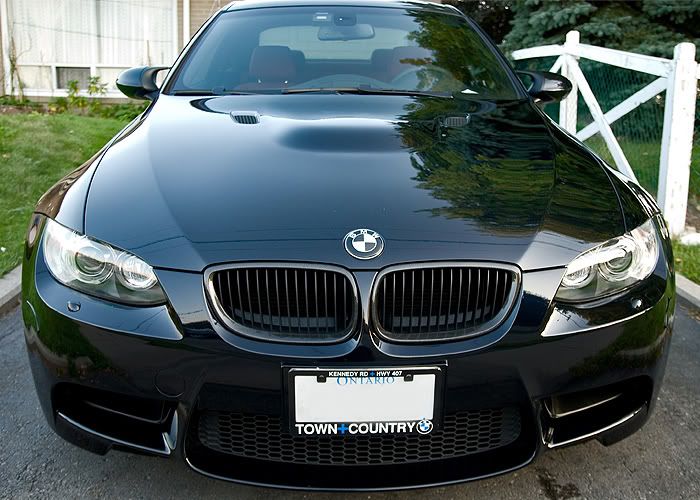  Another shot of the hood which I thought looked really cool. 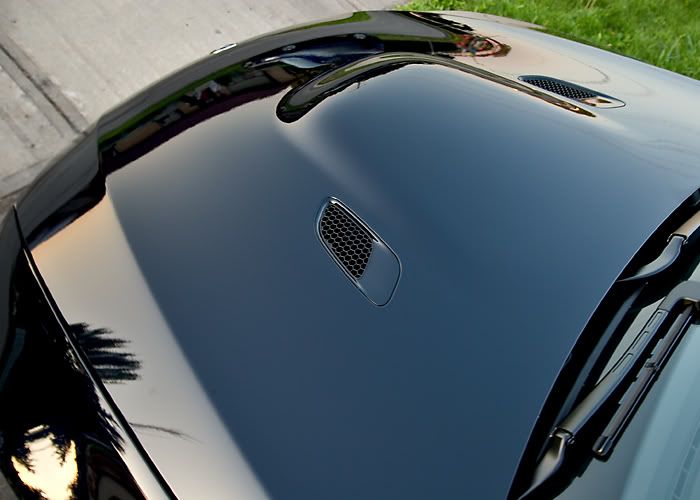 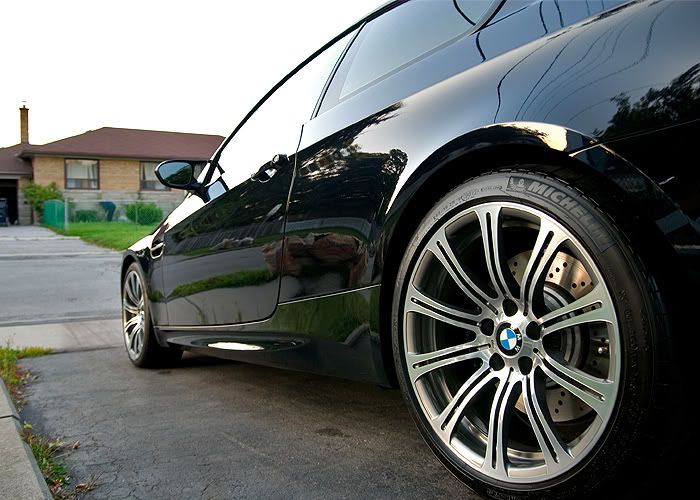 And another shot of the roof which I also thought looked really cool. 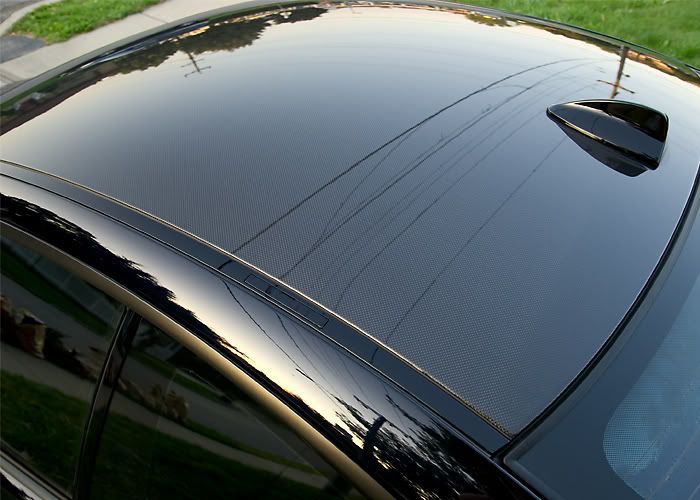 And to complete the the full 360 walk around, the last pic. 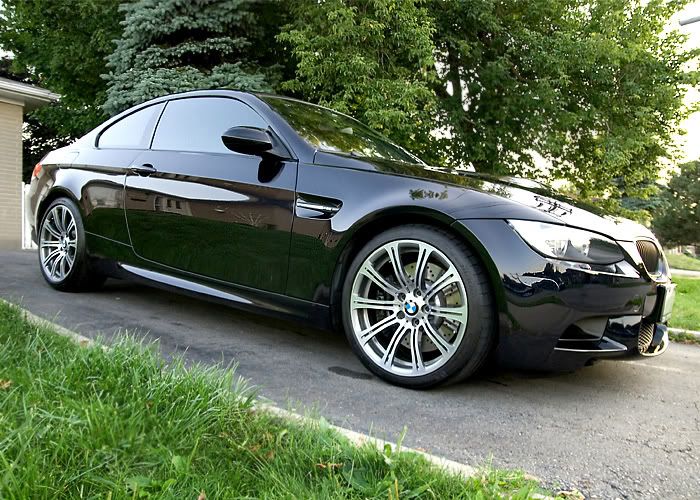 Thank you for reading I hope you enjoyed it  Cheers, Cheers,Wes |
|
Appreciate
0
|
| 07-02-2013, 09:15 AM | #8 |
|
Major

24
Rep 1,077
Posts |
Wes does great work and his location is very convenient for those of us who live in the City of Toronto.
__________________
March-November - '09 C4S (PDK, Akrapovic)
December-February - '00 323 (only mod - snow tires) |
|
Appreciate
0
|
| 07-02-2013, 01:03 PM | #9 | |
|
Brigadier General
416
Rep 3,051
Posts
Drives: 2009 BMW 335d
Join Date: Jan 2012
Location: Toronto, ON, Canada
|
Quote:
 |
|
|
Appreciate
0
|
| 07-04-2013, 10:23 PM | #10 | ||
|
Banned
11
Rep 47
Posts |
Quote:
Quote:
|
||
|
Appreciate
0
|
| 07-04-2013, 10:24 PM | #11 |
|
Banned
11
Rep 47
Posts |
Here is a mini write up on a 993 Turbo we prepped for sale. This was a 1 Stage Polish + Interior Shampoo & Leather Cleaning & Conditioning that costed $400.
before 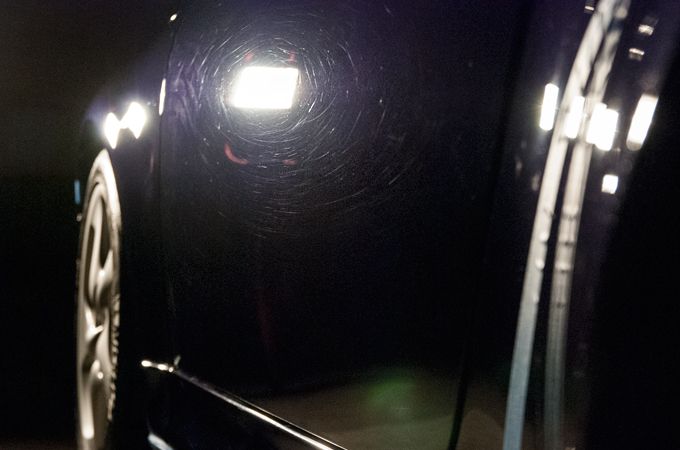 after 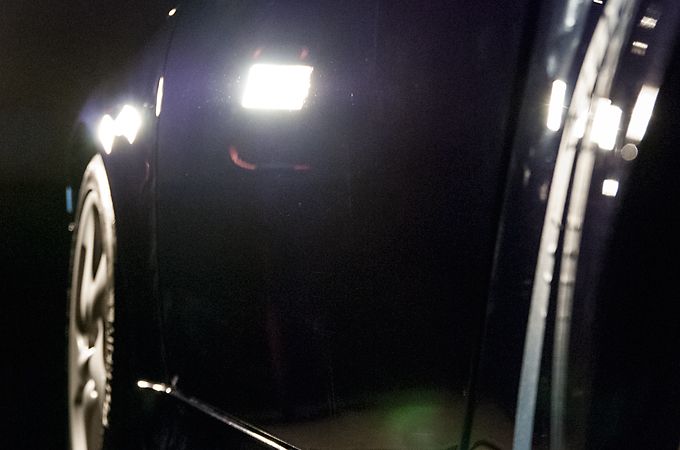 50/50 cleaning on the leather. Left side is still dirty/Right side is clean 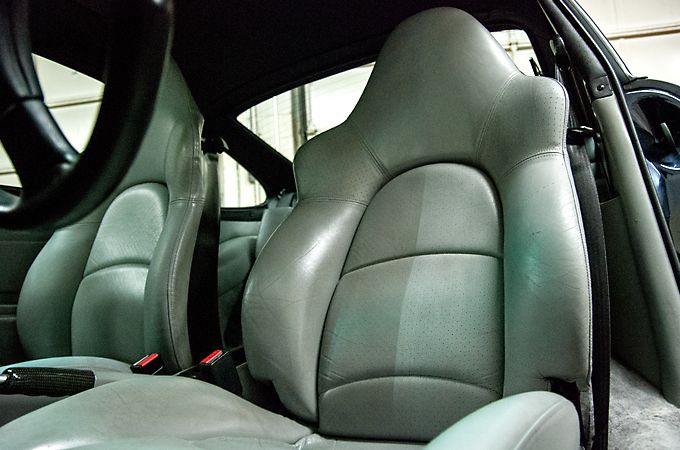 afters interior 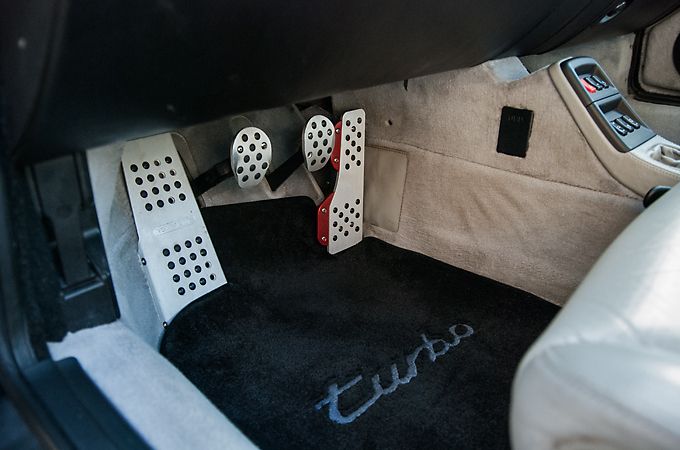 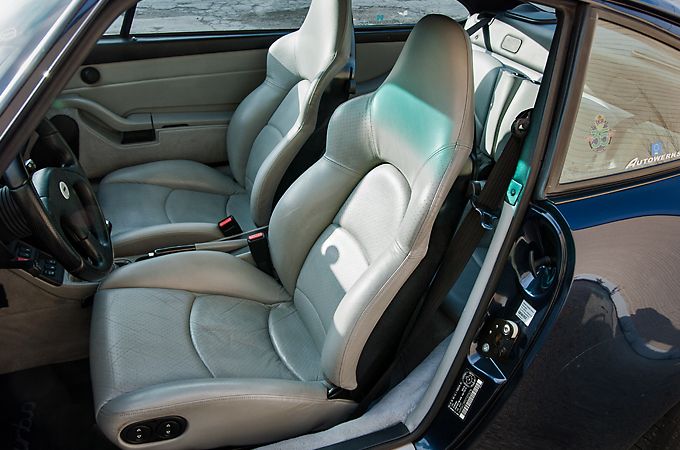 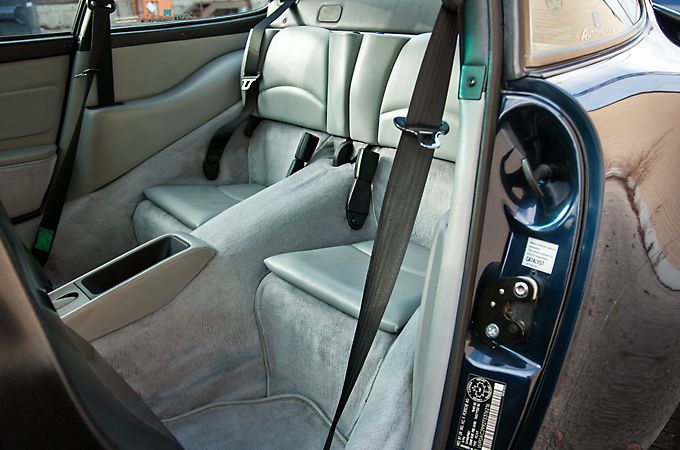 afters exterior  check out that clean exhaust!!!  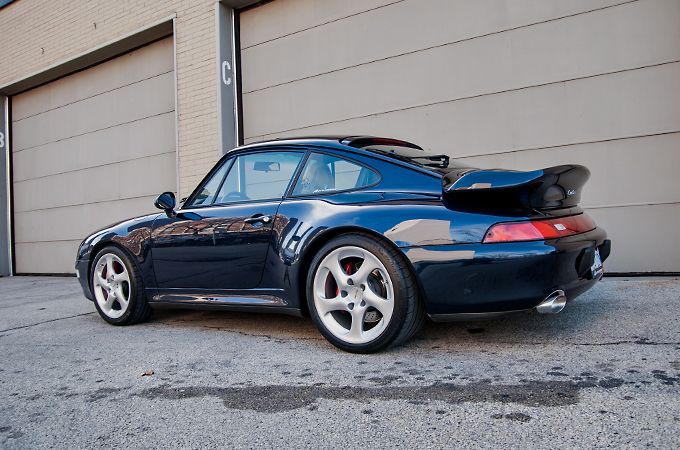 Last edited by Wes@Orion; 07-05-2013 at 01:58 AM.. |
|
Appreciate
0
|
| 07-12-2013, 09:39 PM | #13 |
|
Brigadier General
416
Rep 3,051
Posts
Drives: 2009 BMW 335d
Join Date: Jan 2012
Location: Toronto, ON, Canada
|
 Those are my boys Wes. Treat them well man. |
|
Appreciate
0
|
| 07-15-2013, 10:47 PM | #14 |
|
Brigadier General
416
Rep 3,051
Posts
Drives: 2009 BMW 335d
Join Date: Jan 2012
Location: Toronto, ON, Canada
|
Just picked up my car a few hours ago from Wes. Him and his crew did a great job on my car. They take their time to get the job done right and as I mentioned before, very meticulous and thorough.
Thanks again Wes.  |
|
Appreciate
0
|
| 07-21-2013, 08:29 PM | #16 |
|
Banned
11
Rep 47
Posts |
Orion x GT3 RS (89 pics)
Hey Bimmerposters,
I got a call back in Dec. regarding this Orange RS and the owner stating that he wanted to give it a "freshen up" and good protection as it was a daily driver and had never been detailed since he took ownership. We discussed what it may need and figured out a date. Upon arrival it turned out I knew the owner and we had gone to school together. Small world! Anyways again on to the write up hope you guys enjoy seeing the process! First off the initial walk around 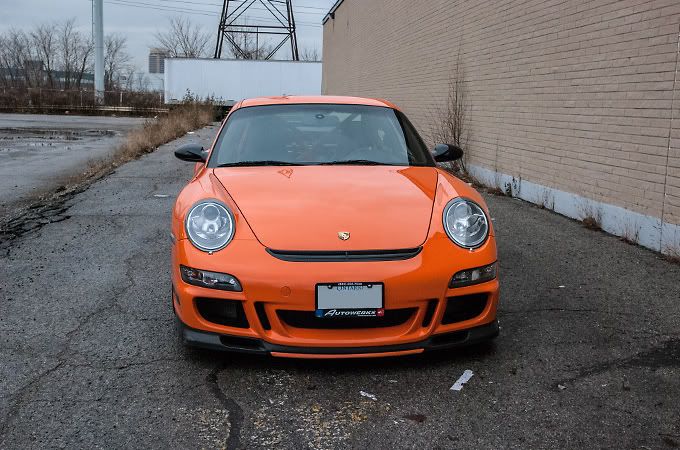 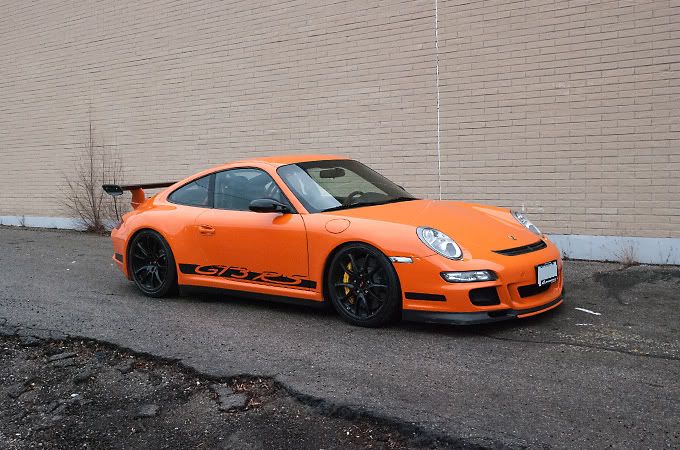 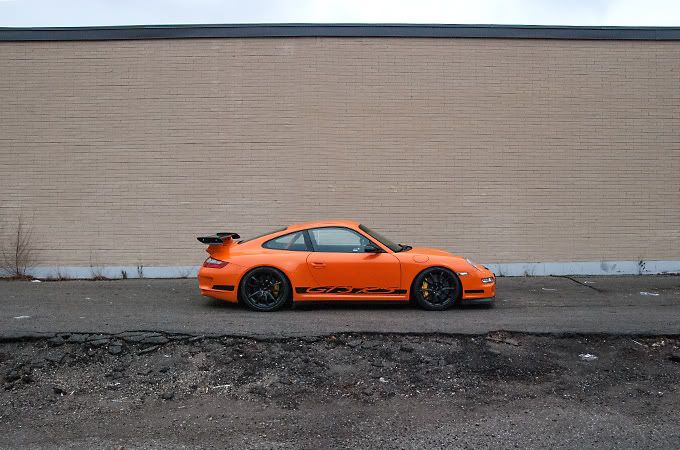 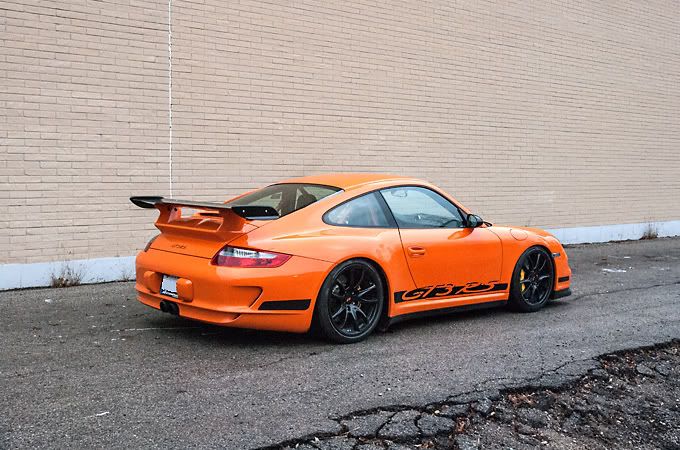 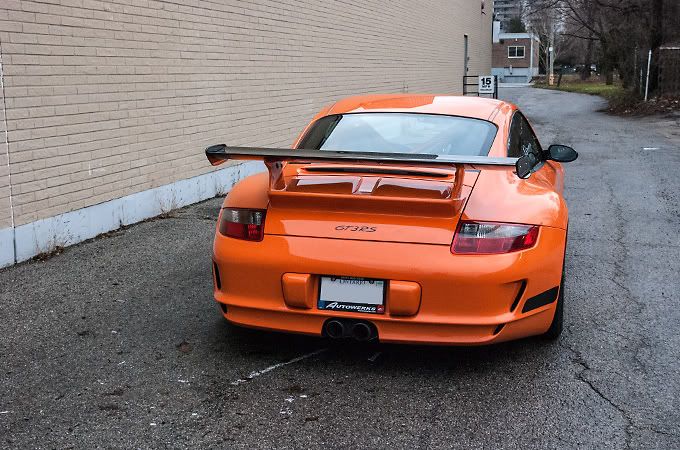 Brought it in to the garage and started cleaning the wheels first Starting with the inner barrel 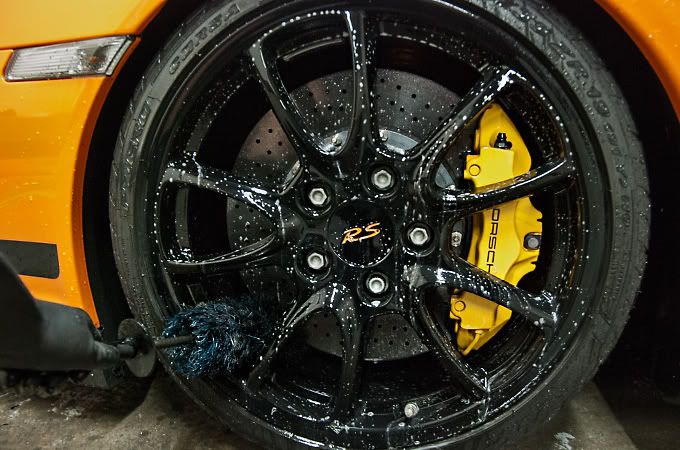 Lugnuts and calipers 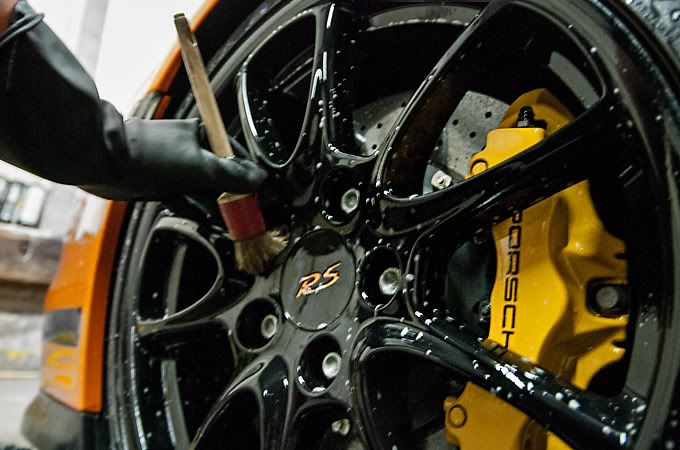 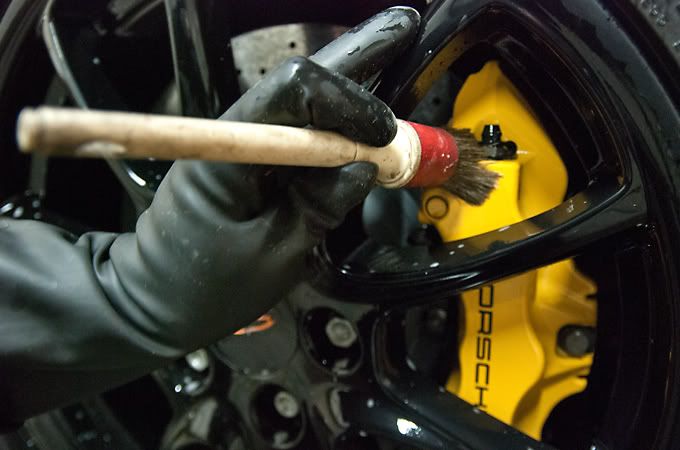 and rimface 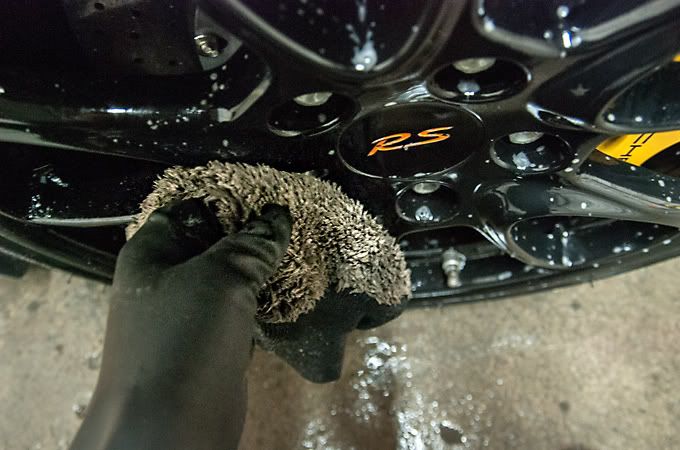 Moving on to the exhaust, steel wool was used to clean the outside and inside. Lol, free advertising for Courtney 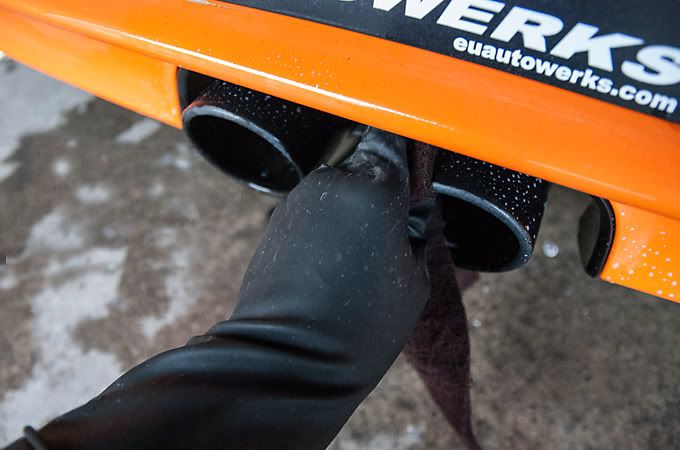 All clean 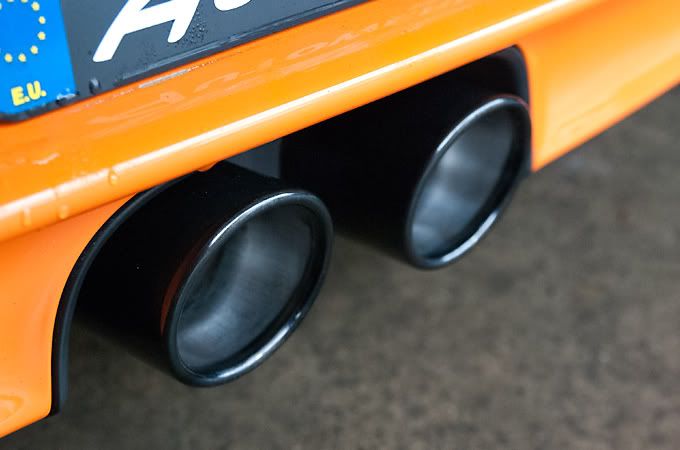 Engine also got a quick shampoo and dressing Before  After 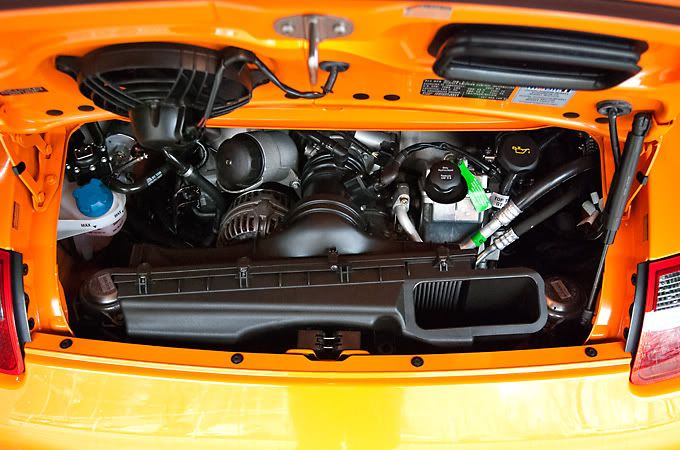 Finally after all the prep now we can start washing the car starting with the rinse 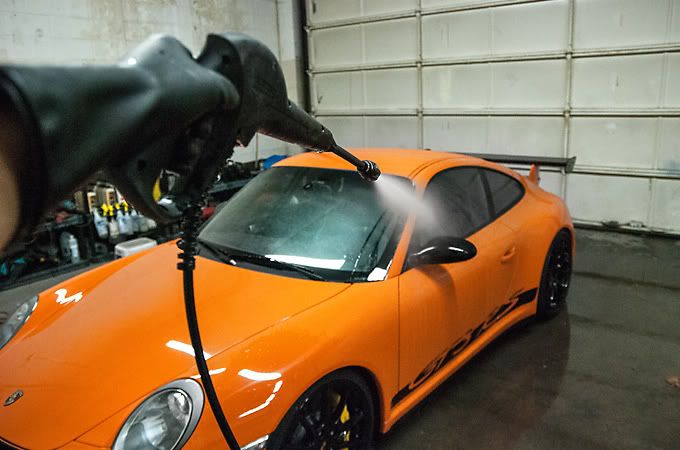 Cars are always washed using the 2 Bucket Method. If you are not familiar with the 2 Bucket Method, in a nutshell it is basically 2 buckets, one water only, the other soap. The water only bucket is where you rinse off the dirt from your mitt before placing it back in the soap water thus eliminating the potential to drag dirt all over your paint and causing swirls. This is the dirt from a previous car. You definitely don't want to be dragging this all over your paint. Also notice the bucket with the sponge is pretty much clean 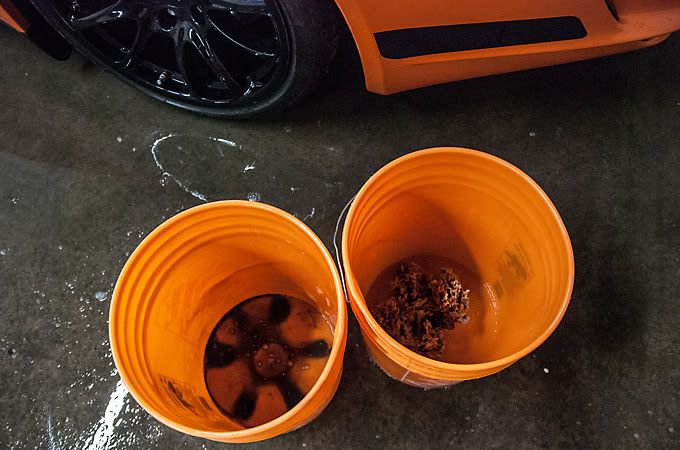 Rinsed out and new soap and water 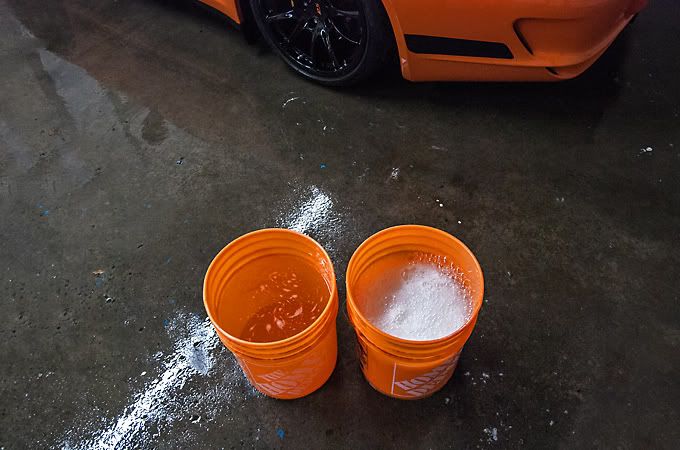 Washing panel by panel starting with the roof 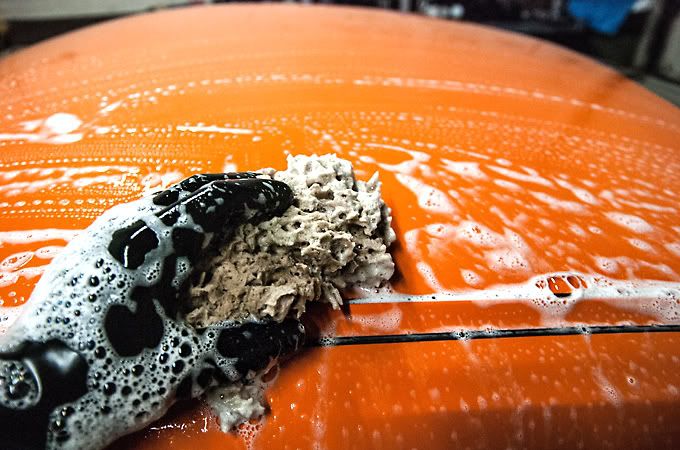 And rinsing off the dirt 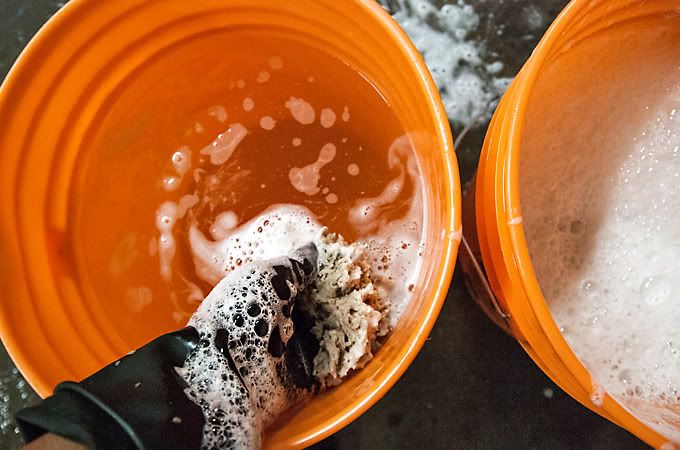 Other details taken care of  After rinsing the soap off while the car was still wet I began to clay the paint to remove any embedded dirt in the clearcoat 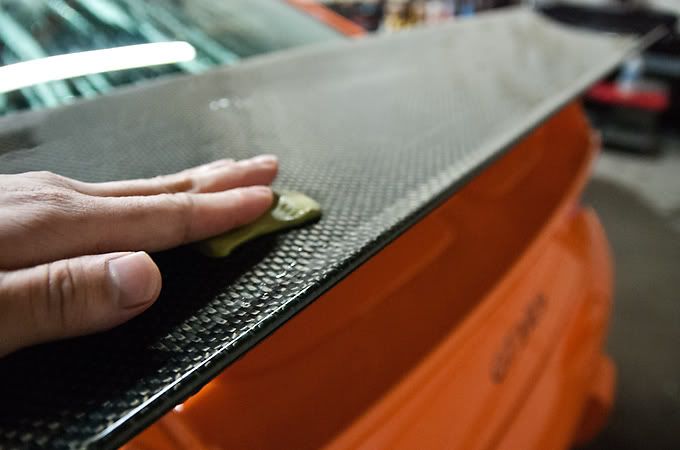 Pretty rough  Finally began to dry it off with a microfibre towel 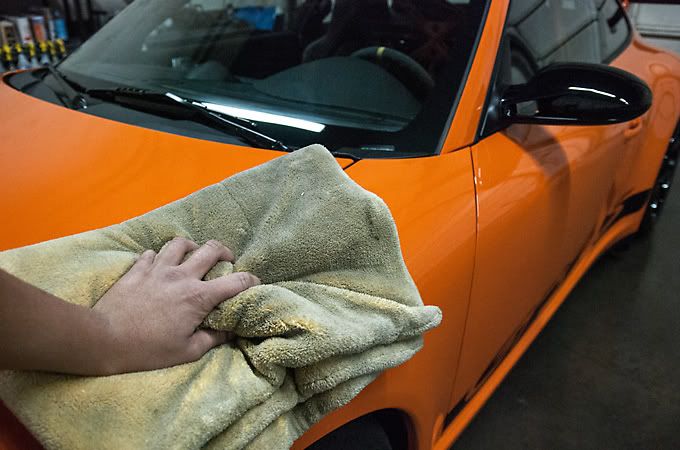 All rubber trim was masked off 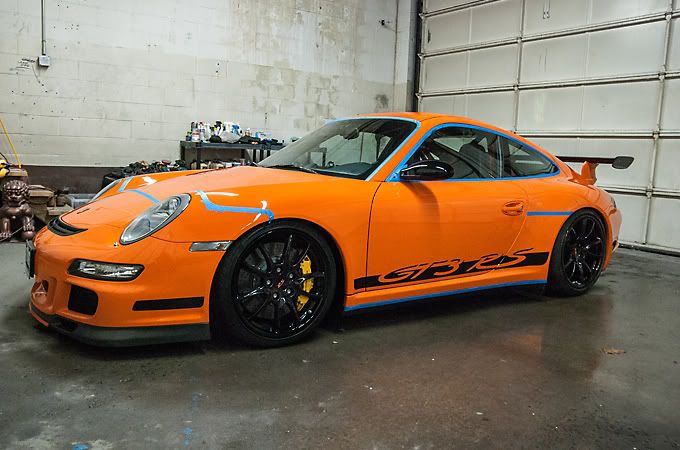 Paint measurements were taken in microns to look for any low spots to be careful of and to see if anything had been repainted that the owner might not have been aware of 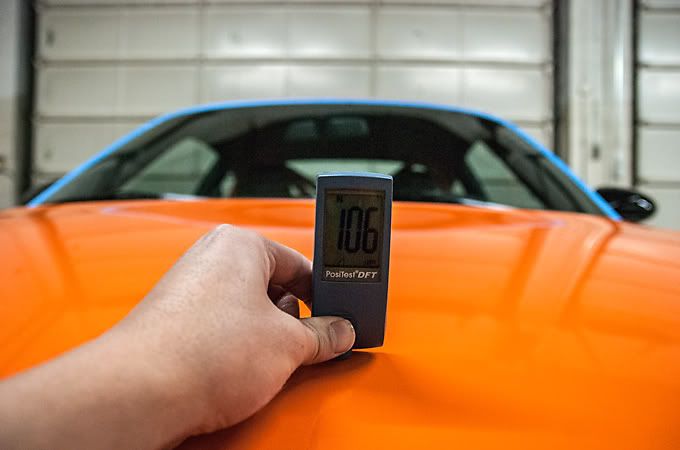  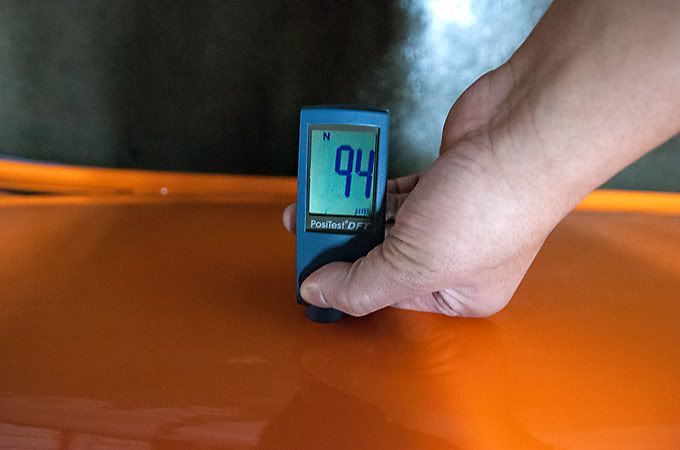 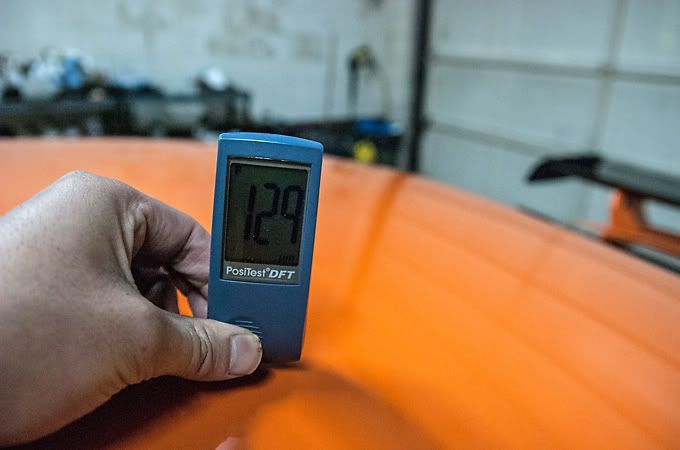 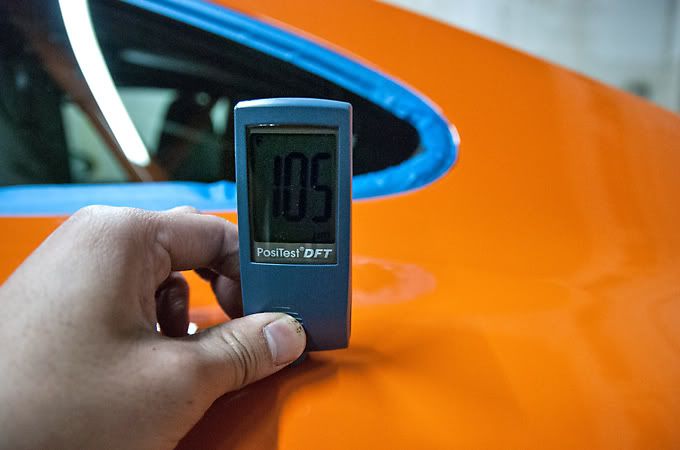 Finally the polishing can begin and a medium cutting polish and pad were used to clean up the swirls before  after 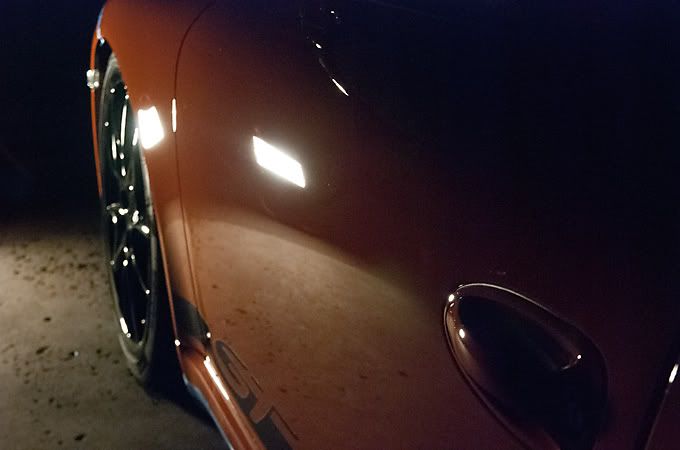 before 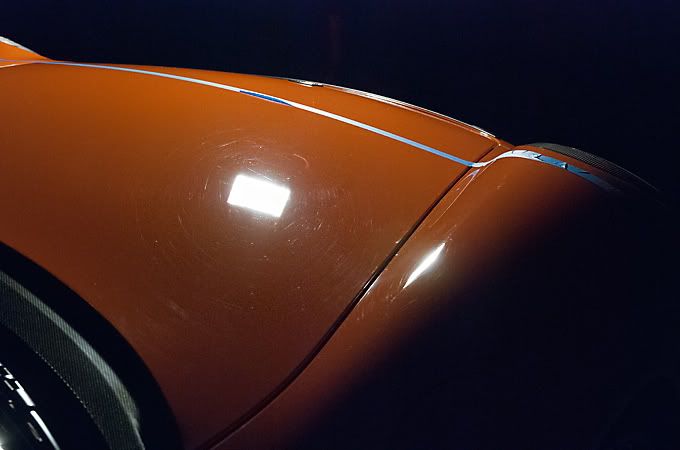 after 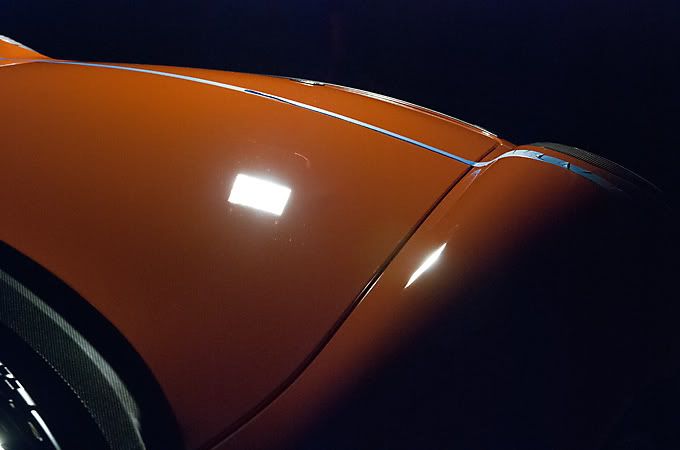 before  after 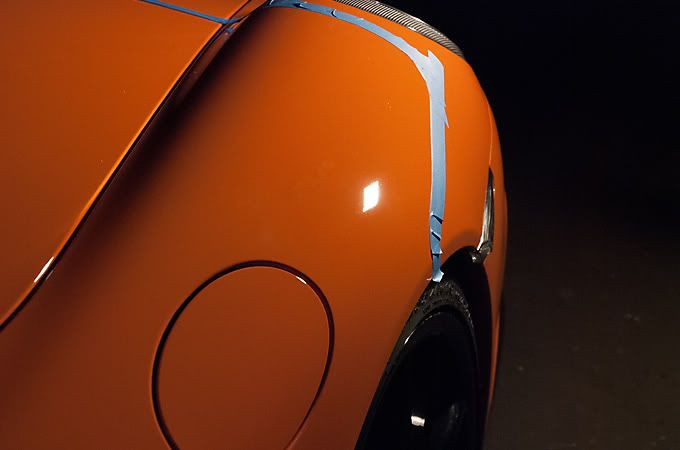 before 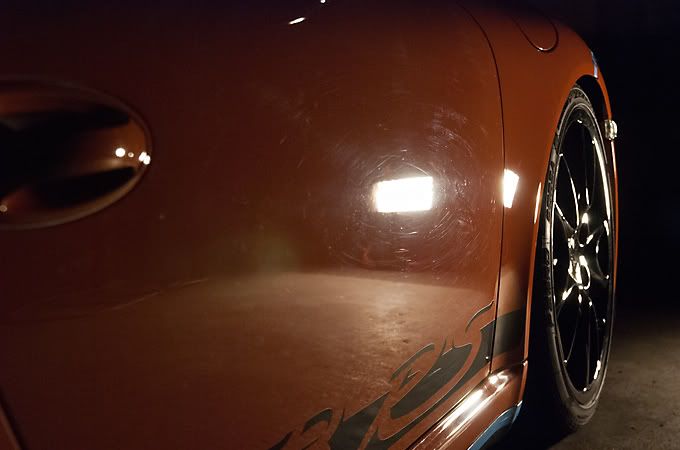 after 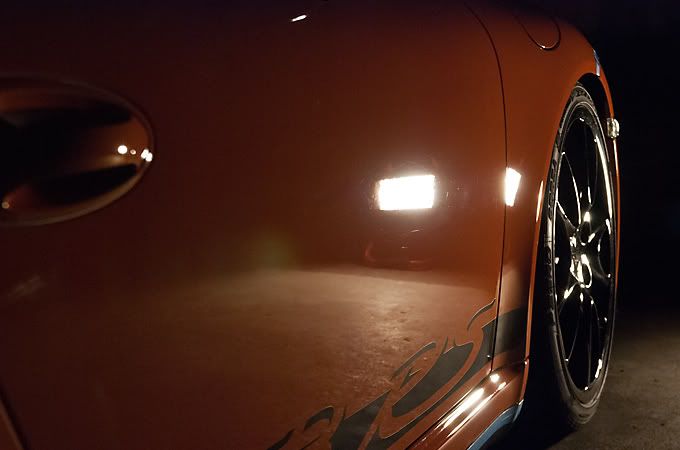 before 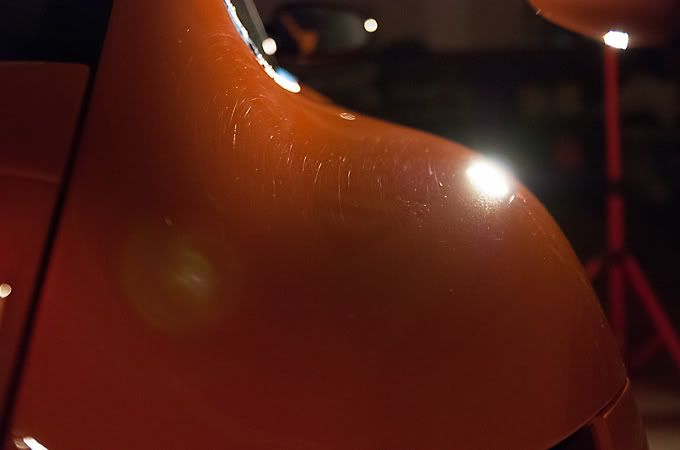 after 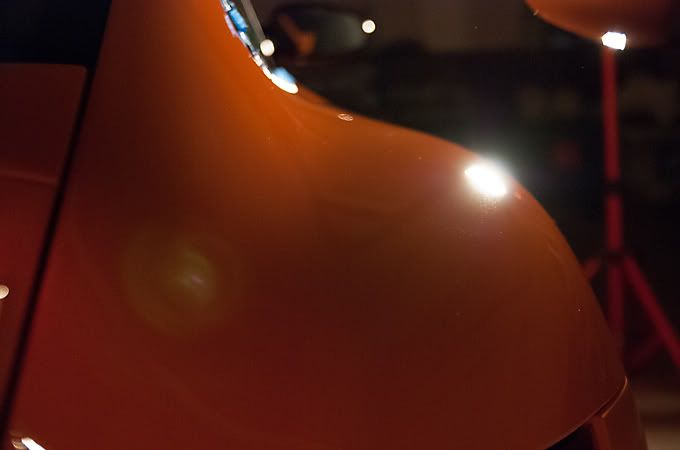 before 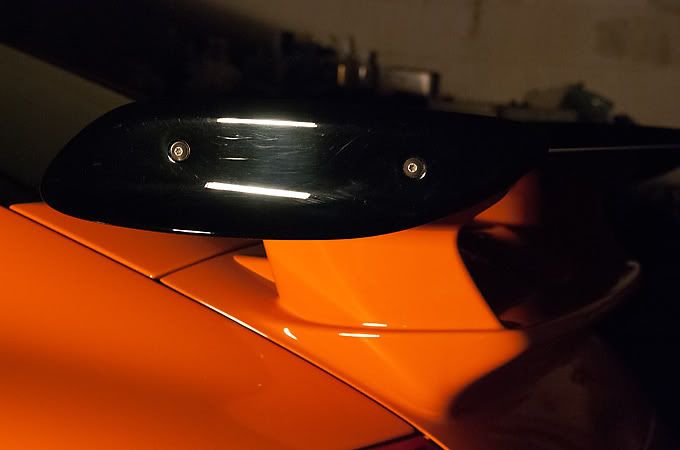 after 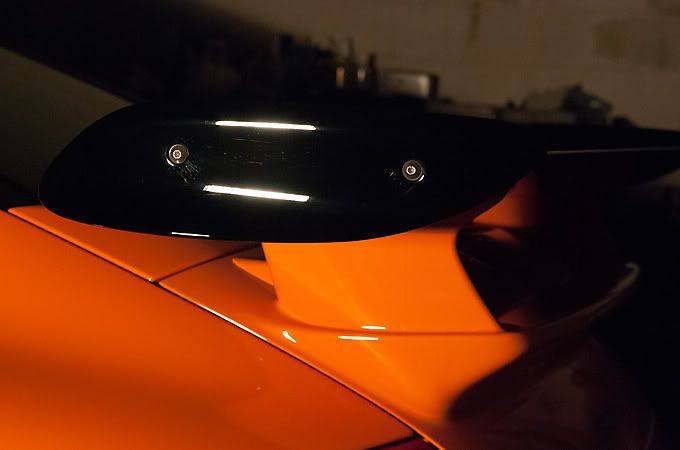 before 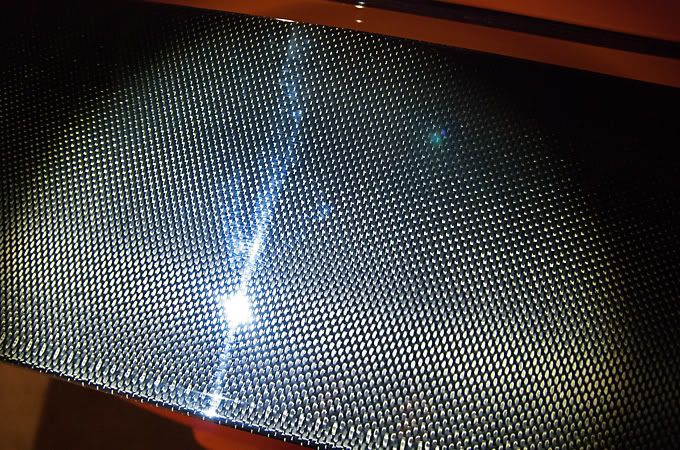 after 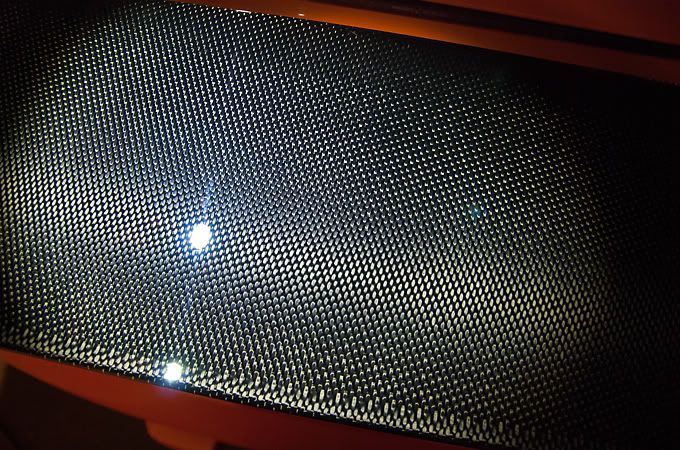 before 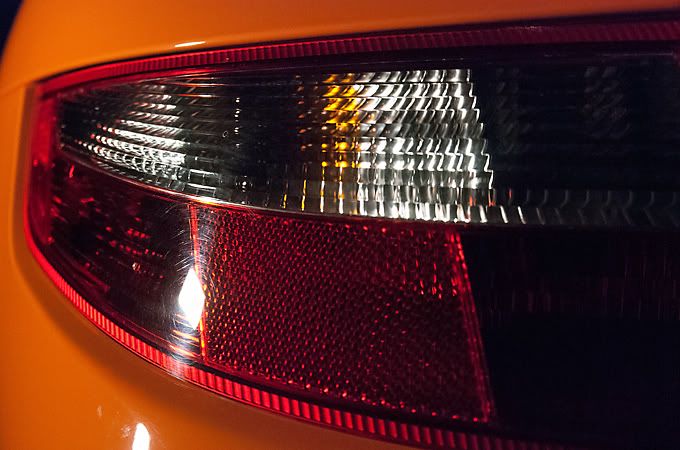 after 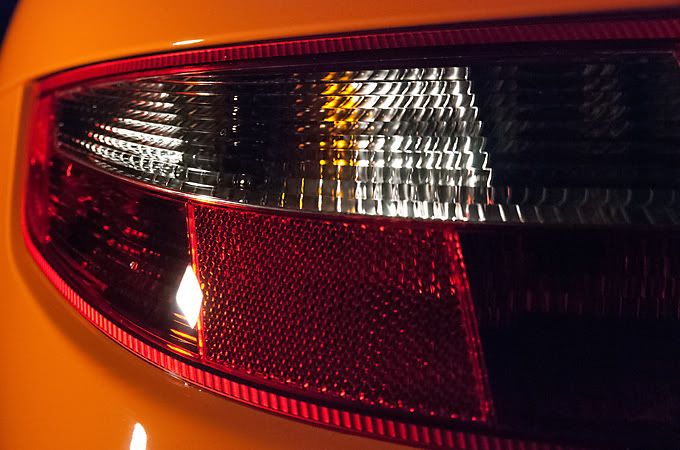 Here is a cool artsy fartsy shot of me polishing 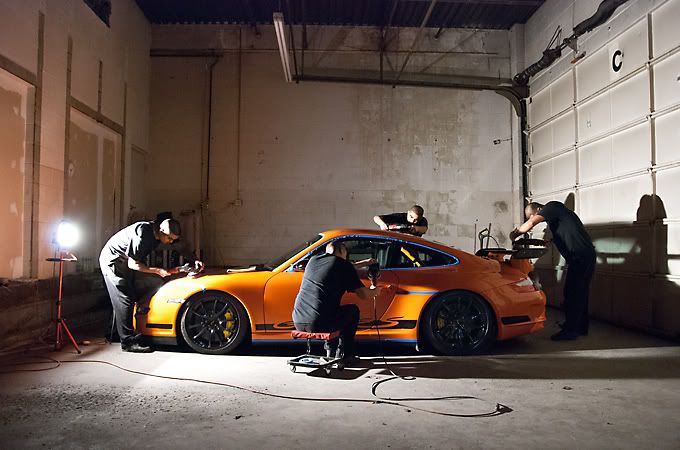 After the polishing was done the masking tape was removed 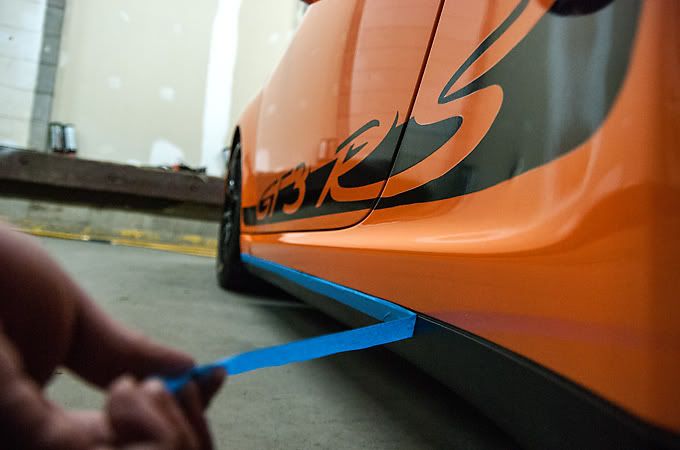 Then alcohol was brought out to wipe down the panels to remove oils left behind by the polish so that the wax could have a clean surface to bond to 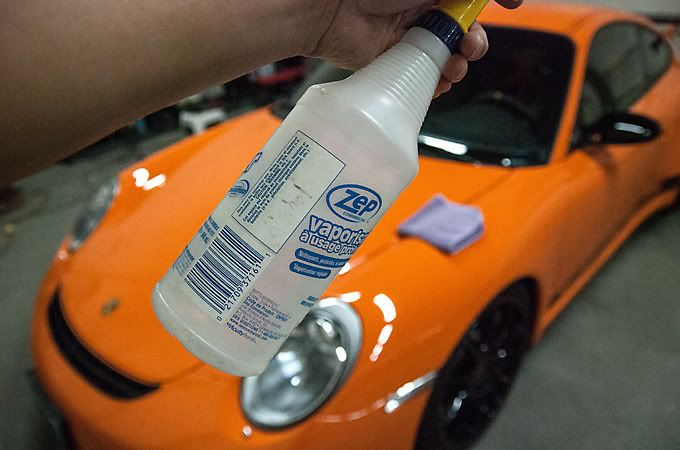 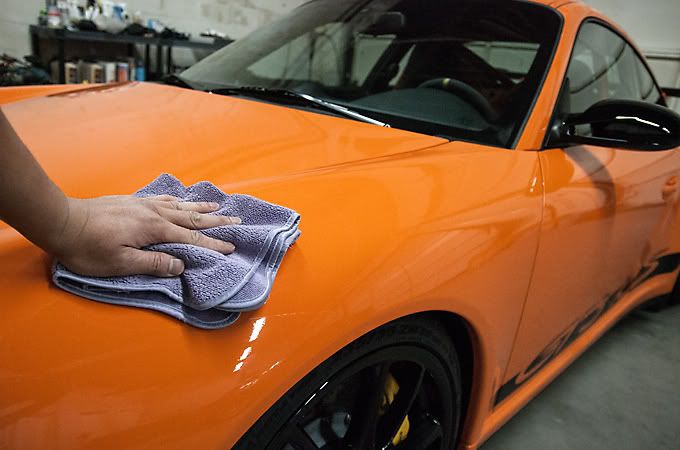 Here is a teaser of the shine achieved with no wax on yet 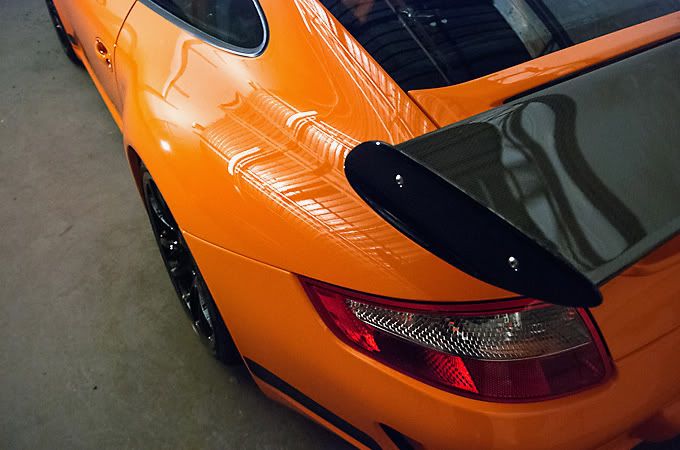 After the wipe down the panels were double checked with a special light that omits the same spectrum light as the sun 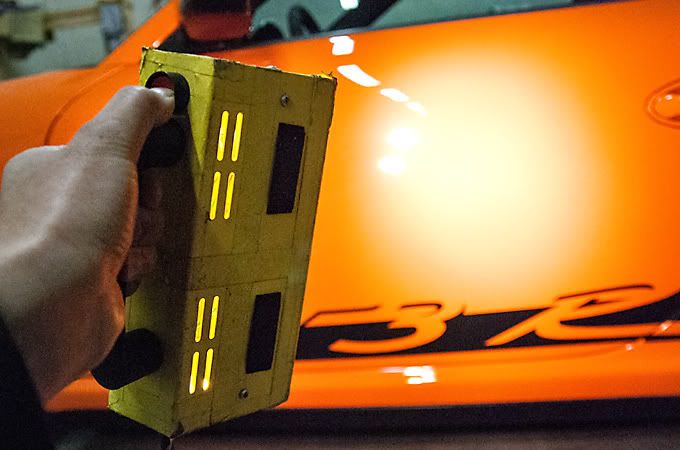 Perfect  Wax applied was Swissvax Concorso 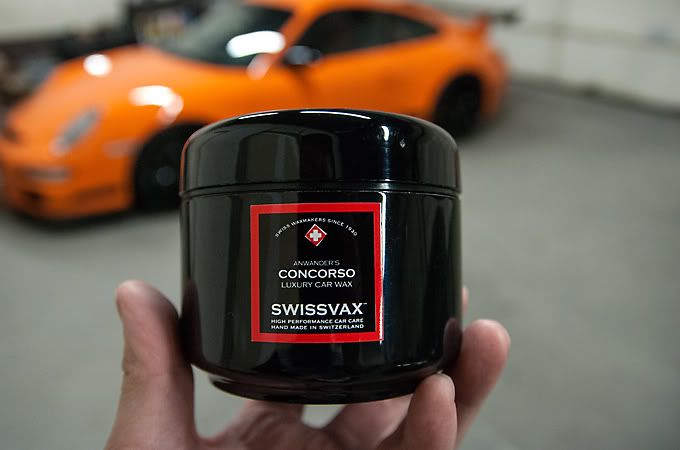 While the wax was curing the tires were dressed with a satin finish. Personally I don't really like the shiny stuff 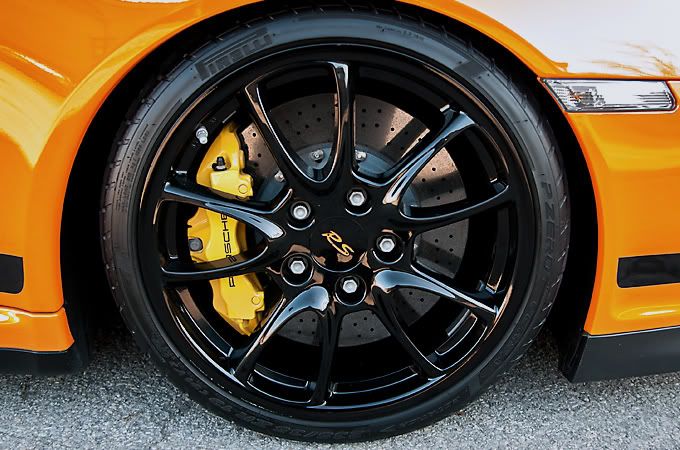 Starting now with the interior I began vacuuming 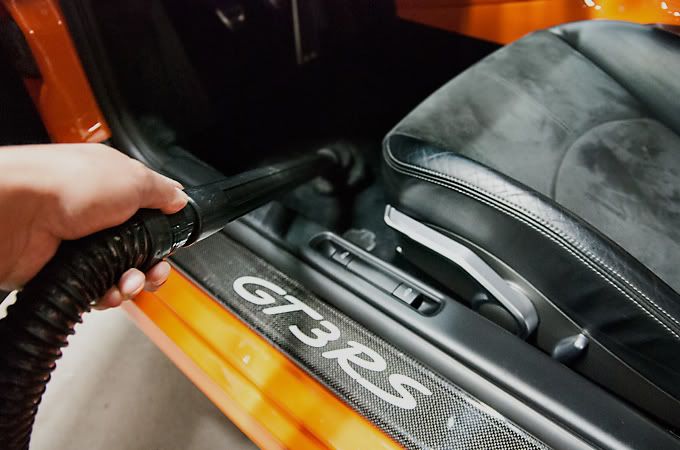 Getting in between the seats 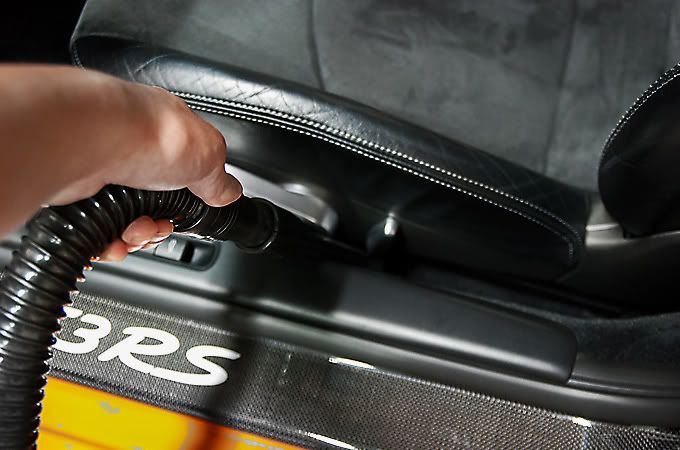 Started dusting the cracks and crevices 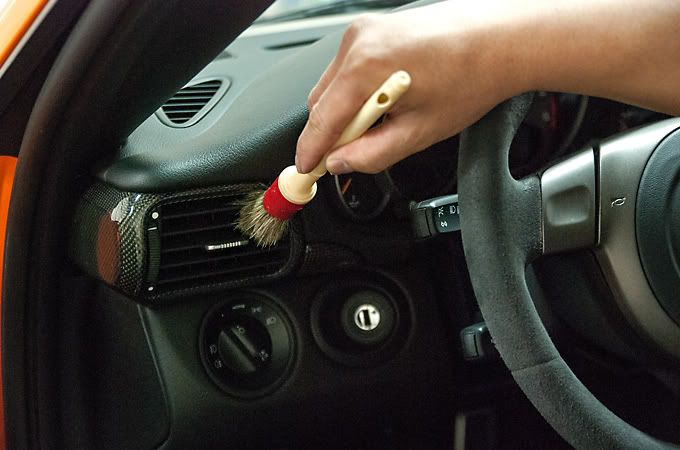 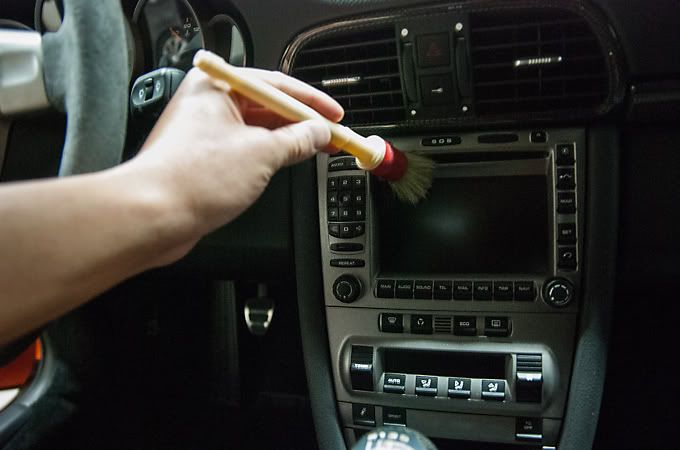  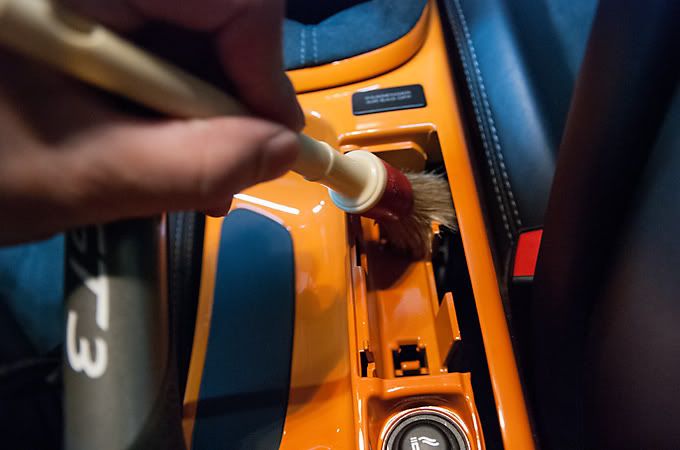 Pulled out a different brush with longer bristles to reach behind the tach 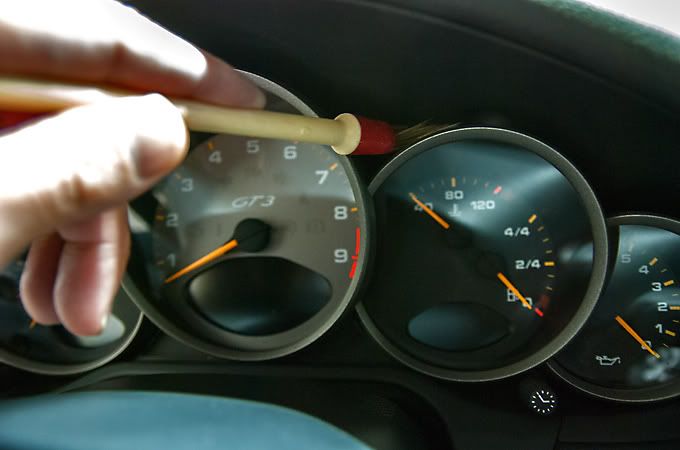 After the dusting and brushing I can finally wipe down the different surfaces I really love this shot for some reason 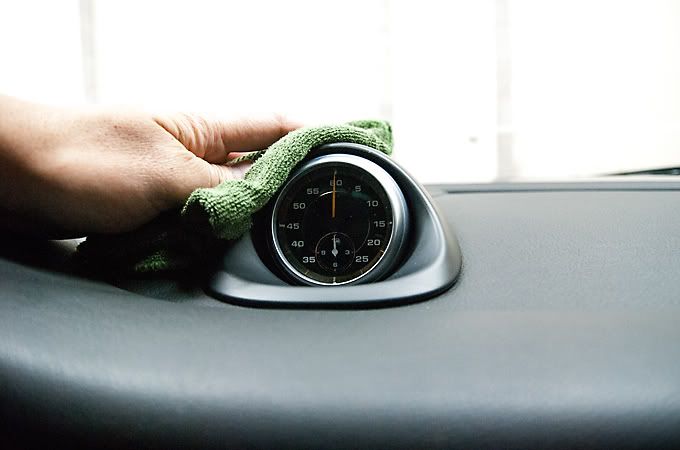 Wiping down the doors 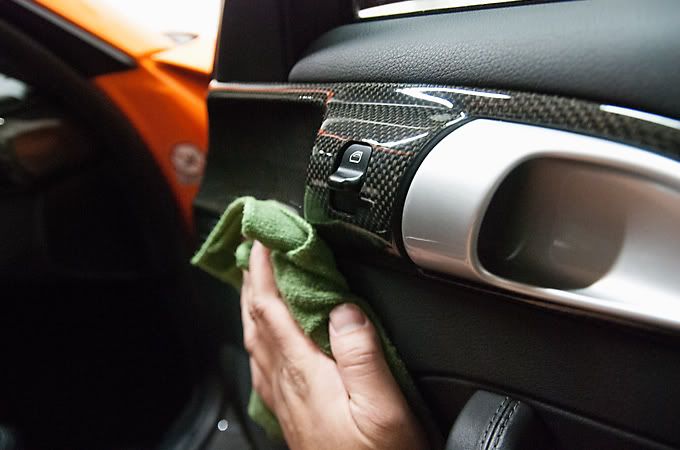 The roll cage 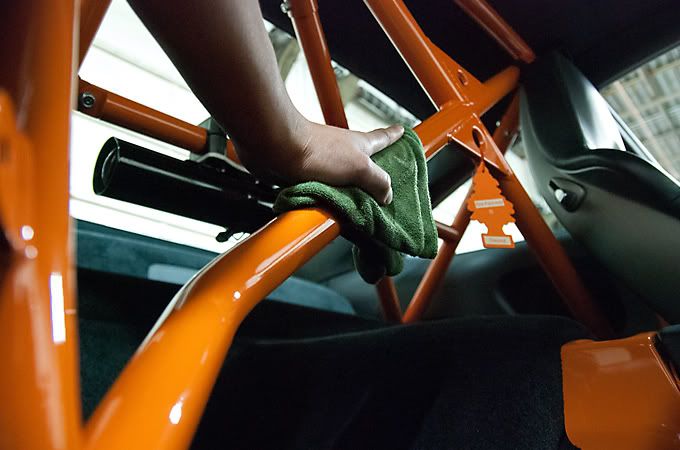 Even the extinguisher lol 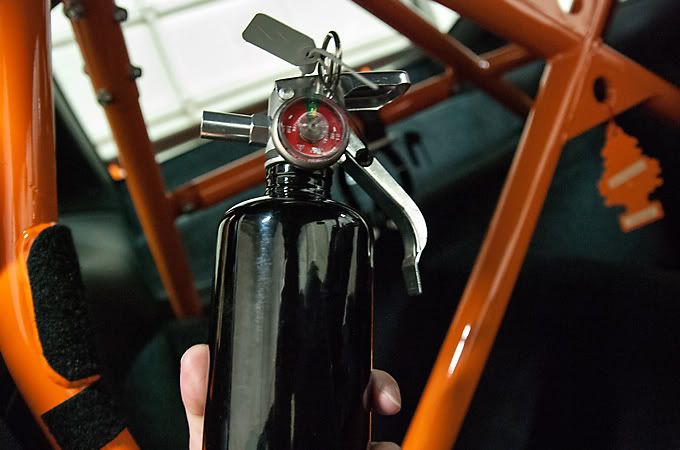 A finishing that I love to add to the detail is cleaning the pedals. Lol at the end of the detail and when the customer is taking delivery, they always say that the feel bad to sit in the car afterwards hahaha 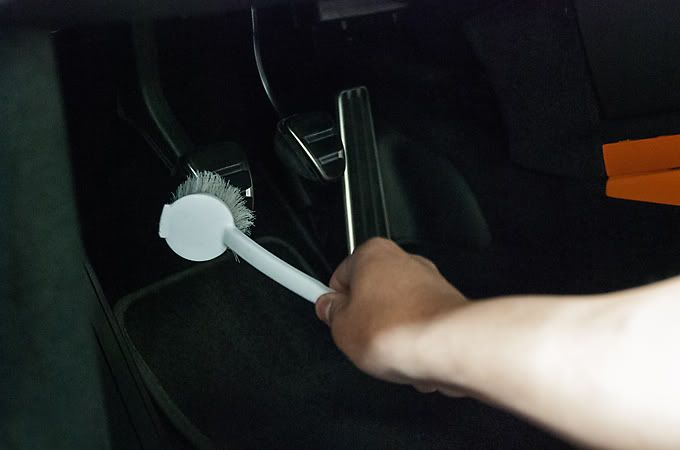 Finally I cleaned the windows but doing the back inside windows was the worst! Luckily I have been doing hot yoga lol so I was able to handle the job 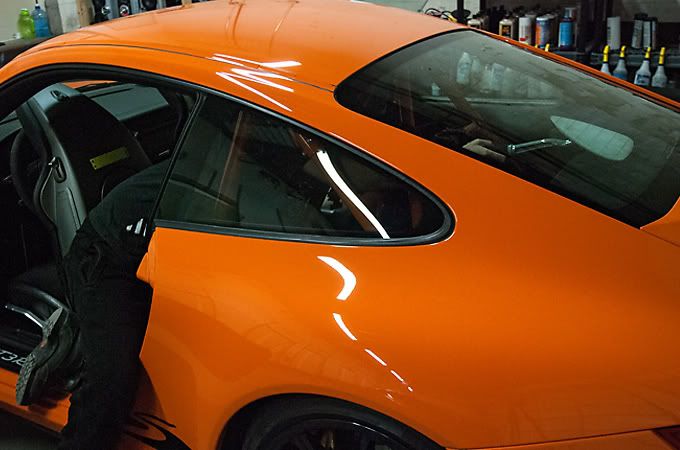 And now after all that hard work here are the final pics! Starting with some sun shots 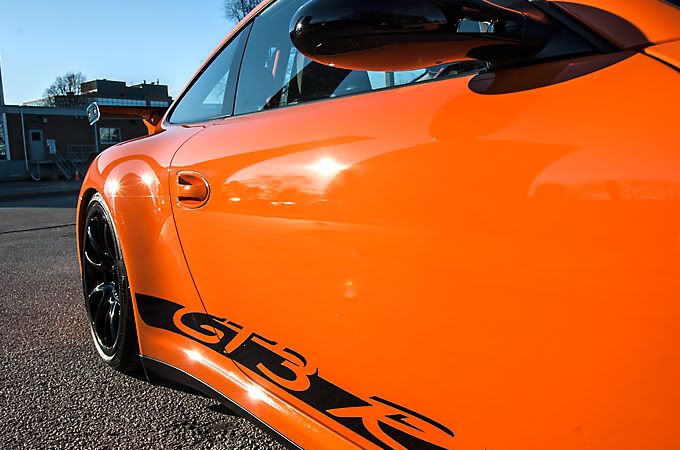 No swirls 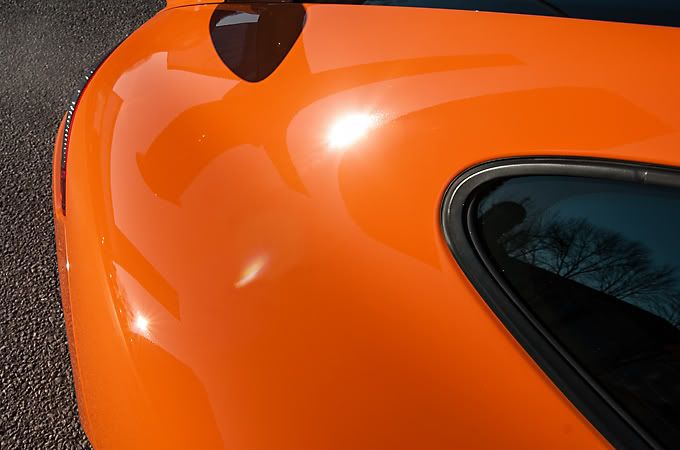 Finished interior shots 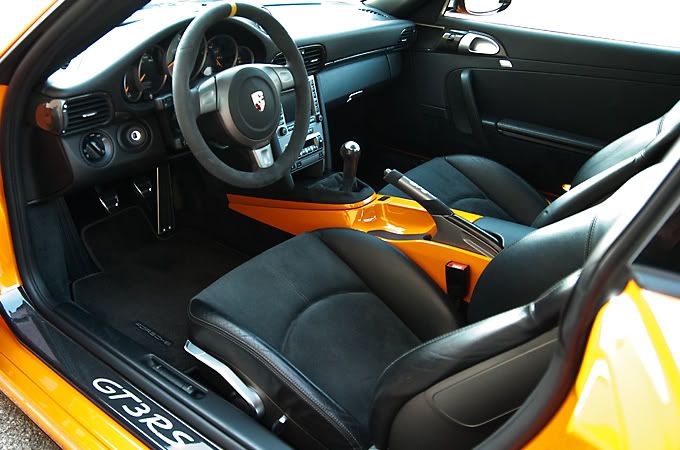 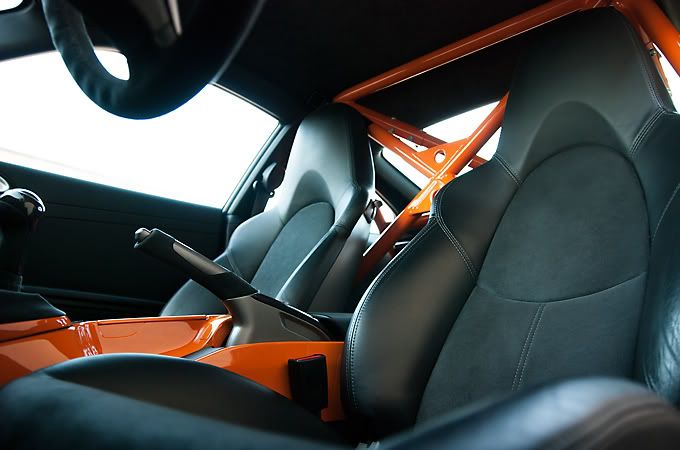 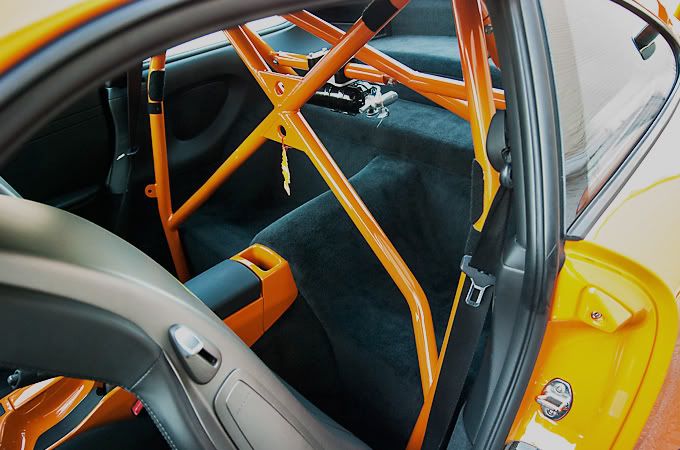 Exterior finished shots 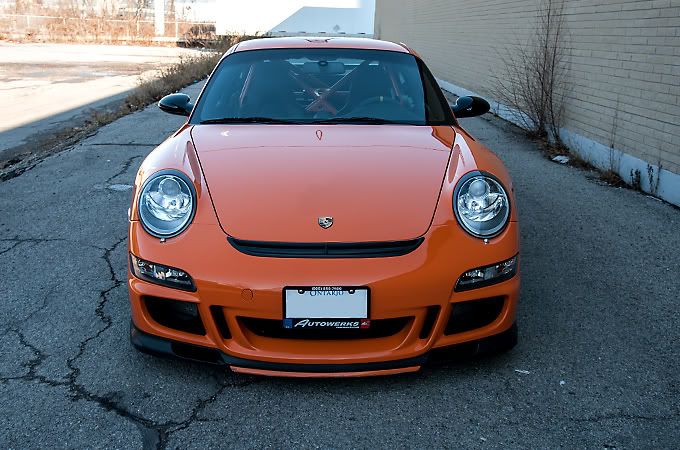 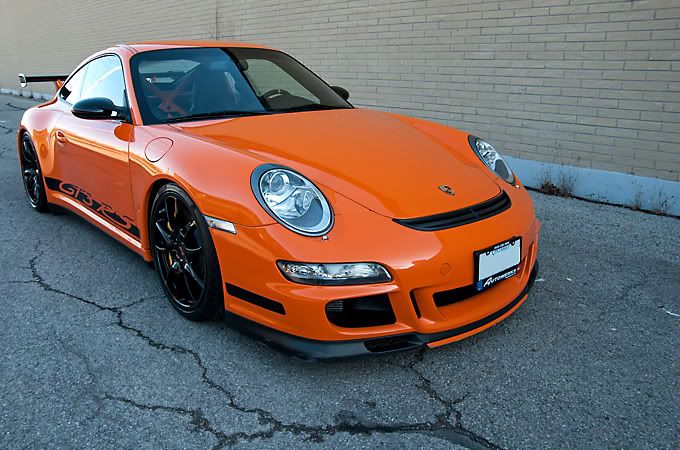 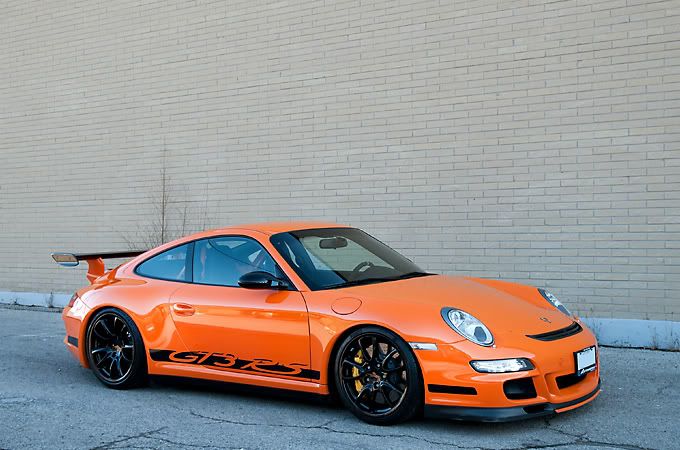 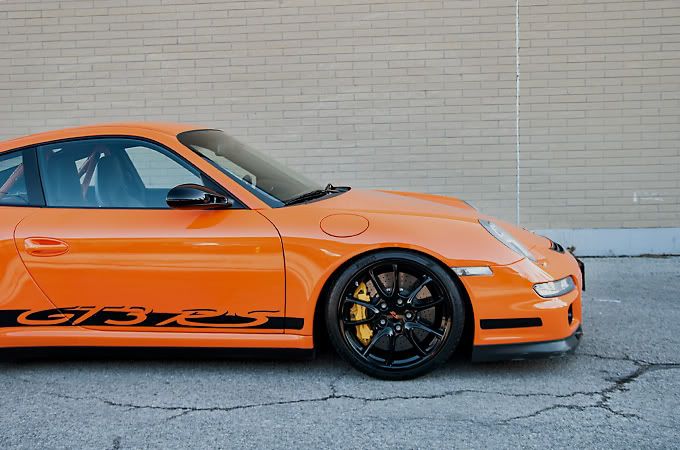 I think this pic is pretty cool too 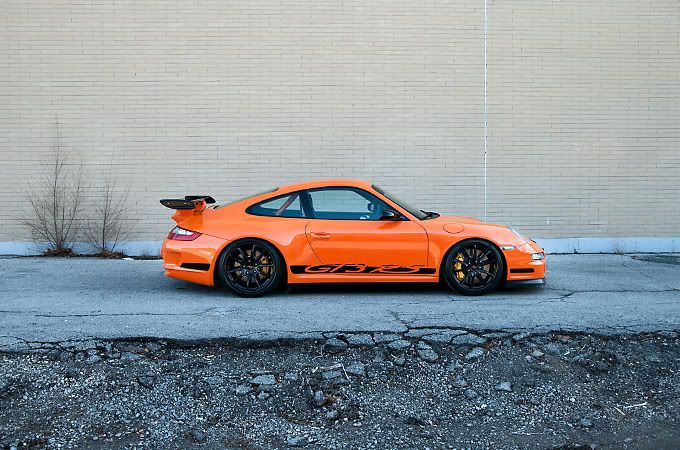 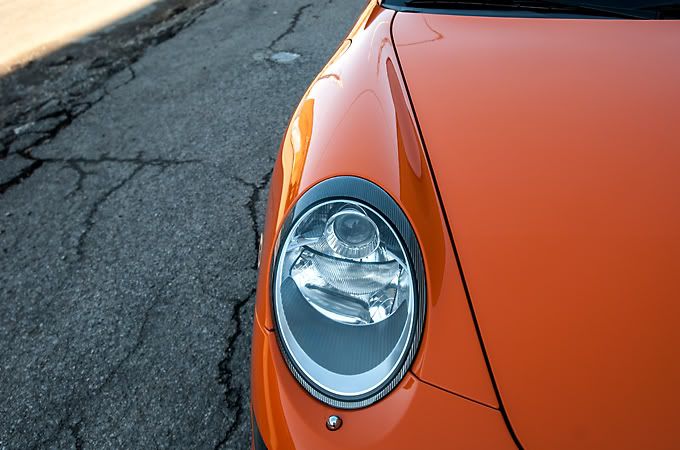 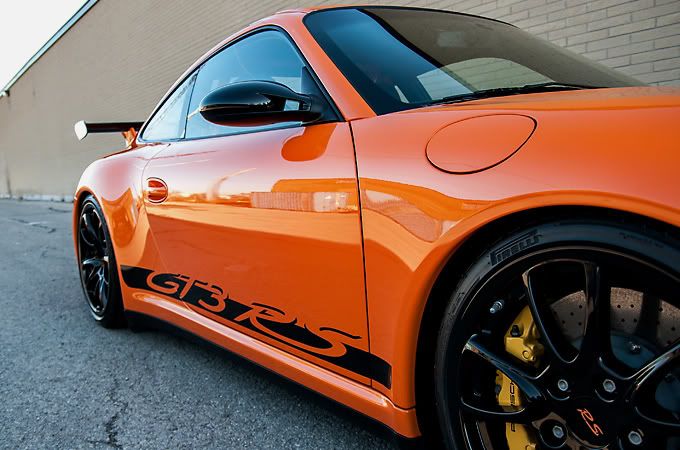  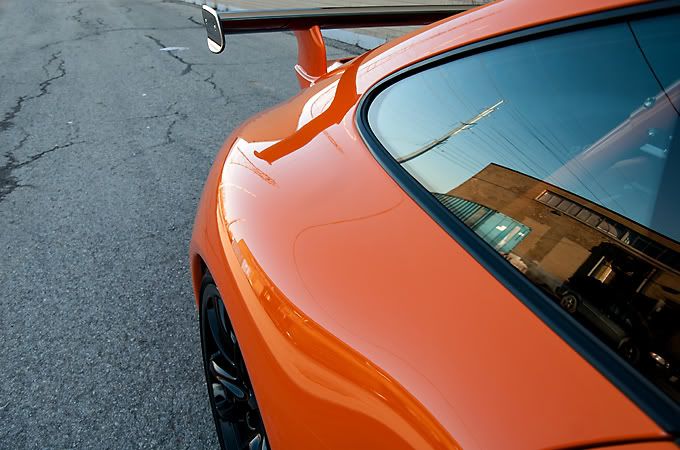  I love the way the beam of light and flare looks in this pic 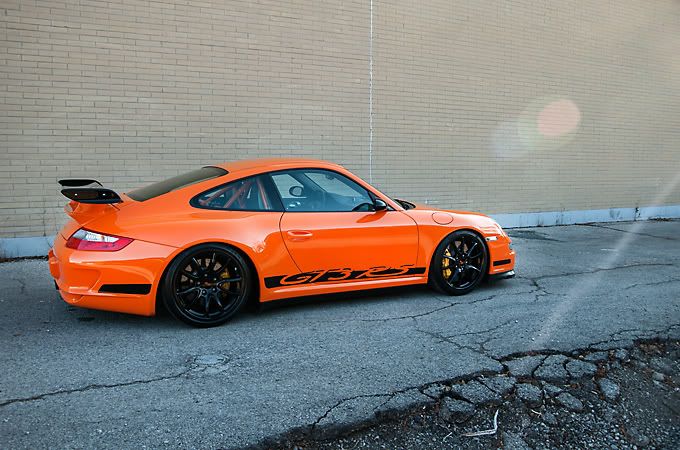 15km speed limit 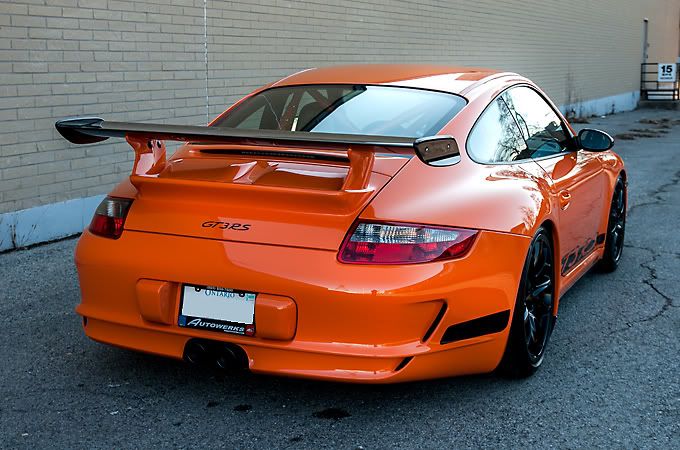 Beautiful reflection shot on the spoiler! 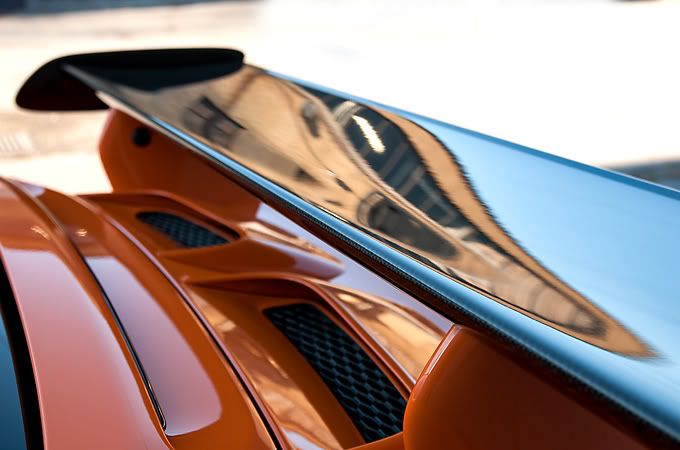 Interesting roof shot 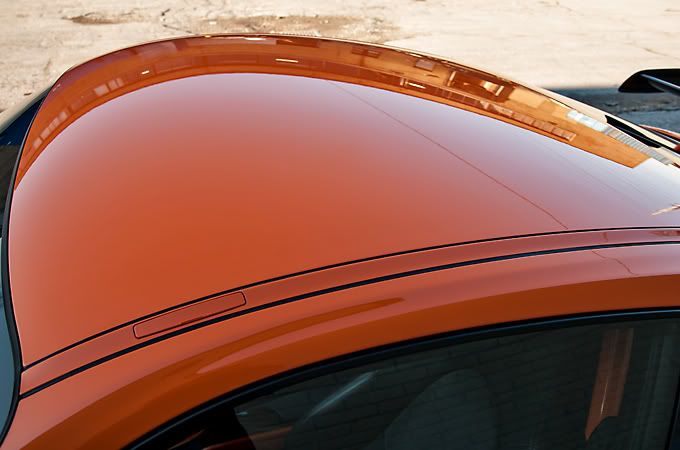 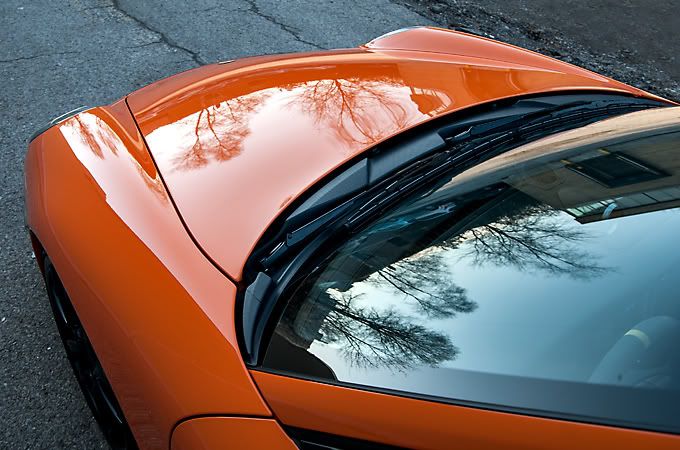 And finally the last artsy fartsy 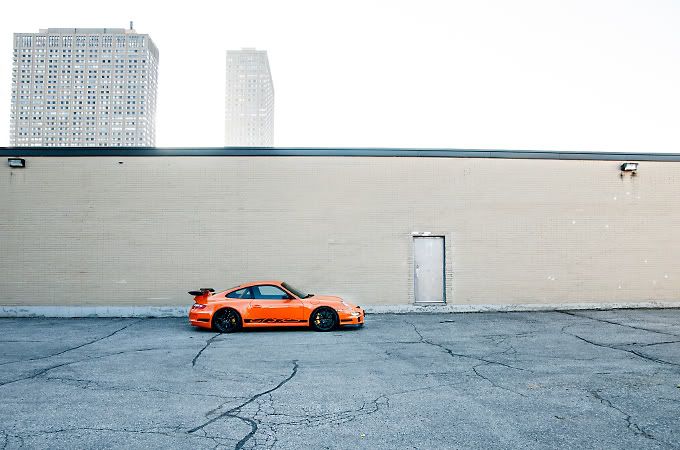 I hope you guys and gals enjoyed reading through the documentation! |
|
Appreciate
0
|
| 07-22-2013, 12:46 AM | #18 |
|
Brigadier General
2565
Rep 3,663
Posts |
Great work.
When you do your paint thickness reading, what numbers would indicate issues. I noticed on a few photos it said 106, 107, 94, 129. What fluctuation would indicated problem areas? |
|
Appreciate
0
|
| 07-22-2013, 09:49 PM | #19 | ||
|
Banned
11
Rep 47
Posts |
Quote:
Quote:
|
||
|
Appreciate
0
|
| 03-13-2014, 08:26 PM | #20 |
|
New Member
11
Rep 22
Posts |
Wes is the real deal. Took my car in last week for an in & out detail and it went from looking like it went through hell to looking like it came right off the factory line.
|
|
Appreciate
0
|
| 03-17-2014, 07:39 PM | #22 | |
|
Emperor

12
Rep 129
Posts |
Quote:
__________________
|
|
|
Appreciate
0
|
 |
| Bookmarks |
| Tags |
| orion detailing co, toronto detailing |
|
|

 some guys dropped by the shop today looking for a quote saying they heard about us from Bimmerpost.


