

|
|
 |
 |
 |

|
 |
BMW Garage | BMW Meets | Register | Today's Posts | Search |
 |

|
BMW 3-Series (E90 E92) Forum
>
Leatherique dye bolster touch up
|
 |
| 07-12-2013, 01:15 PM | #1 |
|
101
Rep 952
Posts |
Leatherique dye bolster touch up
Just thought I would post my experience using leatherique "dye" (really more like paint) to touch up the wear on my E92s driver side bolster. Ive seen a lot of leatherique full color changes/restorations but I just wanted to do a spot touch up to keep my bolster from getting any worse. My car is pretty much spotless so the wear on my driver seat was starting to bother me, and it was accelerating since the top coat had worn through in a few places.
I ordered the kit from leatherique and they sent me dye based on my intereior color code, I tested it and the color was way off so per their directions I cut off a sample (found a tiny piece on the bottom of the back seat I could cut off....not much extra leather on these cars!), sent the dye back with the sample so that leatherique could make a custom color, exact match. I read up about different techniques on their website and ended up doing the "wipe dye" method and feathered it into the existing color over many thin coats, so I didnt do the entire panel. I also used the dye on a few small scratches/defects/wear points elsewhere in my interior, example: the console edge next to the ebrake where repeated strikes with the seatbelt male latch had worn off some of the color. It came out VERY good. Color match is pretty much perfect, any color variance you see in the pics is from the lighting conditions, part natural light, part garage lighting, different times of day, etc... The texture is slightly different as the worn leather+leatheriqe makes for a slightly smoother surface, but I gave it a light sanding with a scotch-brite later and got it even closer to stock. Compared to what it looked like before its a 95% improvement..... Pictures are worth a thousand words!....before and afters: 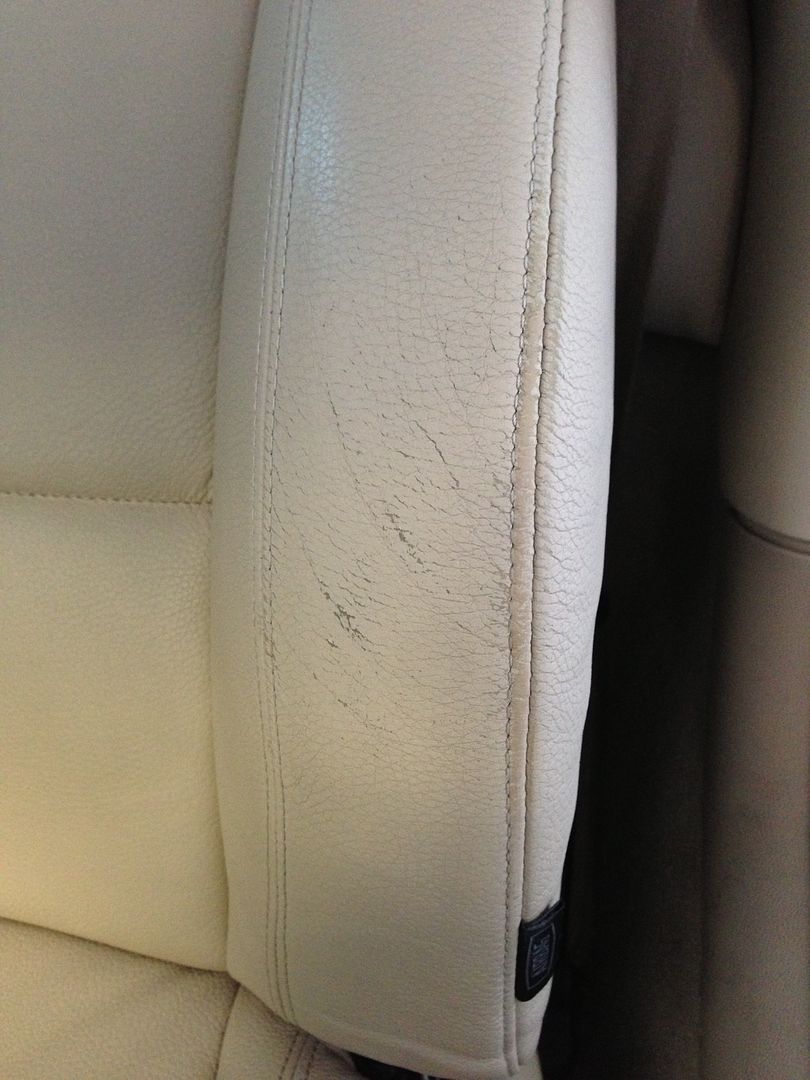 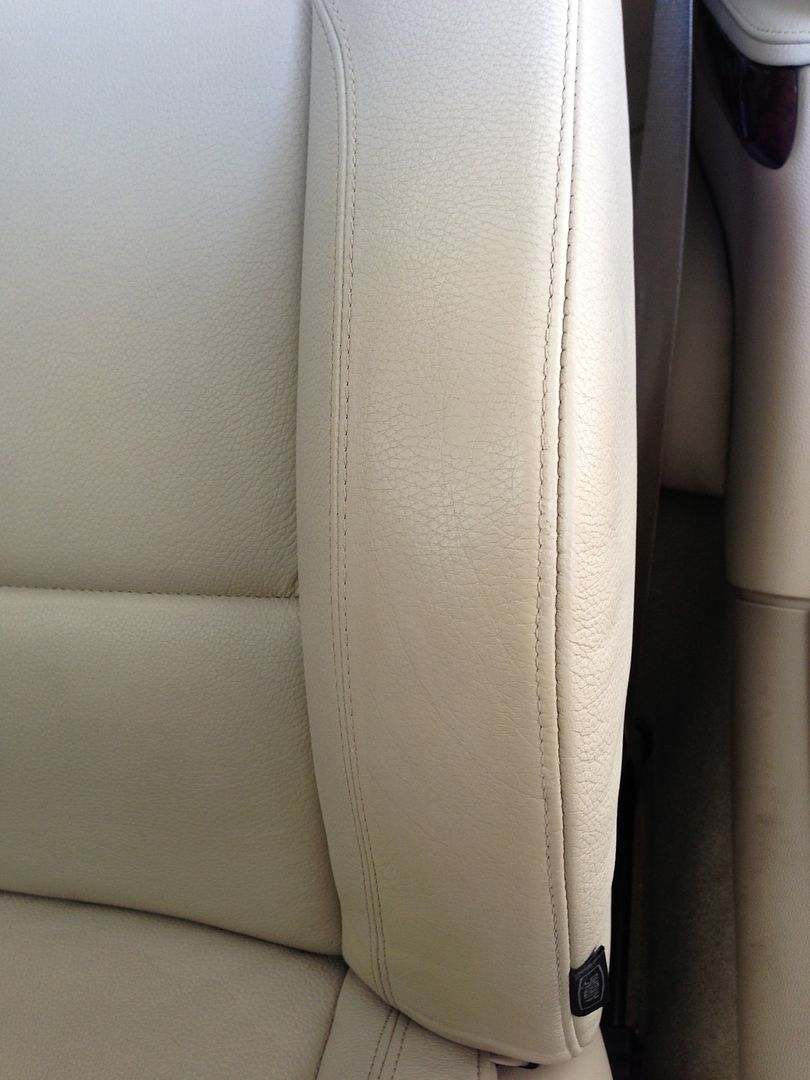 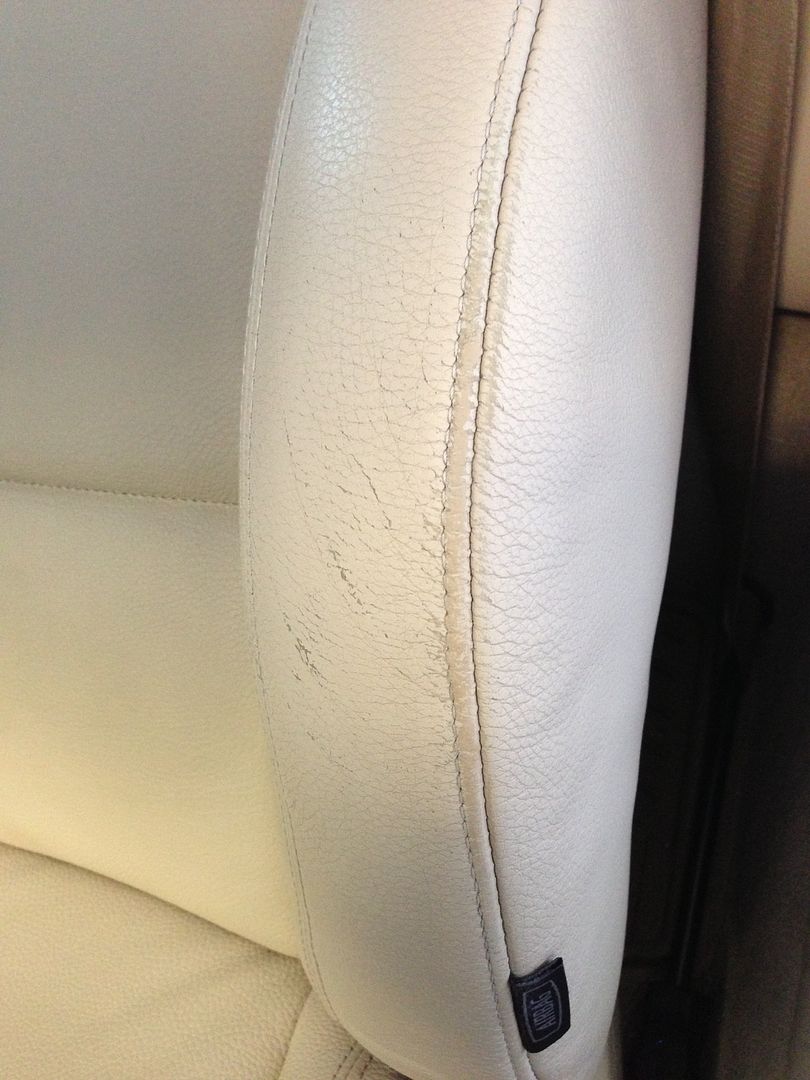 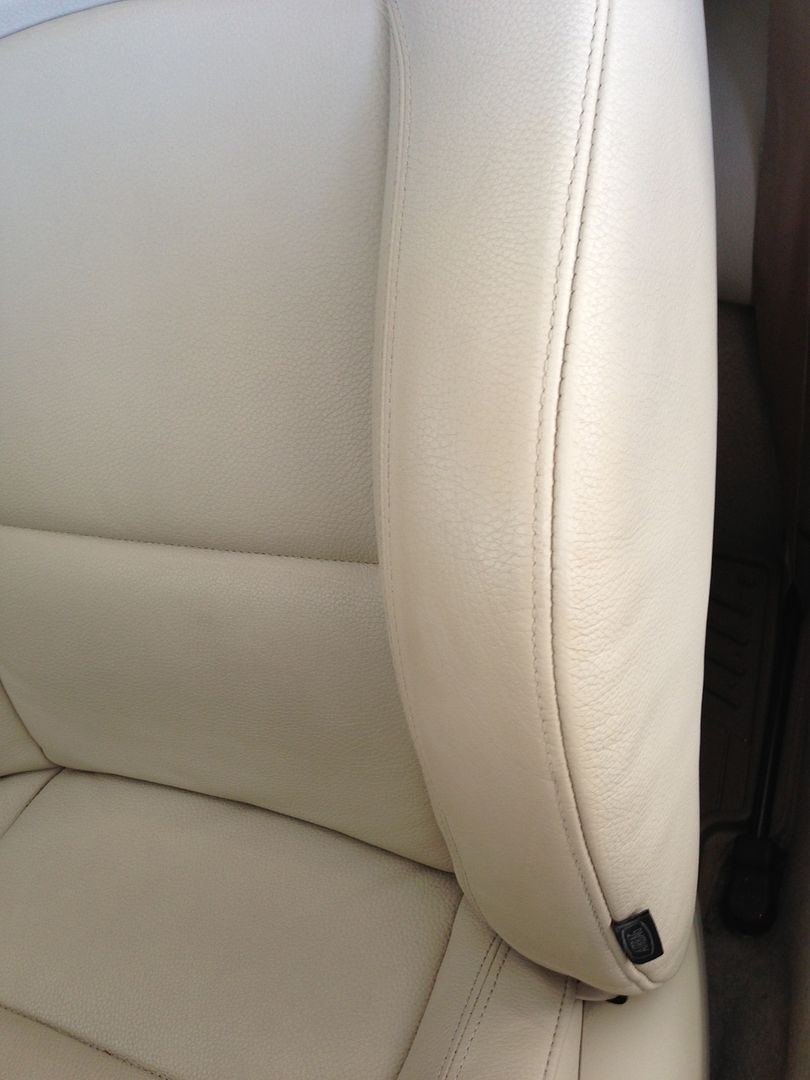 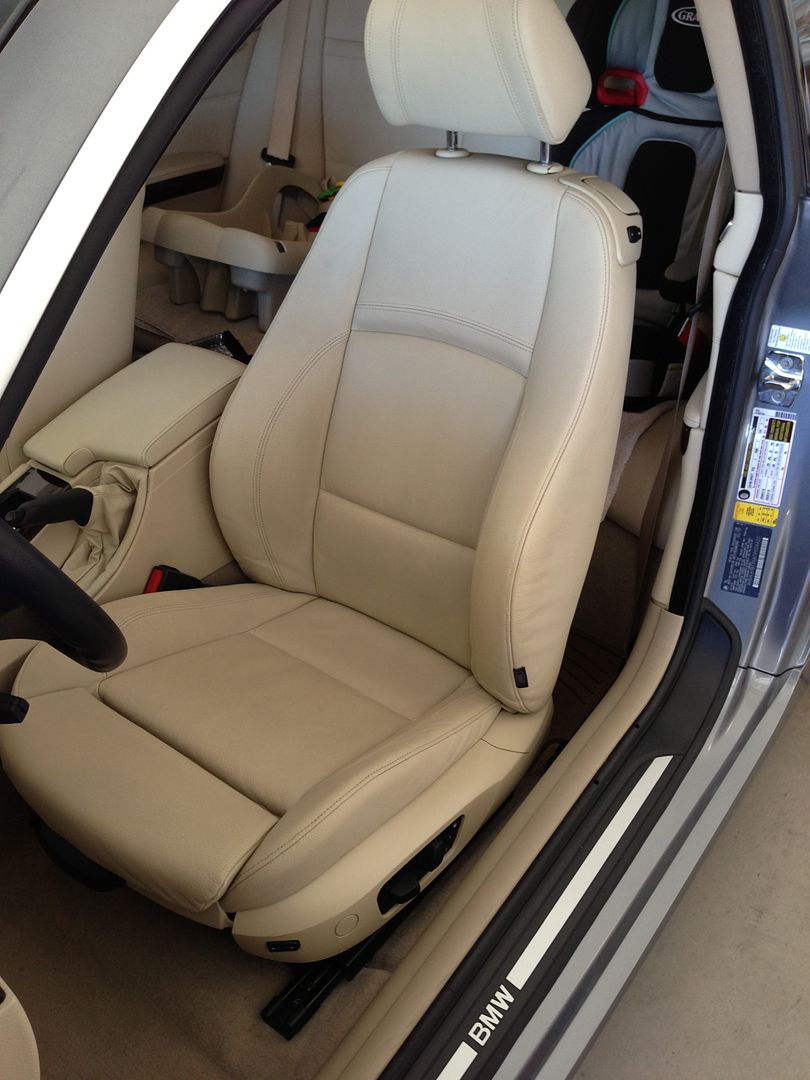  Last edited by jeffb335; 07-12-2013 at 05:20 PM.. |
| 07-12-2013, 04:37 PM | #3 |
|
Lieutenant Colonel
 
179
Rep 1,843
Posts |
Thank you for posting this, I have a similar tiny wear spot and was considering doing the exact same thing. Your pics are convincing me that I can really do this!
|
|
Appreciate
0
|
| 07-12-2013, 04:50 PM | #4 | |
|
101
Rep 952
Posts |
I think it was around $100 for the "kit", but that included leatherique's other conditioning products as well, the rejuvenator oil, pristine clean cleaner, dye prep solution, and dye. So I used the oil and cleaner on my entire interior, there are plenty of other posts here about that though so I didnt go into it here.....After this little project I DID order a bunch more of the oil and cleaner, need to do my wifes X5 now!
Quote:
Here is an in progress pic....I taped off the edges as you have to work kind of quick when doing the "wipe dye" technique and I didnt want any dye getting where it didnt belong. You can tell in this pic that the color match is right on, after this pic I just added a few more coats as its such a high wear area that I wanted it to have a little toughness.... 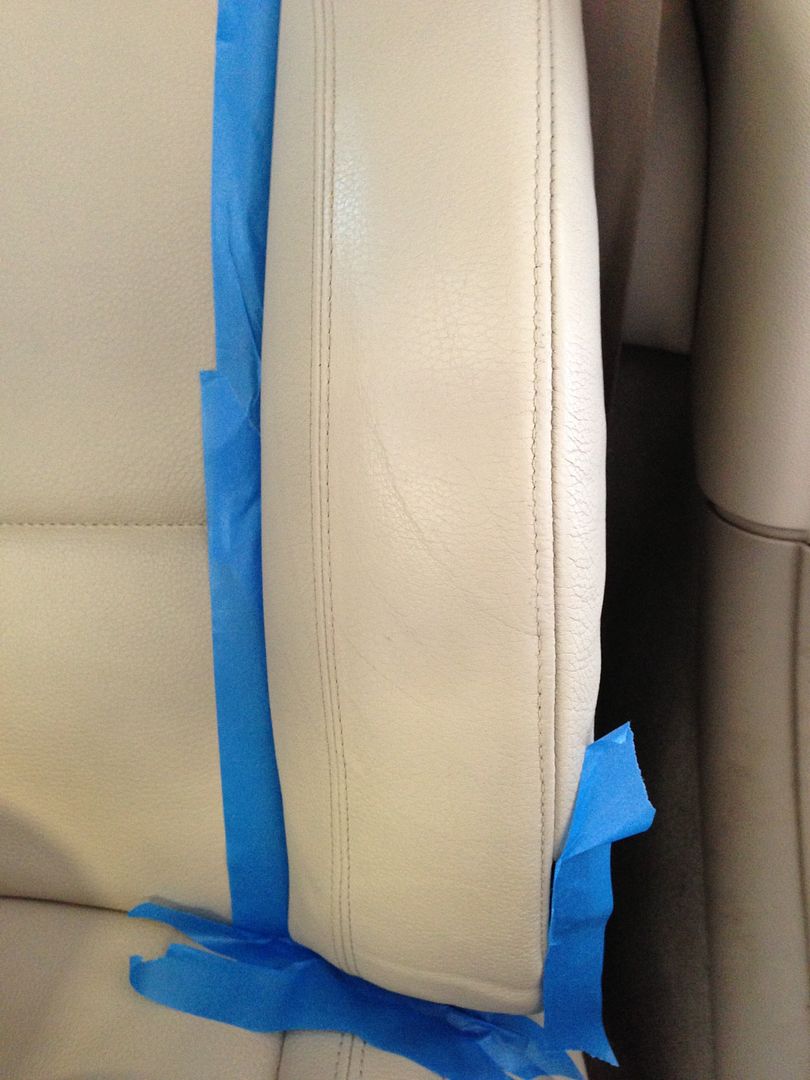 Last edited by jeffb335; 07-12-2013 at 05:13 PM.. |
|
|
Appreciate
0
|
| 07-18-2013, 12:54 PM | #5 |
|
101
Rep 952
Posts |
|
|
Appreciate
0
|
| 07-18-2013, 01:11 PM | #6 |
|
Major General
  
1091
Rep 5,660
Posts |
TY for sharing. Very useful info.
Your handiwork turned out nicely.
__________________
Cheers,
Tony  ------------------------------------------------------------------------------------------ '07, e92 335i, Sparkling Graphite, Coral Leather, Aluminum, 6-speed |
|
Appreciate
0
|
 |
| Bookmarks |
|
|